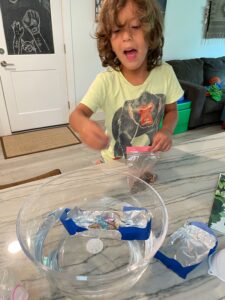
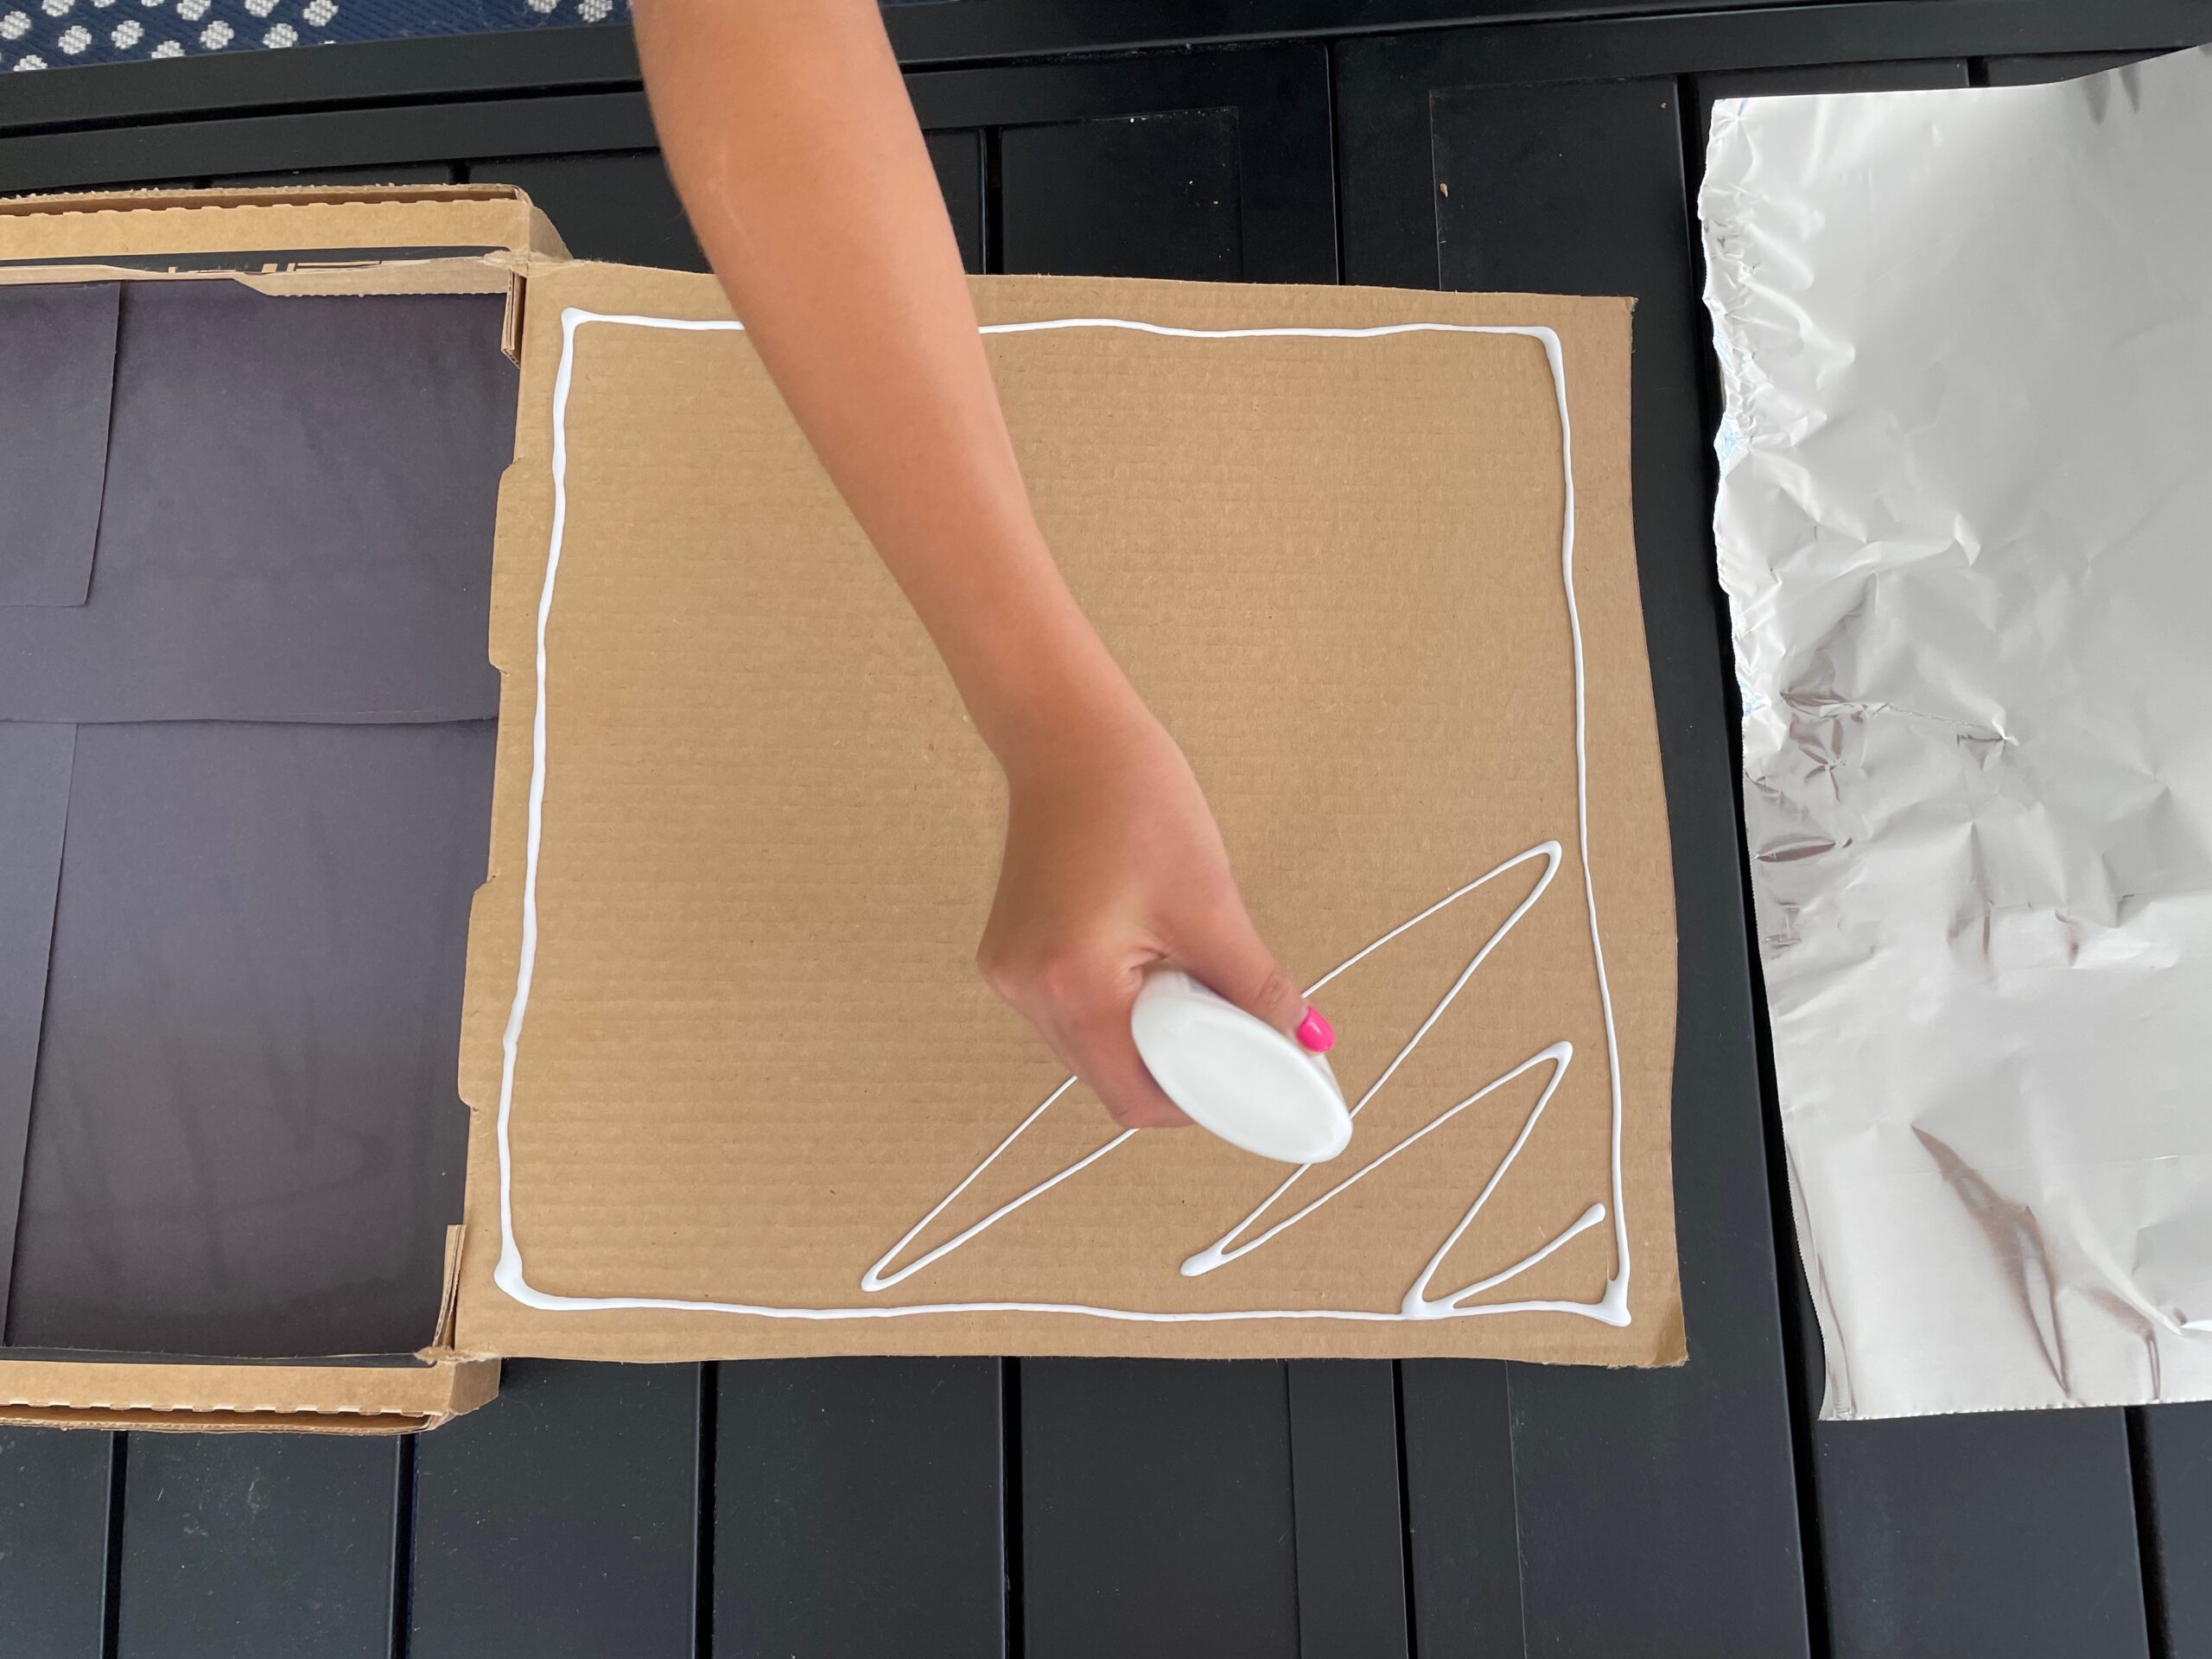
Building is fun, but testing our designs can be even more fun…especially if you get to sink a boat! Making mistakes is part of the engineering process! It helps us to figure out what does NOT work, so we can design it better next time. This experiment encourages you to engineer a stronger boat. You can use strategy and predictions to determine how much weight your cargo ship can carry! Have fun!
Design & Build a strong Cargo Ship!
Materials:
Aluminum Foil
Painters Tape
Large bowl or bin that can hold water
Water
Pennies, feathers, paperclips, cotton balls, or other small items of varying weights
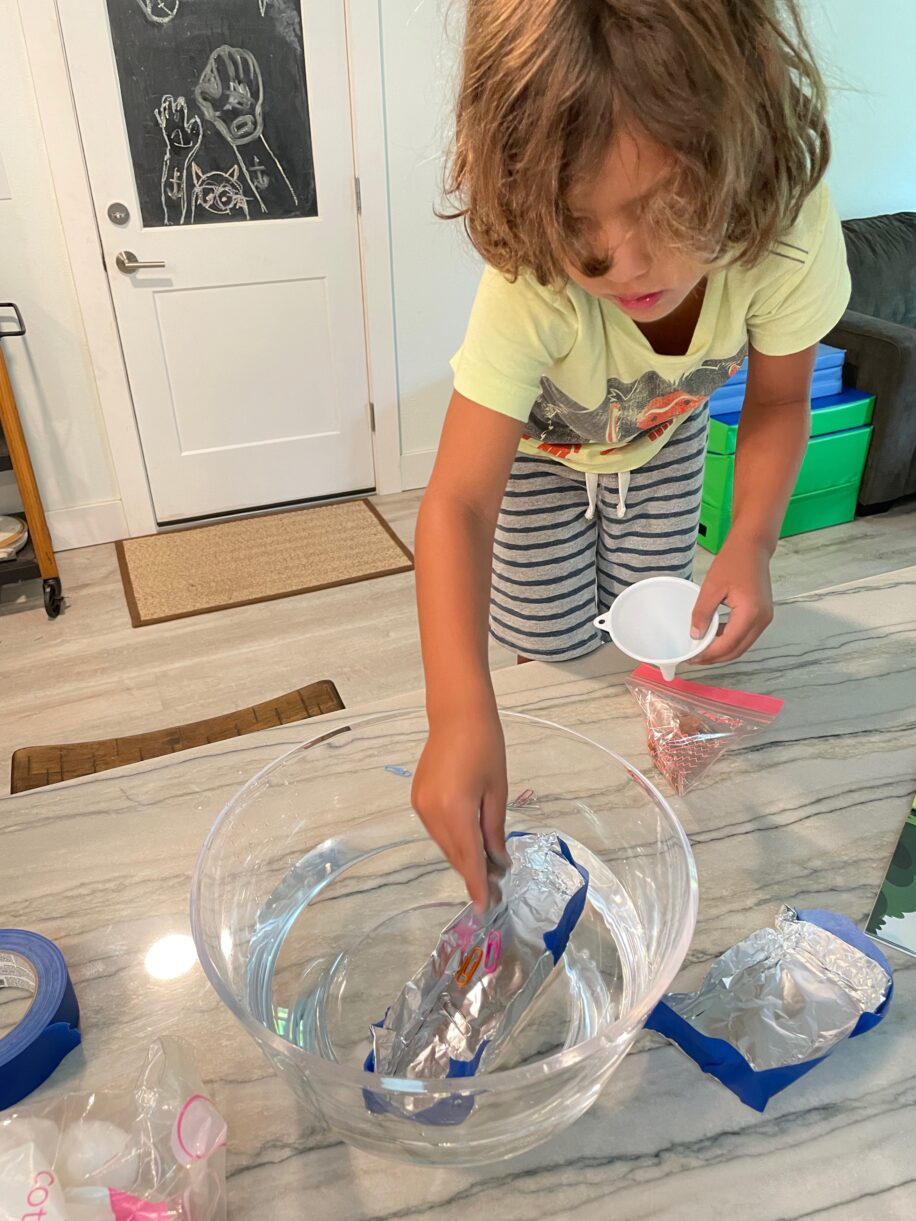
Step 1: Fill your bowl up halfway with water
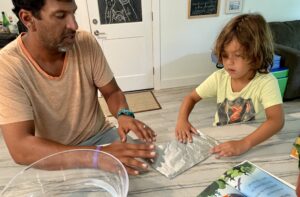
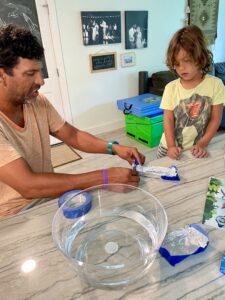
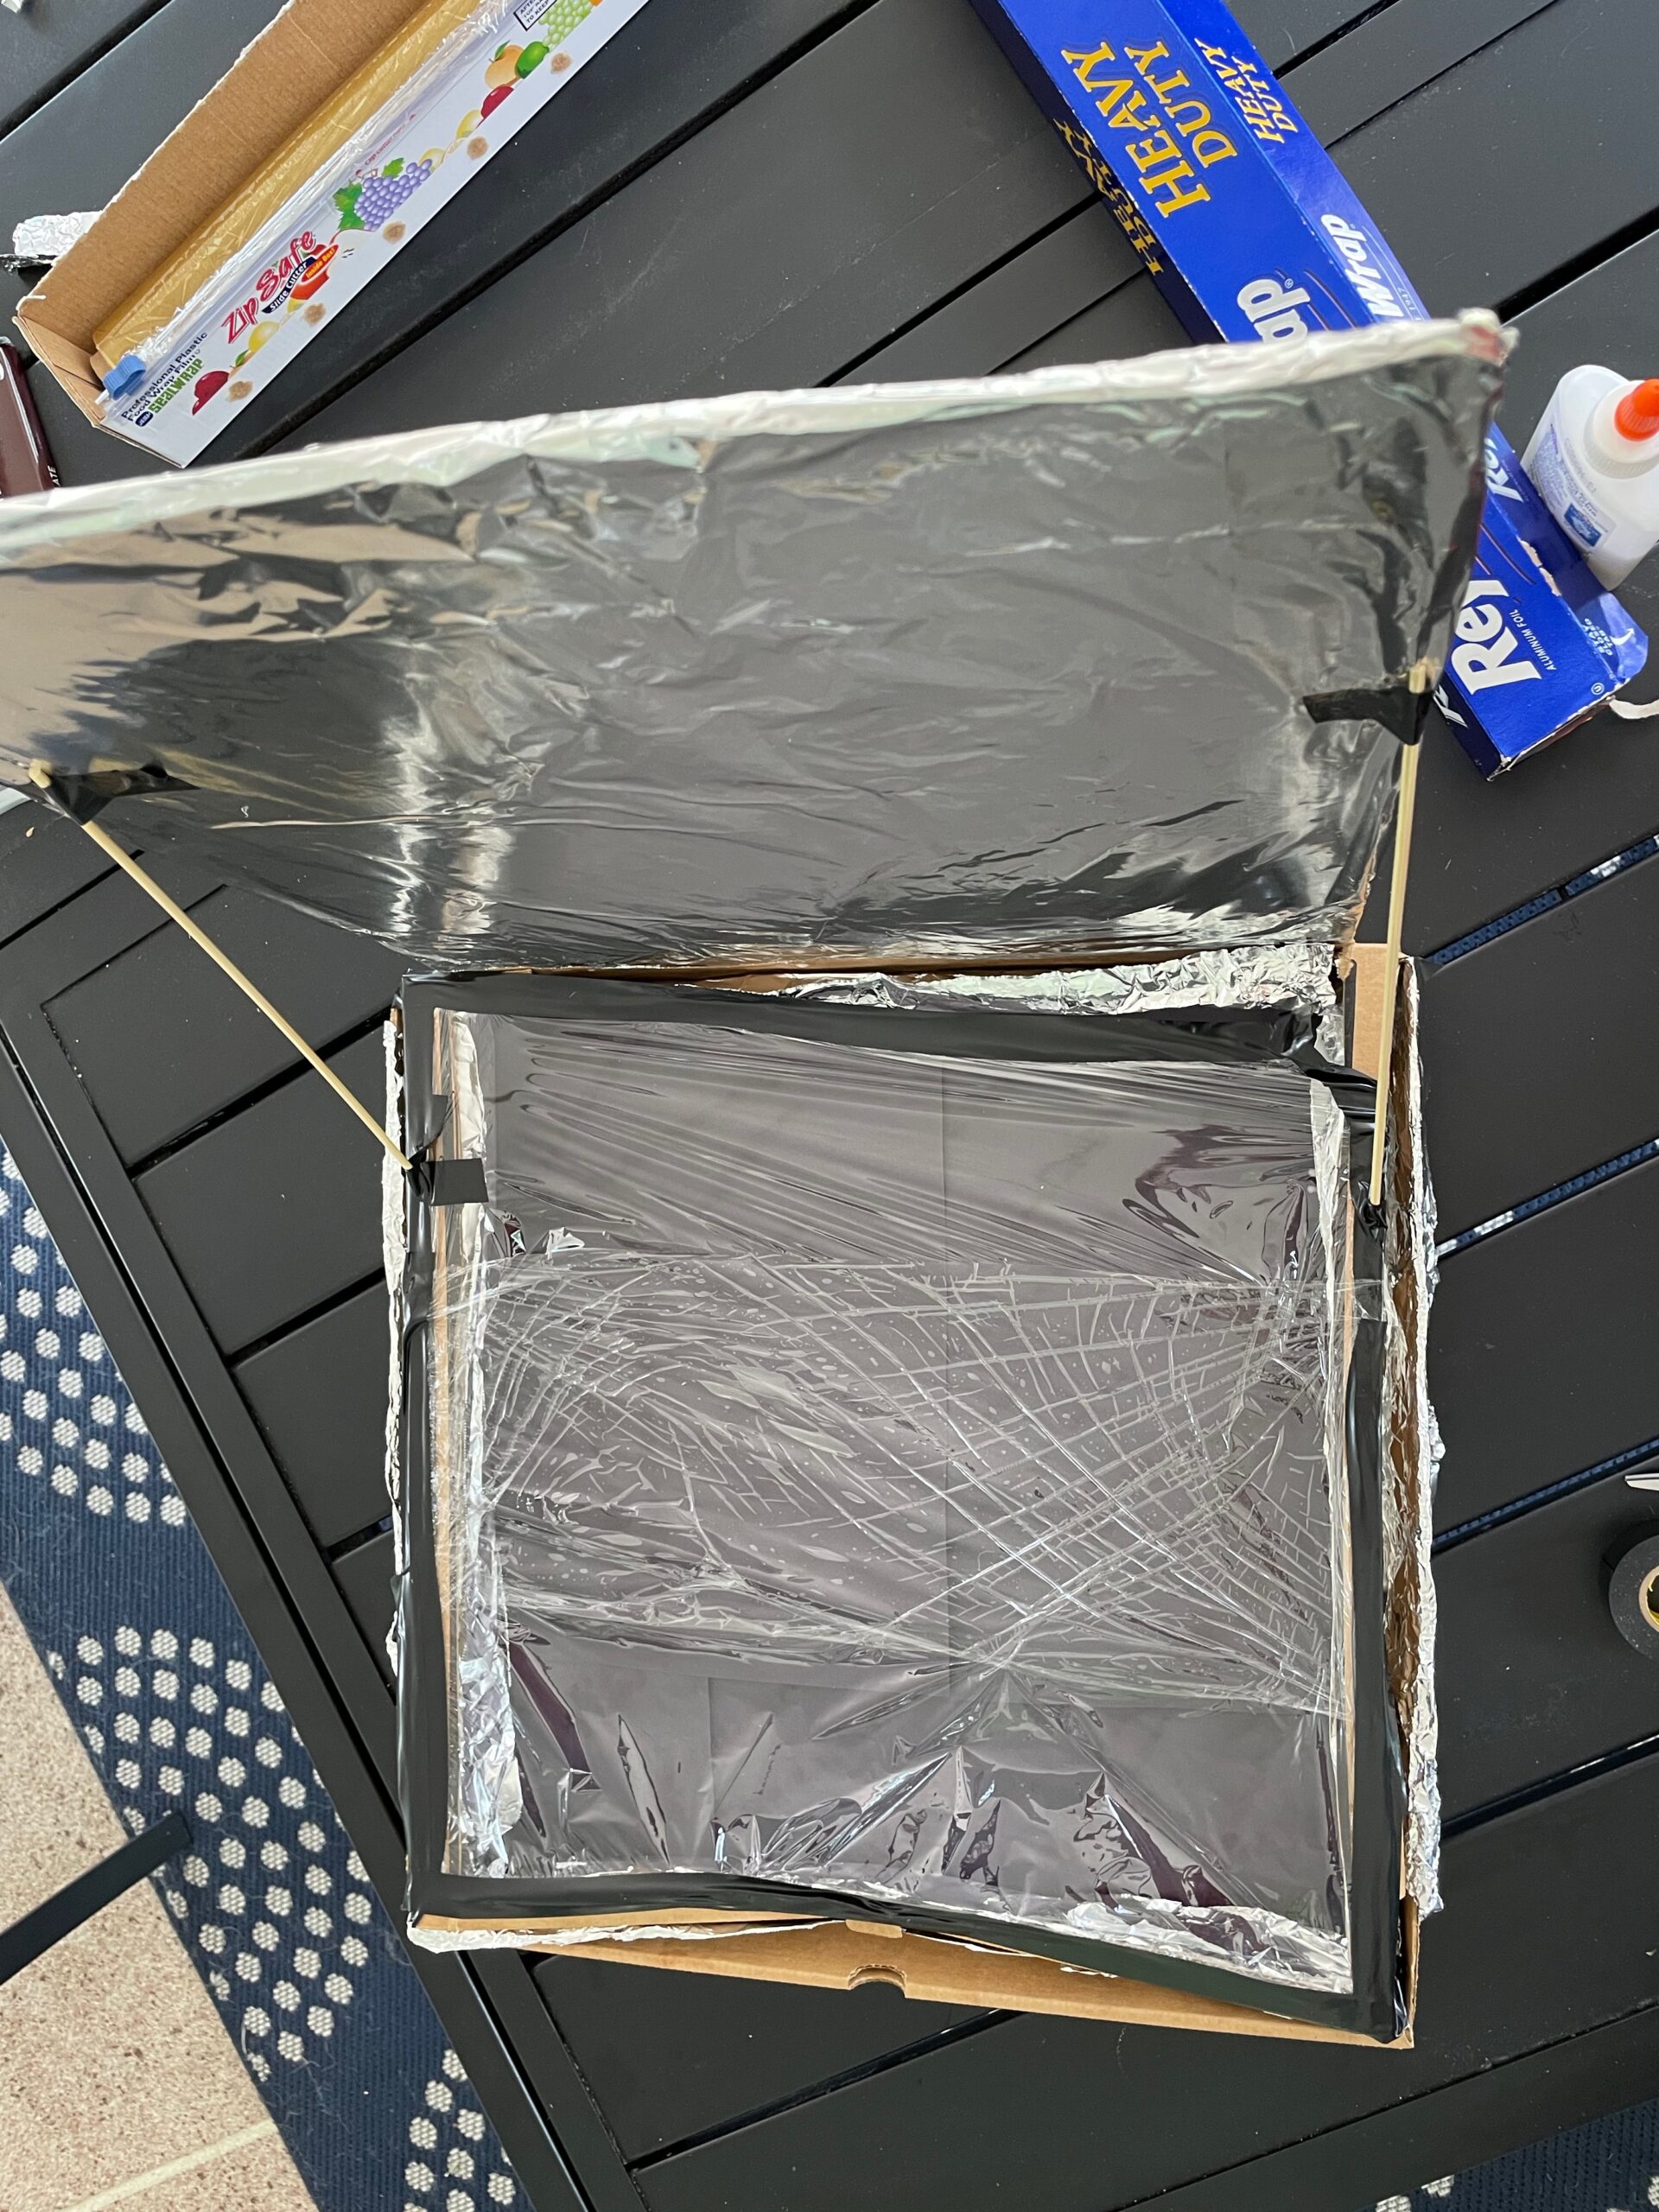
Step 2: Using a piece of aluminum foil (try starting with an approximate 12 inch square,) fold the aluminum in half and then fold up each of the four sides to have a lip around 1 inch tall. Experiment with how many times you fold the foil sides (Do more folds make them stronger? What makes the boat heavier? Are taller or shorter sides better?)
Step 3: Wrap tape around the edges to see if sealing the sides helps keep water out.
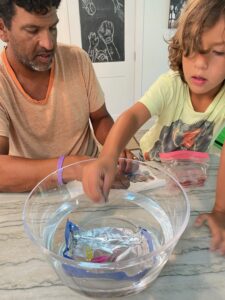
Step 4: Place your Cargo Ship into the water in your bowl
Step 5: Choose some items to place in your ship. You could start with cotton balls first. How many cotton balls will your ship hold?
Try paper clips next…
How about coins?
Does your boat hold more pennies or more quarters?
How many coins does your ship hold before it sinks?
Try this experiment with a friend and see whose ship holds more cargo!
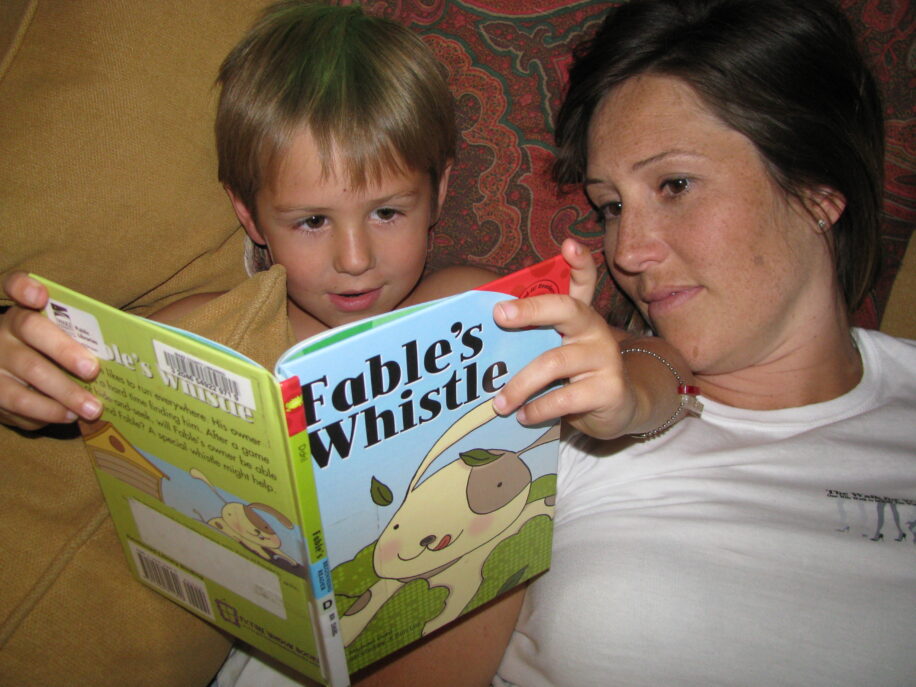
Reading aloud together can boost social, emotional, and mental health!Use reading to start conversations or tackle big emotions. Reading aloud together can explore particular emotions that help children learn empathy or even acknowledge, accept, or voice their own feelings. Keisha Scribe, PHD, an early childhood literacy consultant says reading aloud can help people with stress management, hope and resilience.
BONUS: Reading aloud together is NOT just for our youngest children. Try a family read-aloud night with your middle and high school-aged kids where you take turns passing the book around.
“You’re never too old, too wacky, too wild, to pick up a book and read to a child.” – Dr. Seuss
“If you never did You should. These things are fun. And fun is good.” – One Fish Two Fish Red Fish Blue Fish, Dr. Seuss
Children are naturally curious, like sponges soaking up the world around them. Encouraging that curiosity, can admittedly take patience. But, it’s worth your investment! Being allowed to play and explore their environmentis crucial to a child’s development and well-being. “Curious children are more likely to learn and retain information, and stay involved and do better in school.”(Mayo Clinic https://www.mayoclinichealthsystem.org/hometown-health/speaking-of-health/8-tips-to-develop-childrens-curiosity)
6 Ways to Encourage Curiosity In Your Children…
1. Explore (travel, camp, museums, art show, etc..)
2. Create Experiences Together (hike, bake, playground, build a birdhouse) Try our DIY activities!
3. Wonder Aloud (share your own curiosities)
4. Encourage Interest (find opportunities for them to do/explore things they’re interested in; Like dinosaurs? go to library and read about them together, draw pictures of them, etc..)
5. Ask For Their Thoughts/Opinions (and when they have a question for you, ask for their thoughts on it first!)
6. Unstructured Play! (room for discovery builds confidence)
BONUS: Read a book aloud together!
“Think left and think right and think low and think high. Oh, the thinks you can think up if only you try!” – Oh, The Thinks You Can Think! Dr. Seuss
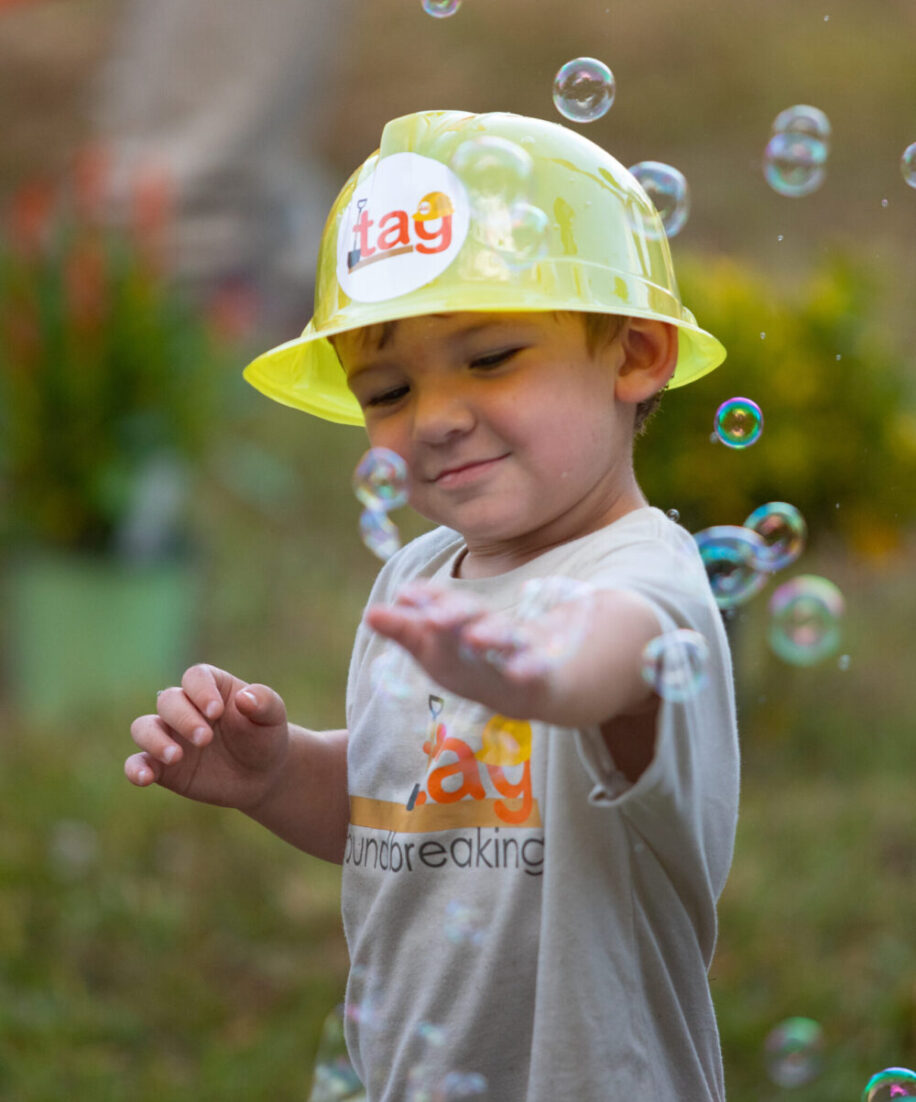
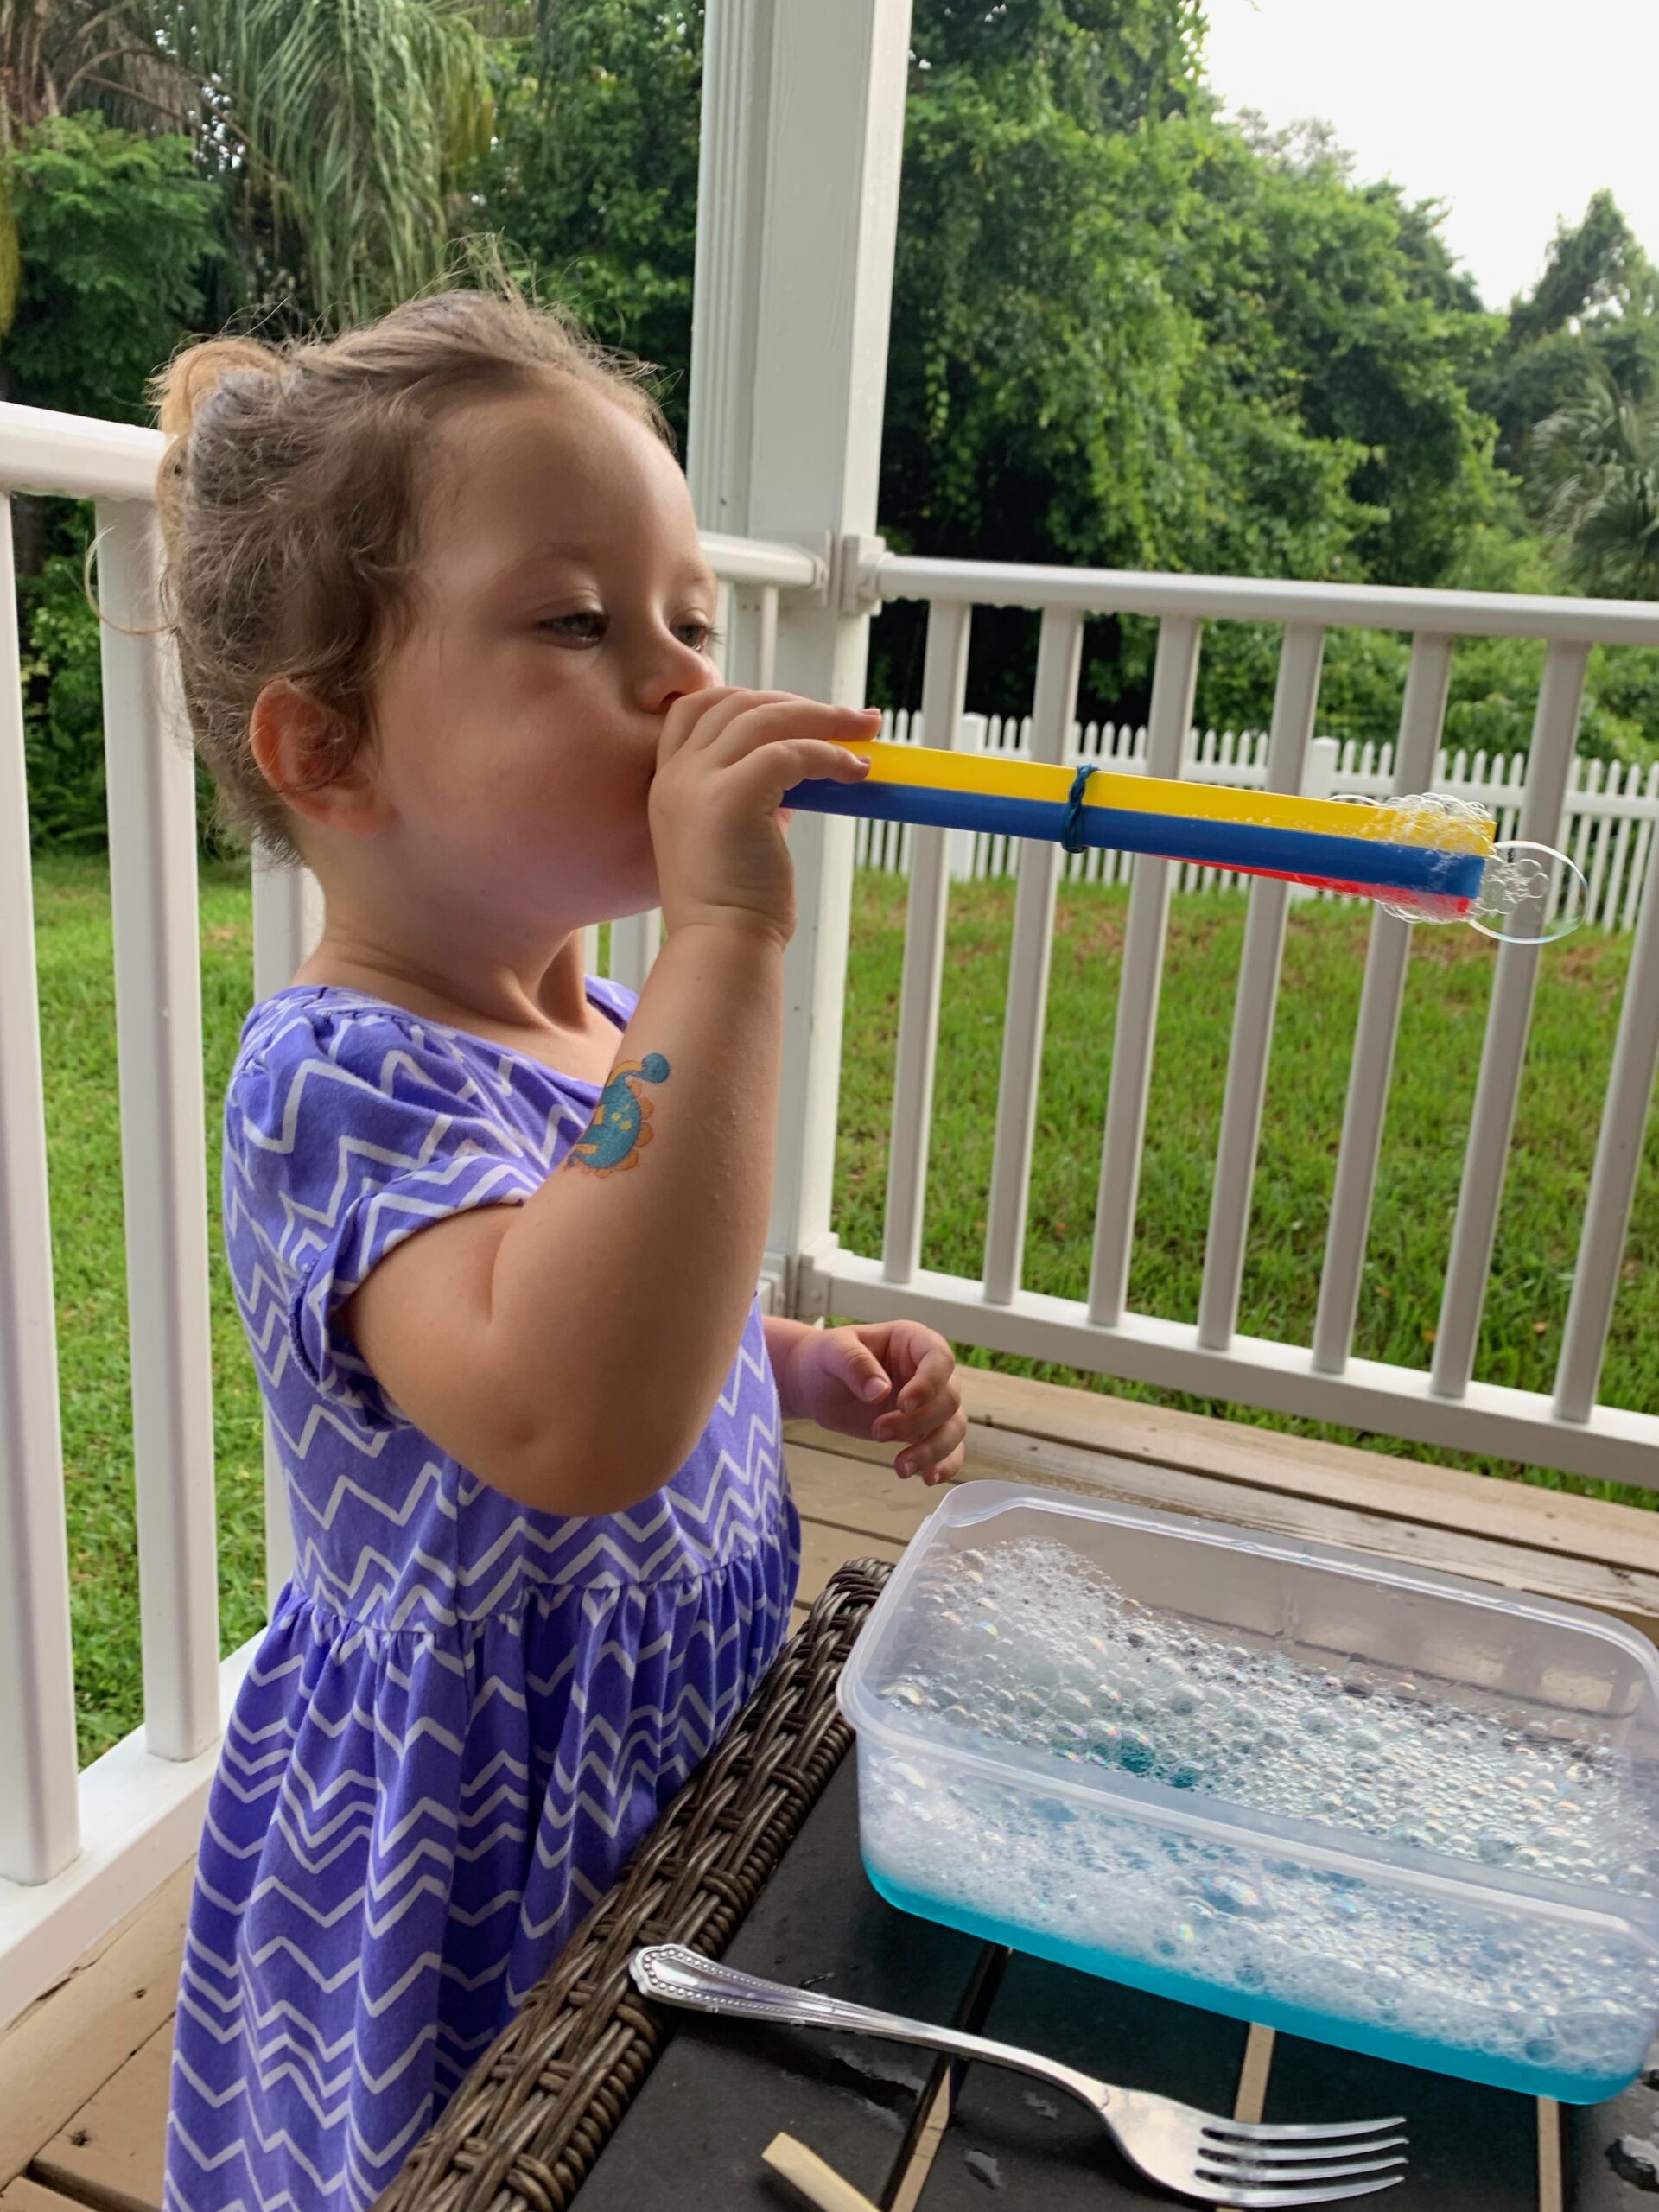
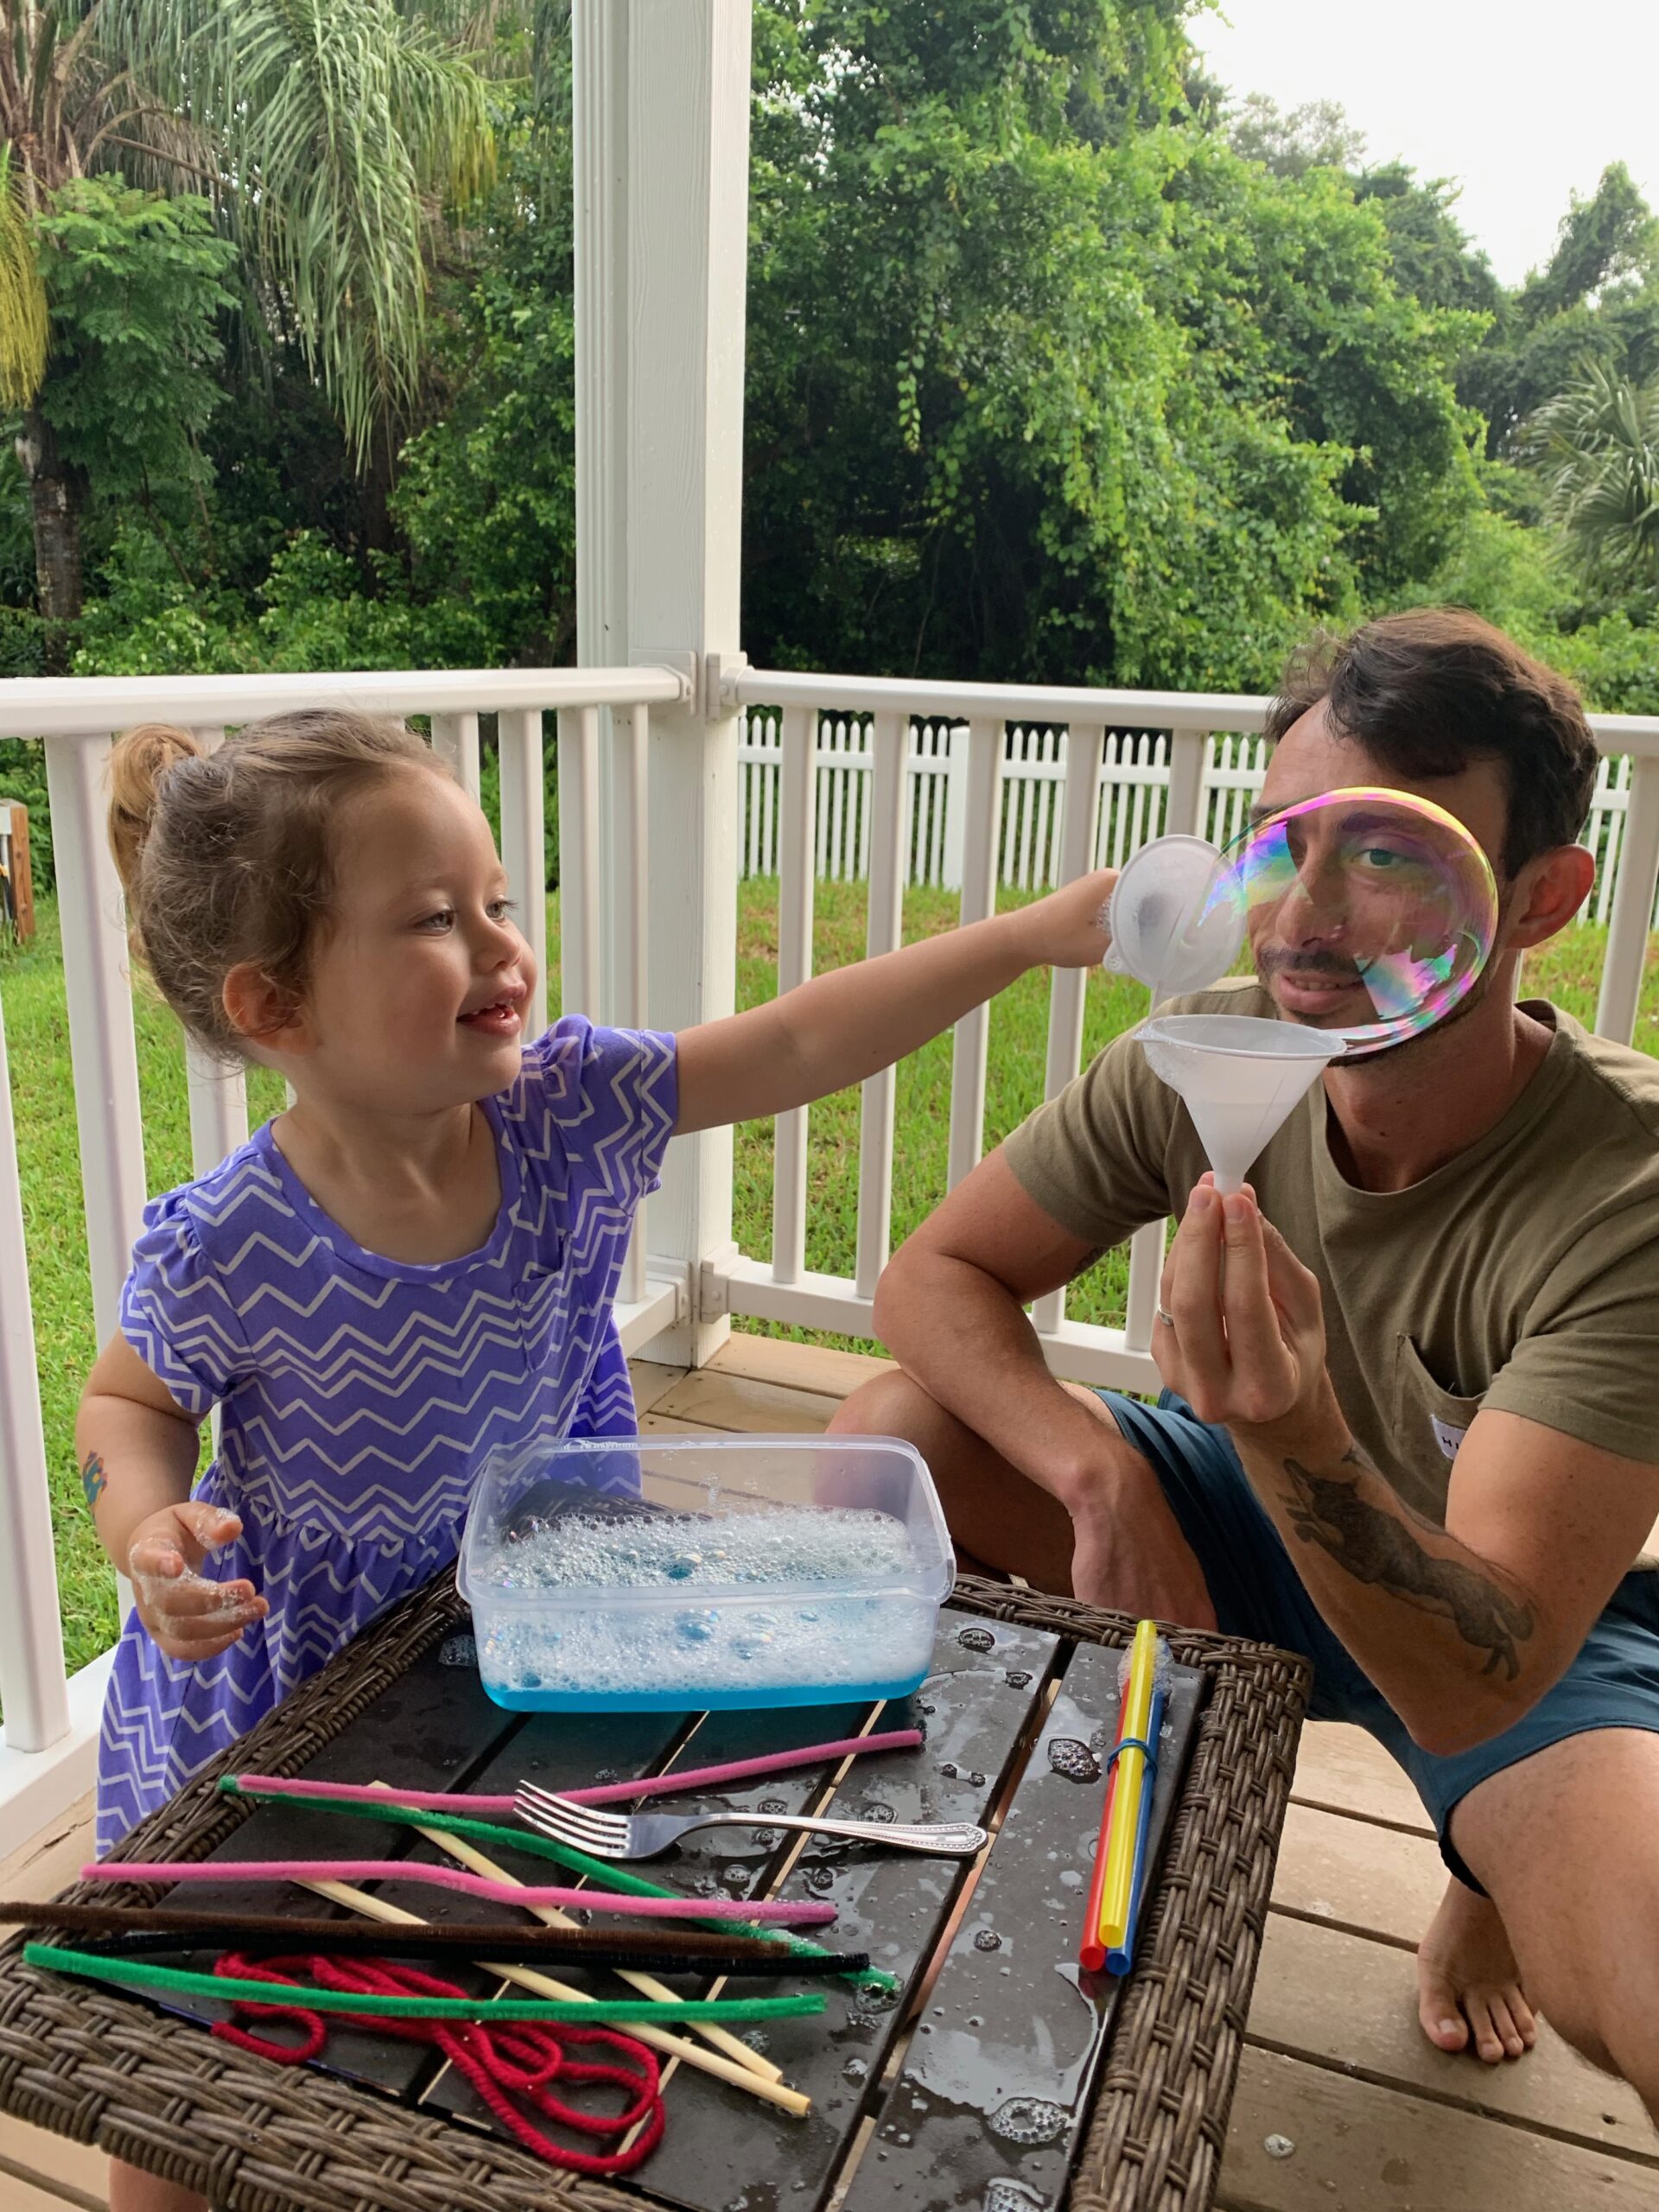
Blowing bubbles is fun! Take it to the next level by becoming a bubble wand engineer!
Experiment with different forms to see which works best for making bubbles. Can you change the shape of your bubbles or make them last longer? These are the types of experiments creative engineers would do to create the best designs for things they’re building. And, it’s okay if it doesn’t work well! That’s part of the design process. Go for it!
Sometimes you just have to go big to get the kids attention, and this fun experiment will do the trick!
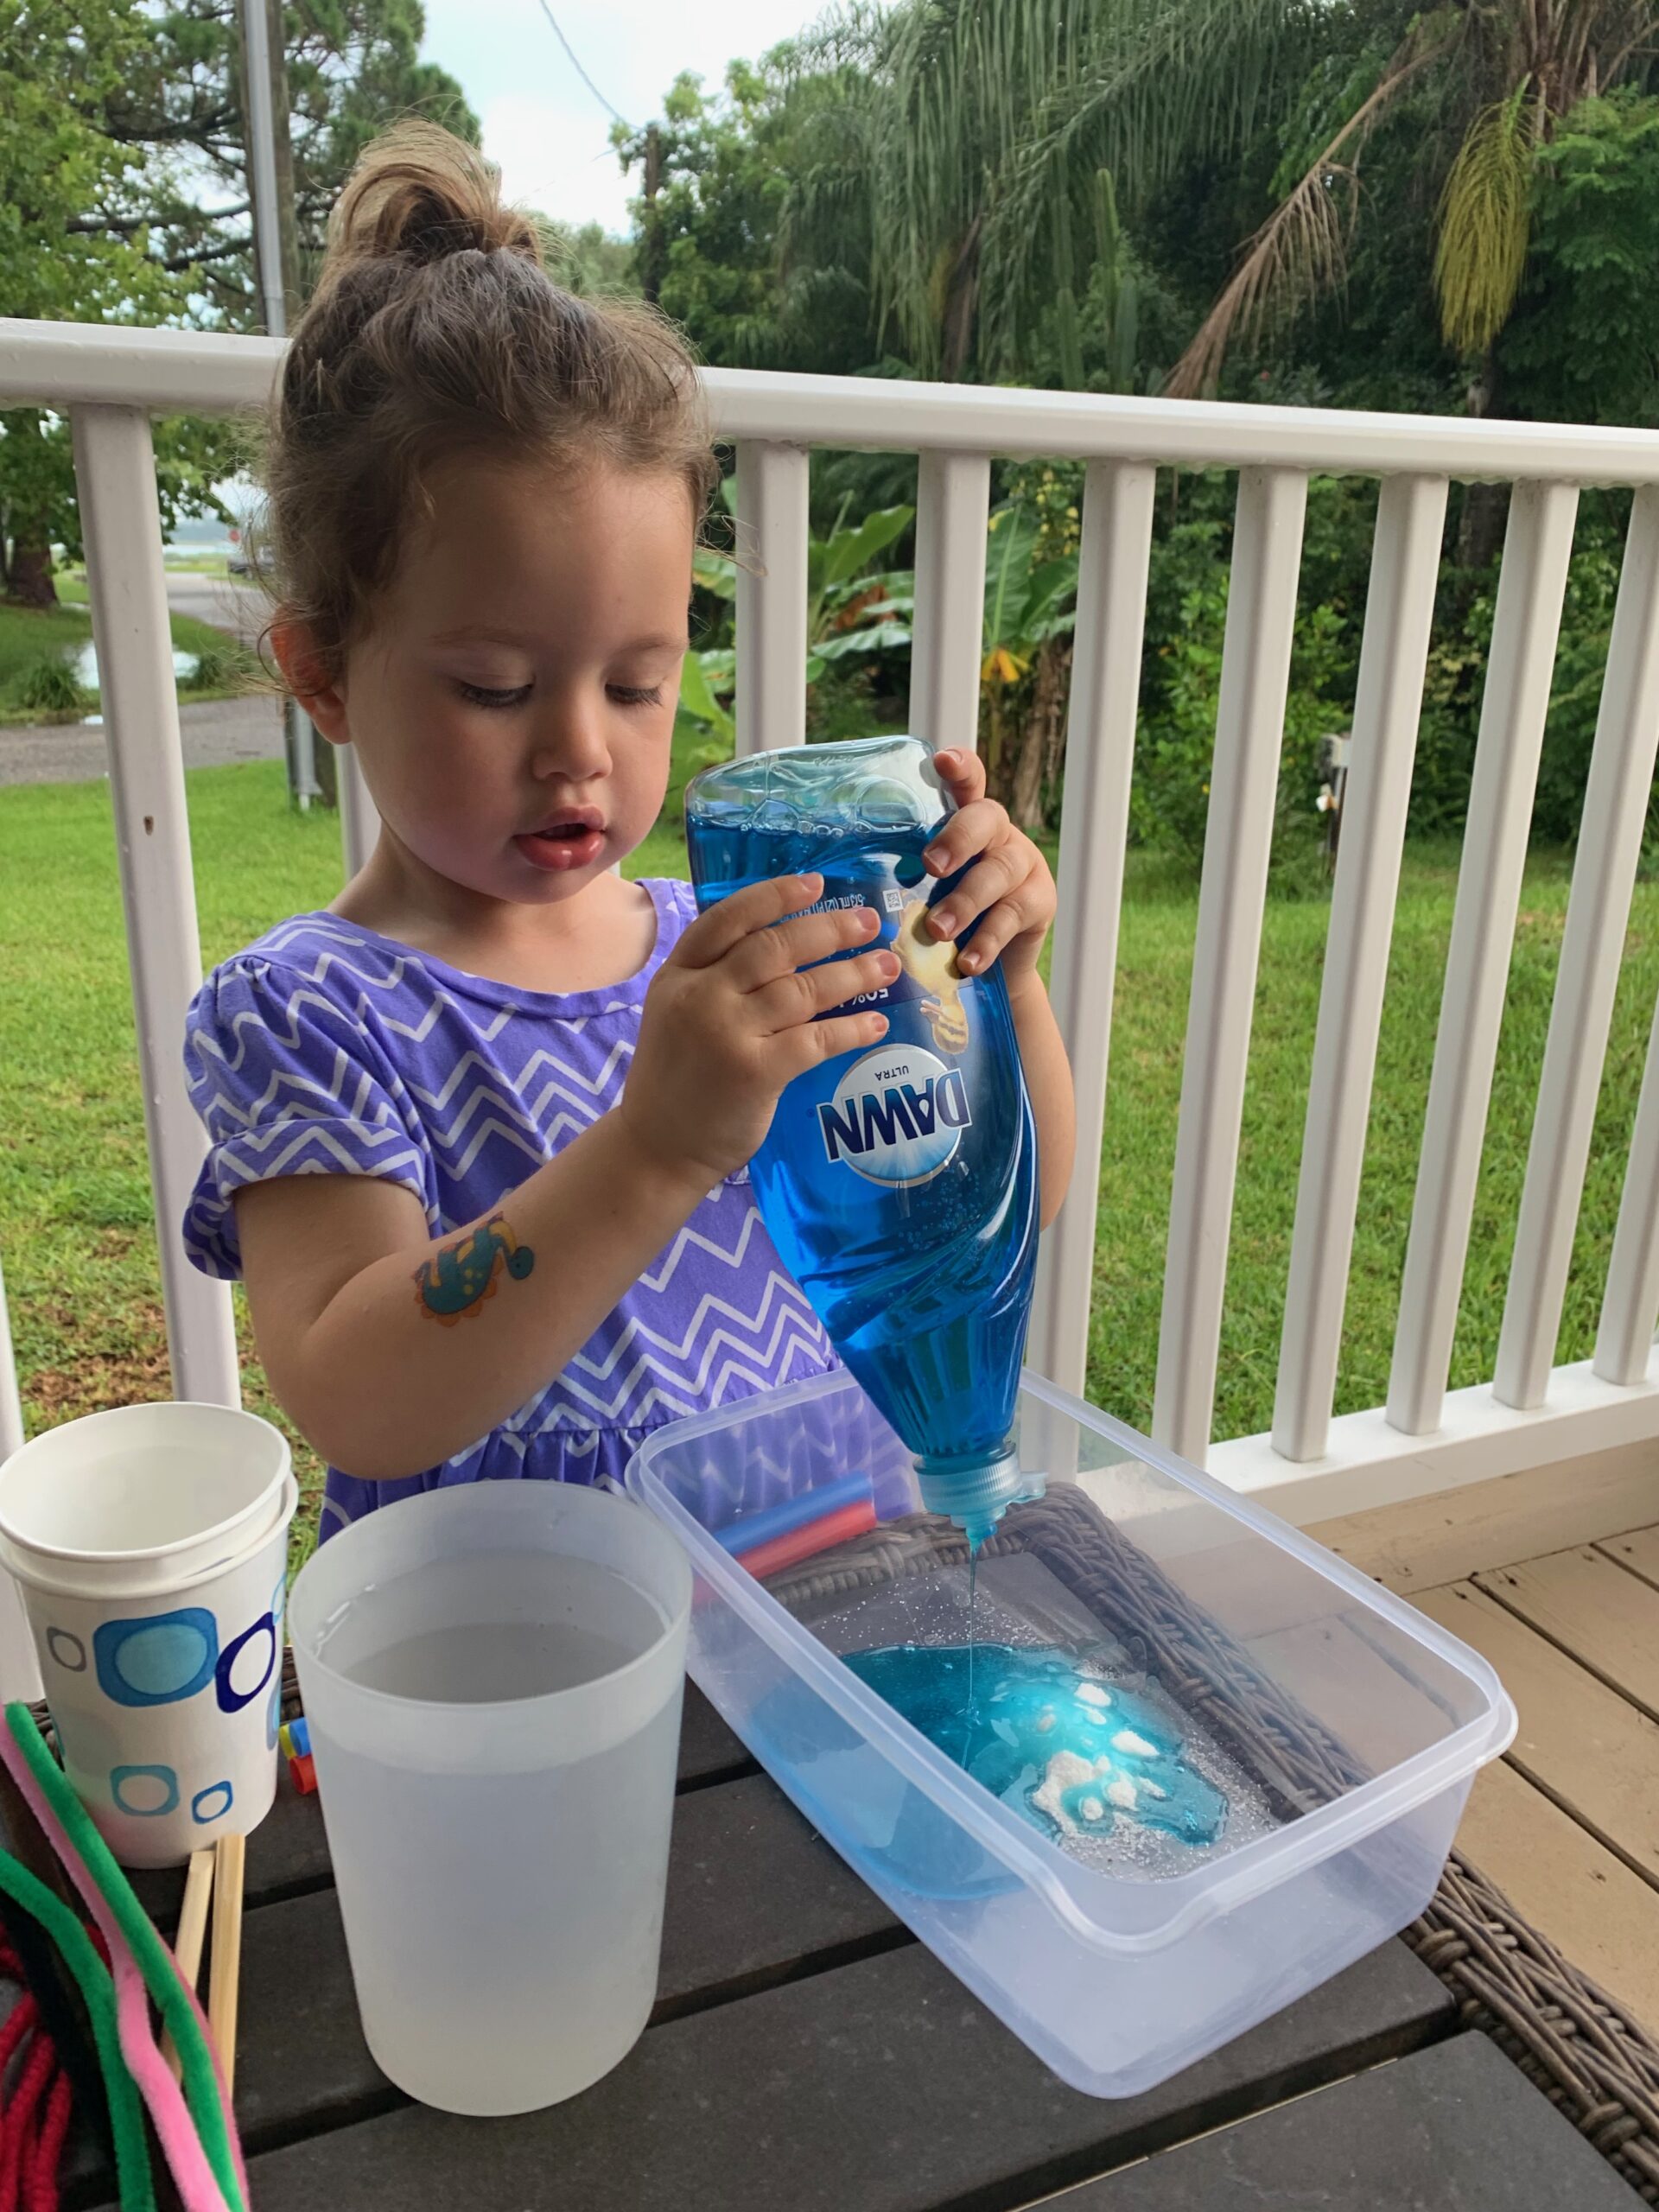
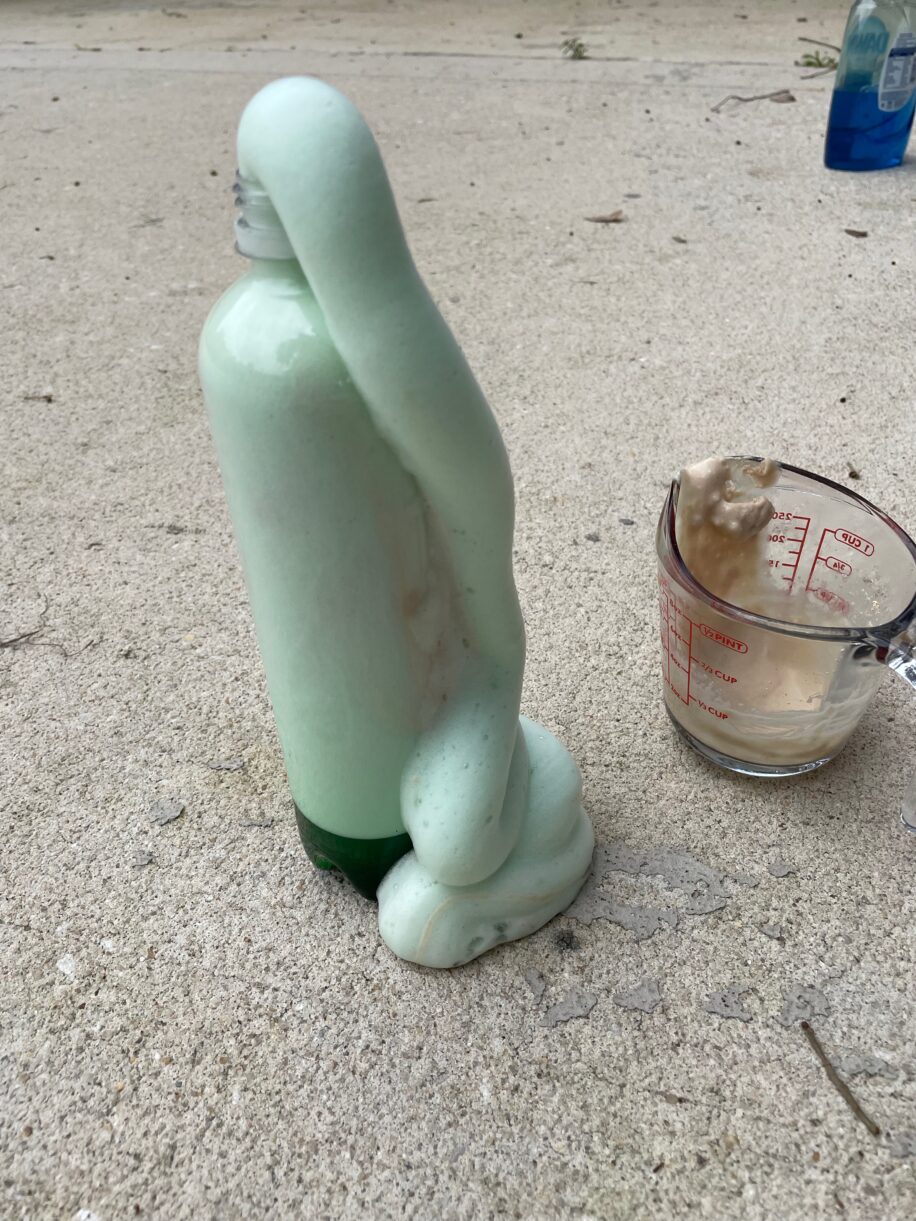
Everyone needs clean teeth, right? What do you think it would look like if elephants used toothpaste? In this fun chemistry experiment, you’ll create a chemical reaction that grows right before your very eyes… into something that looks like Elephant Toothpaste! Don’t forget: Always wear eye protection while doing chemistry experiments.
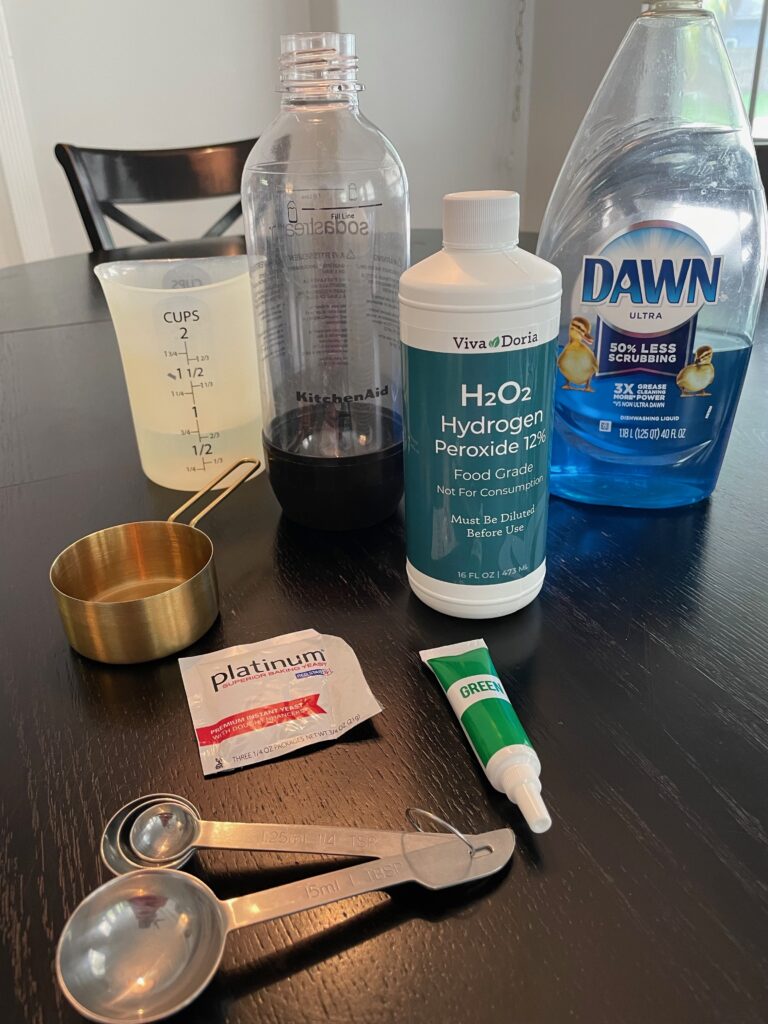
Materials Needed:
Empty plastic bottle
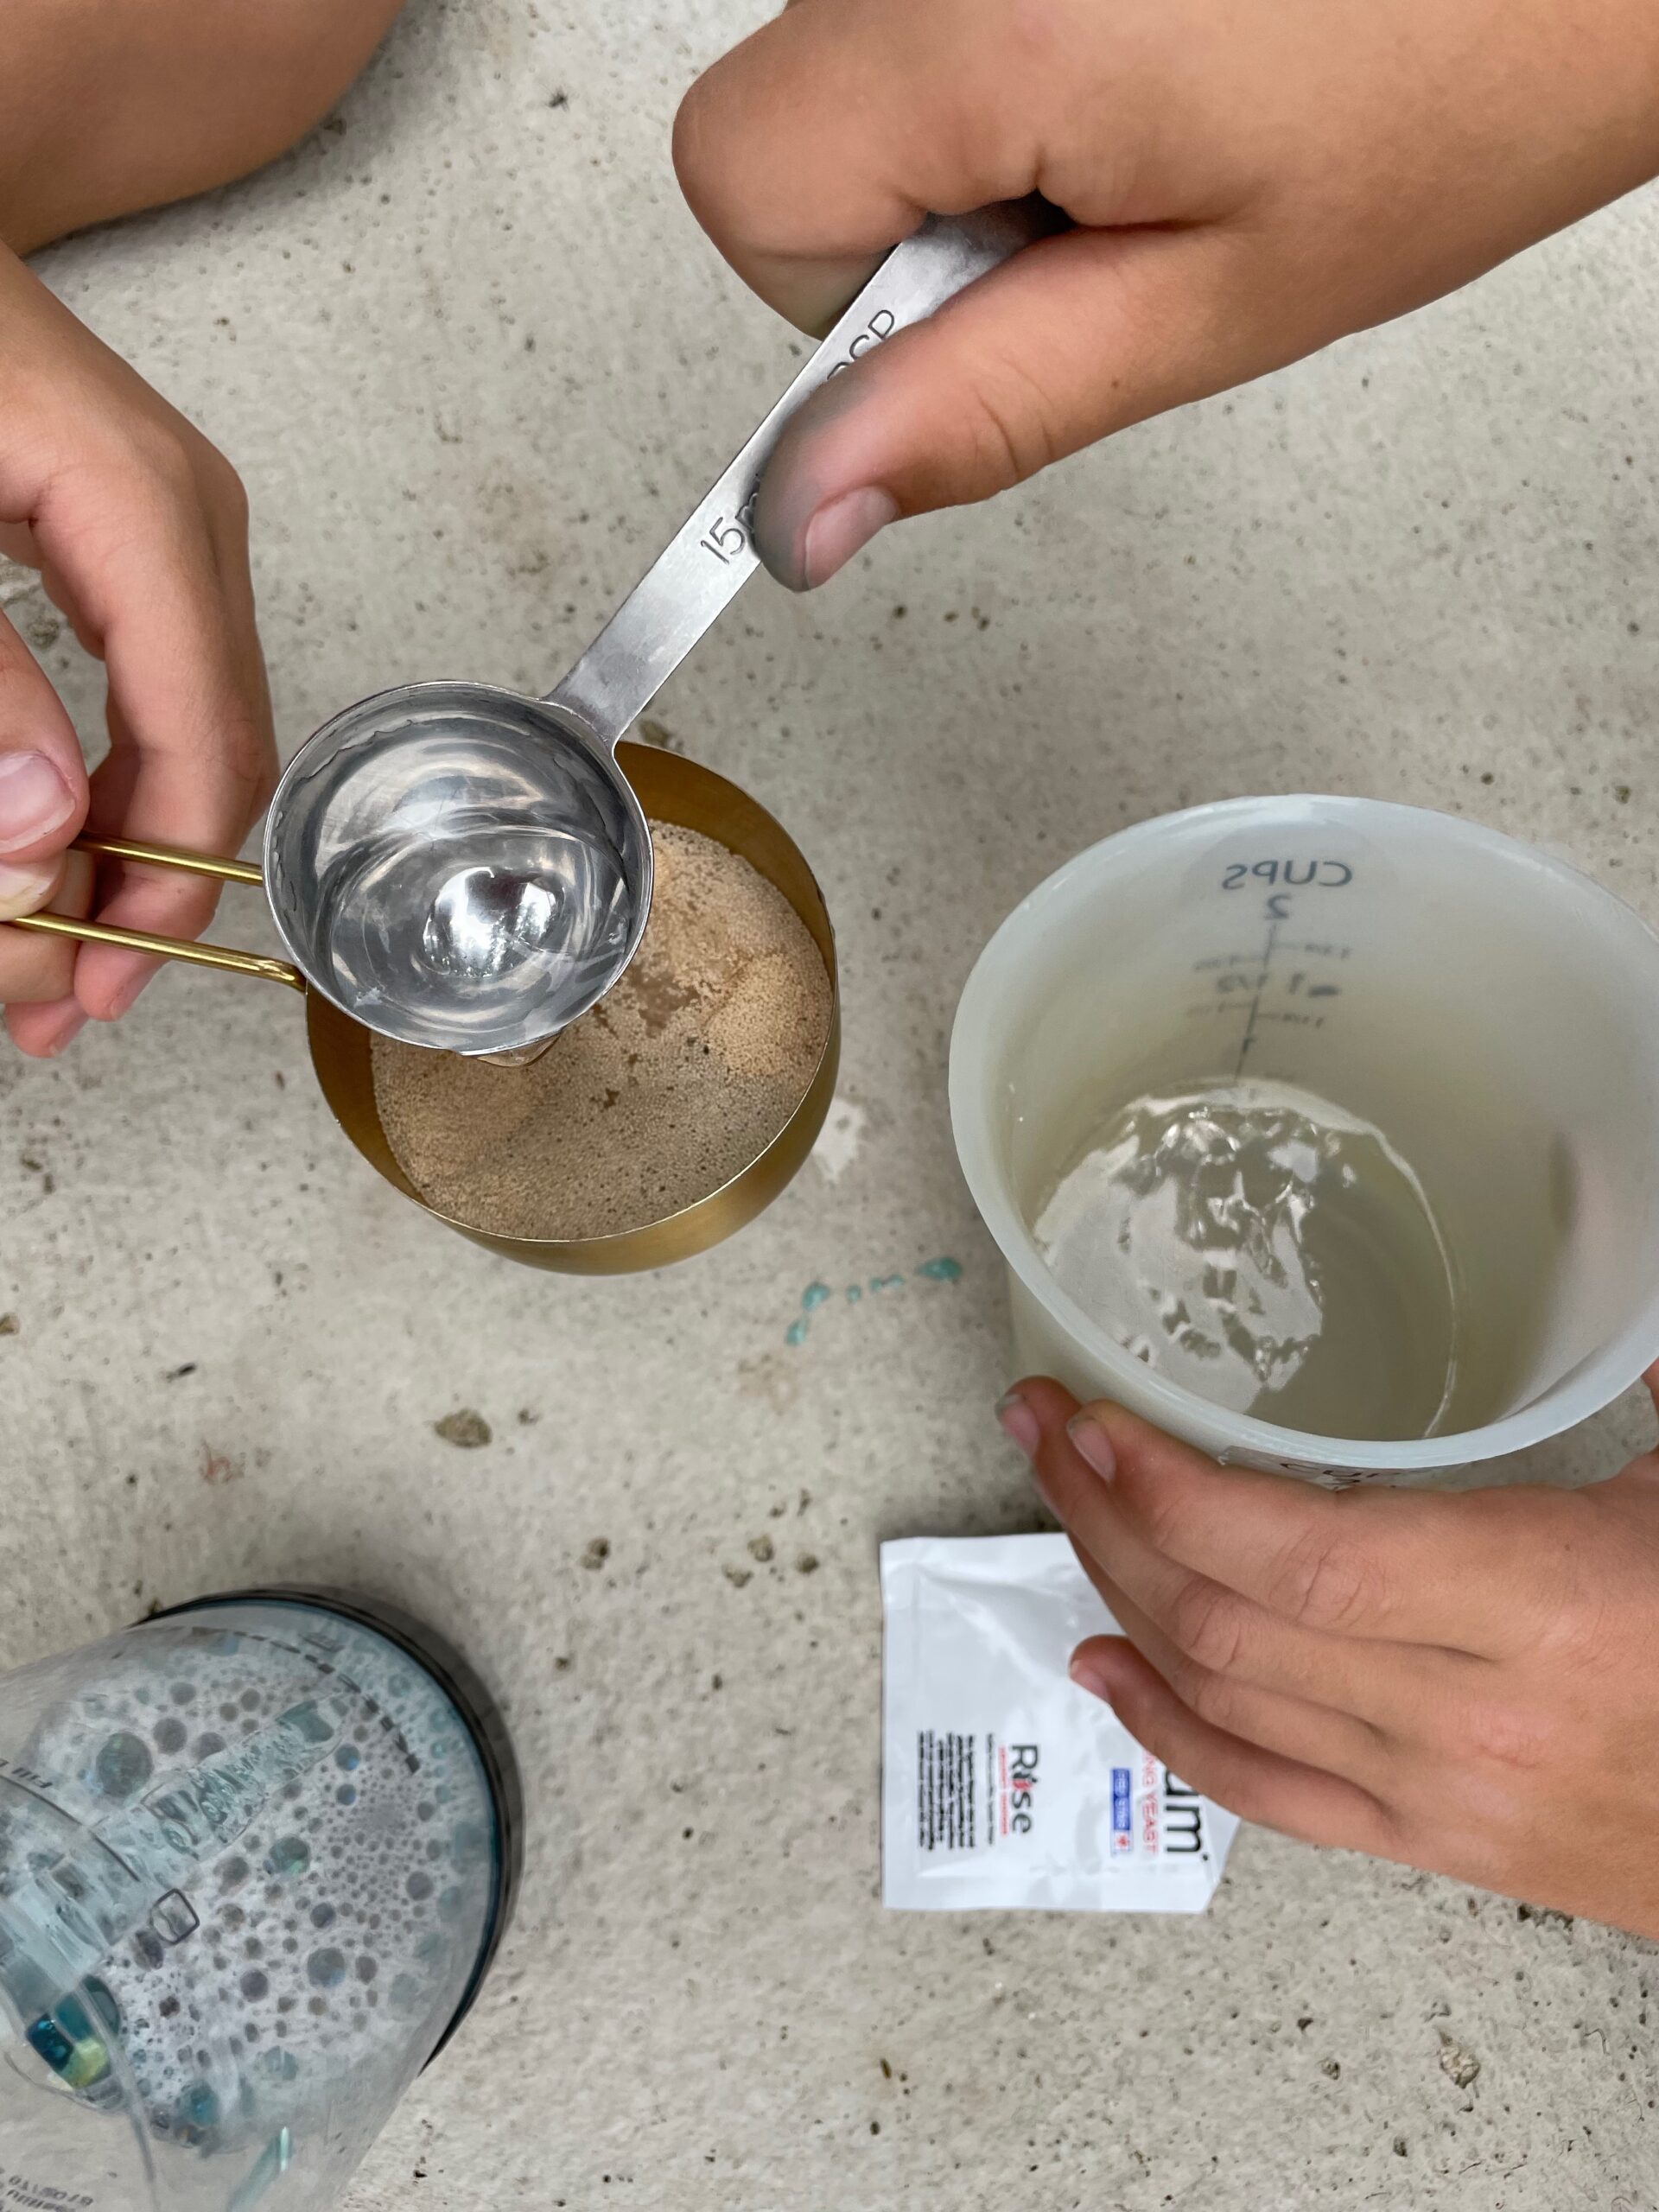
Dry yeast, 1 Tablespoon
Warm water, 3 Tablespoons
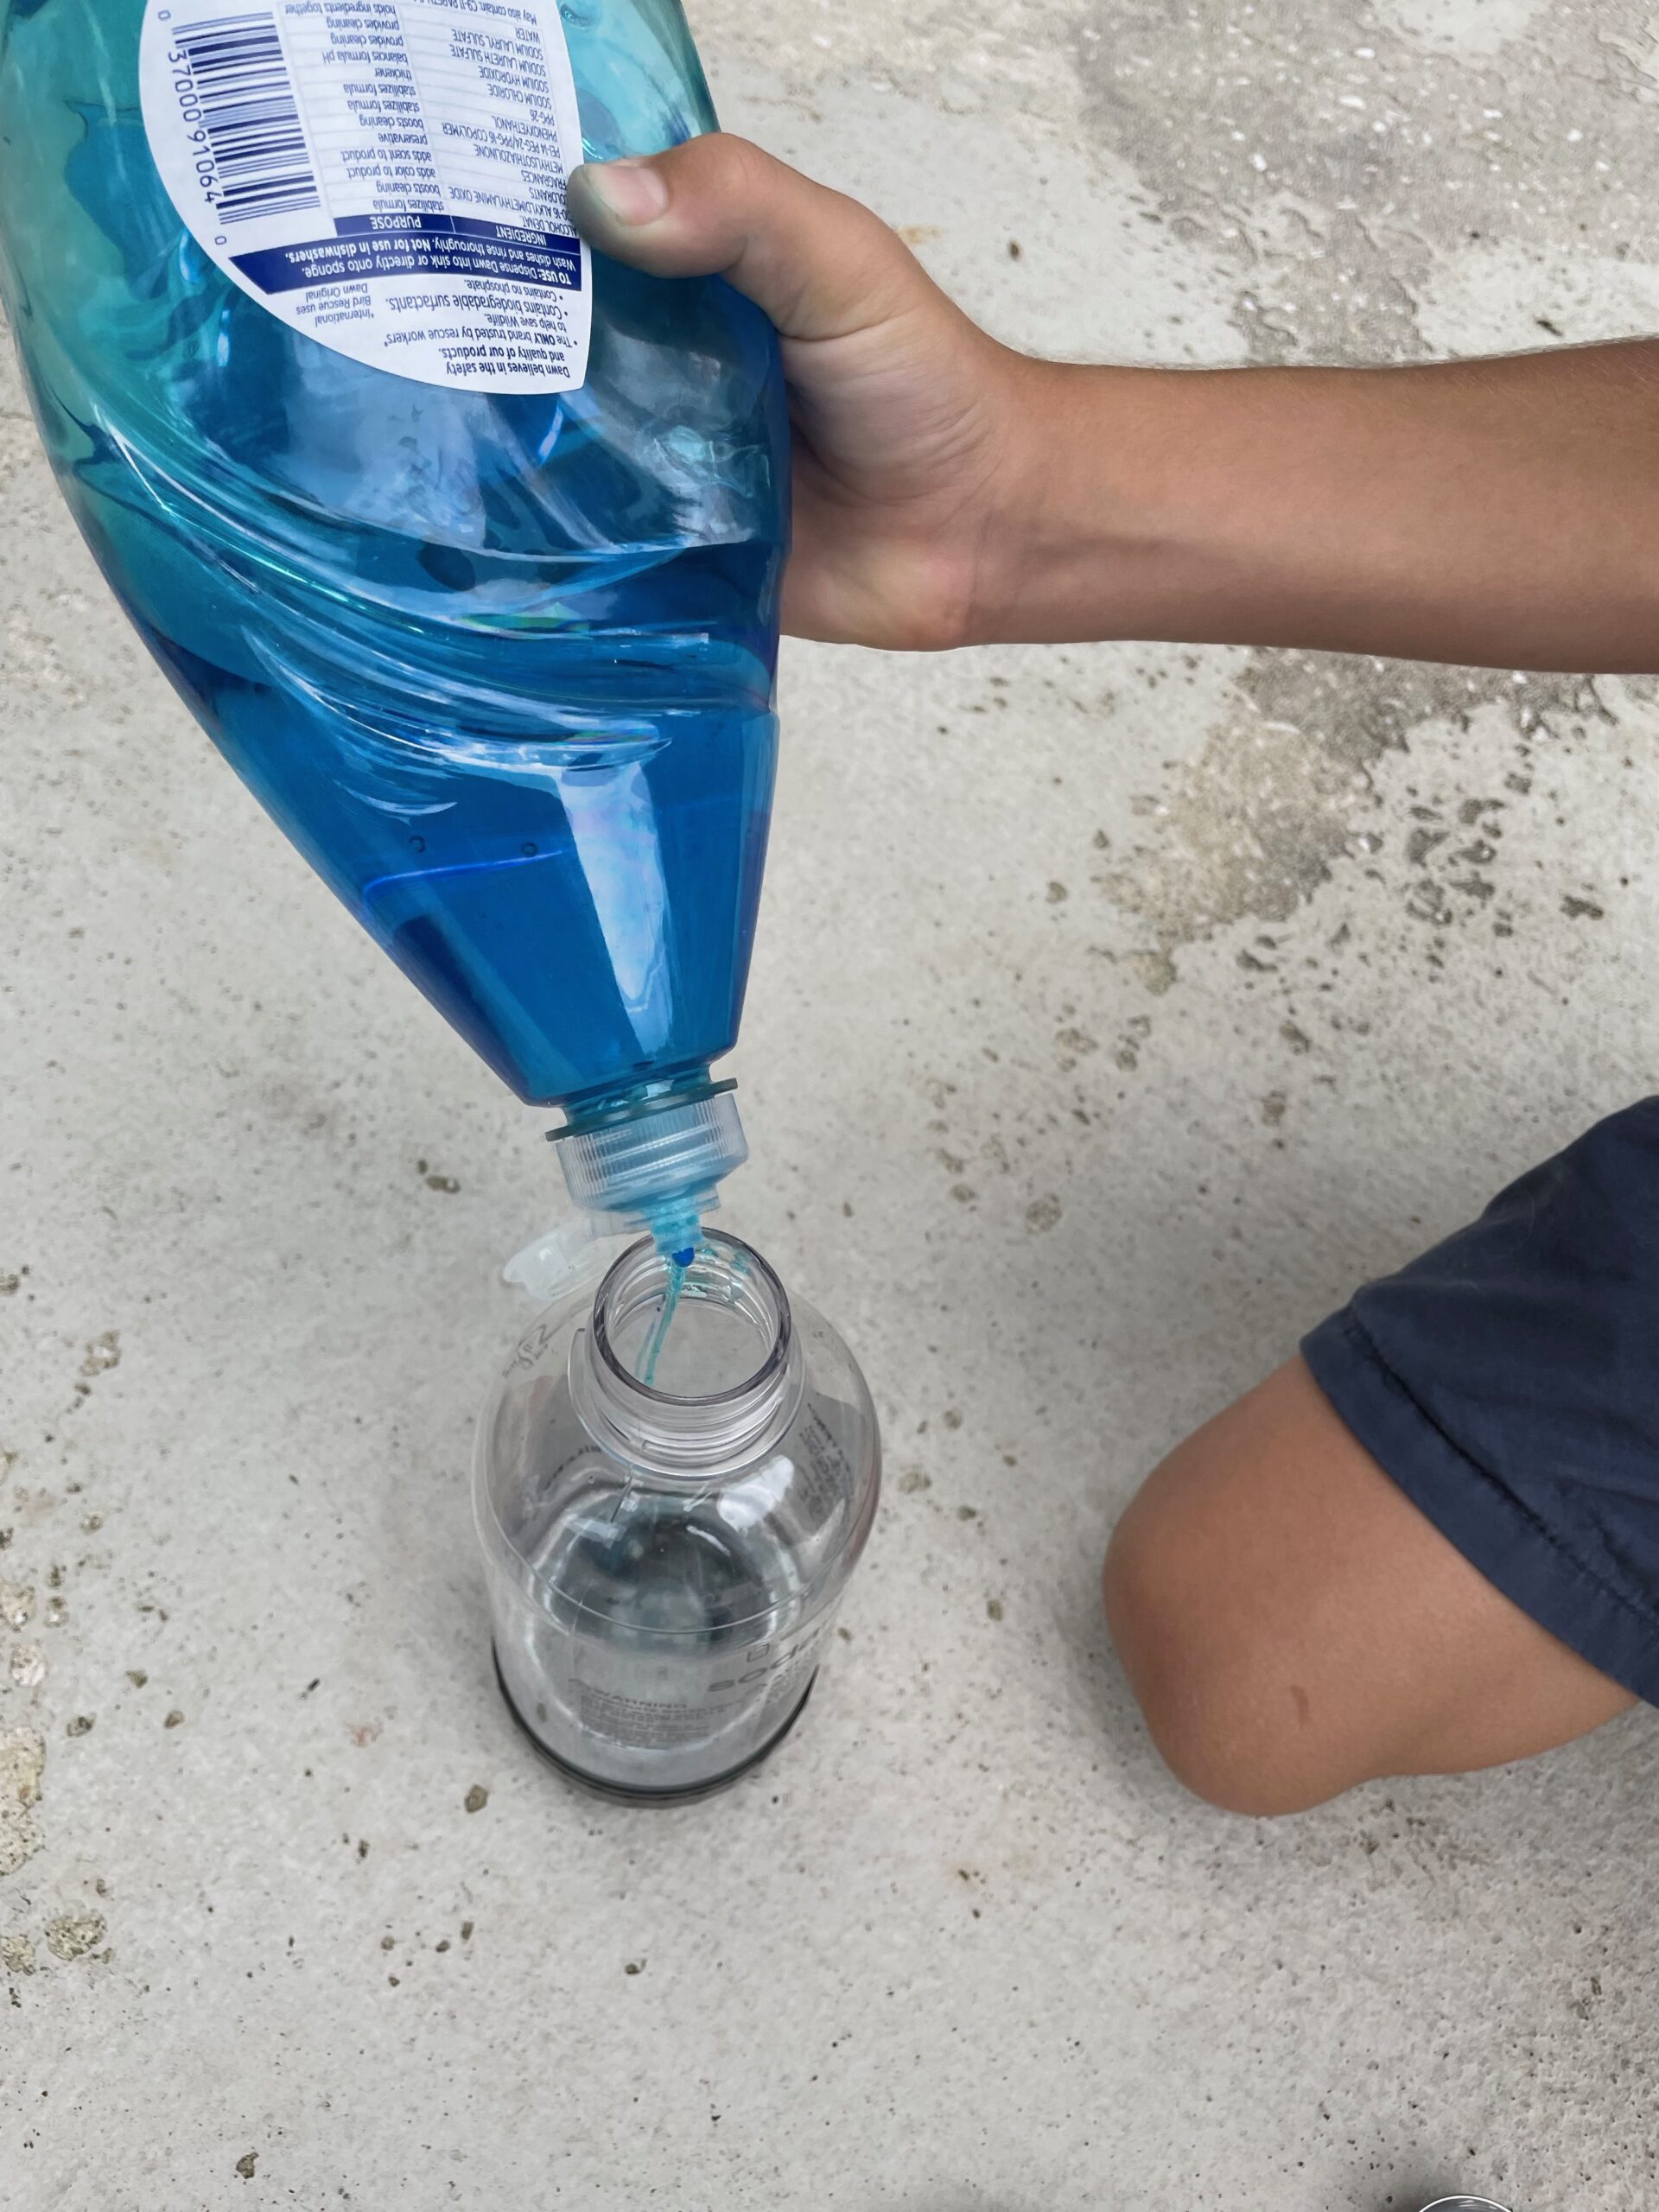
Liquid dish soap
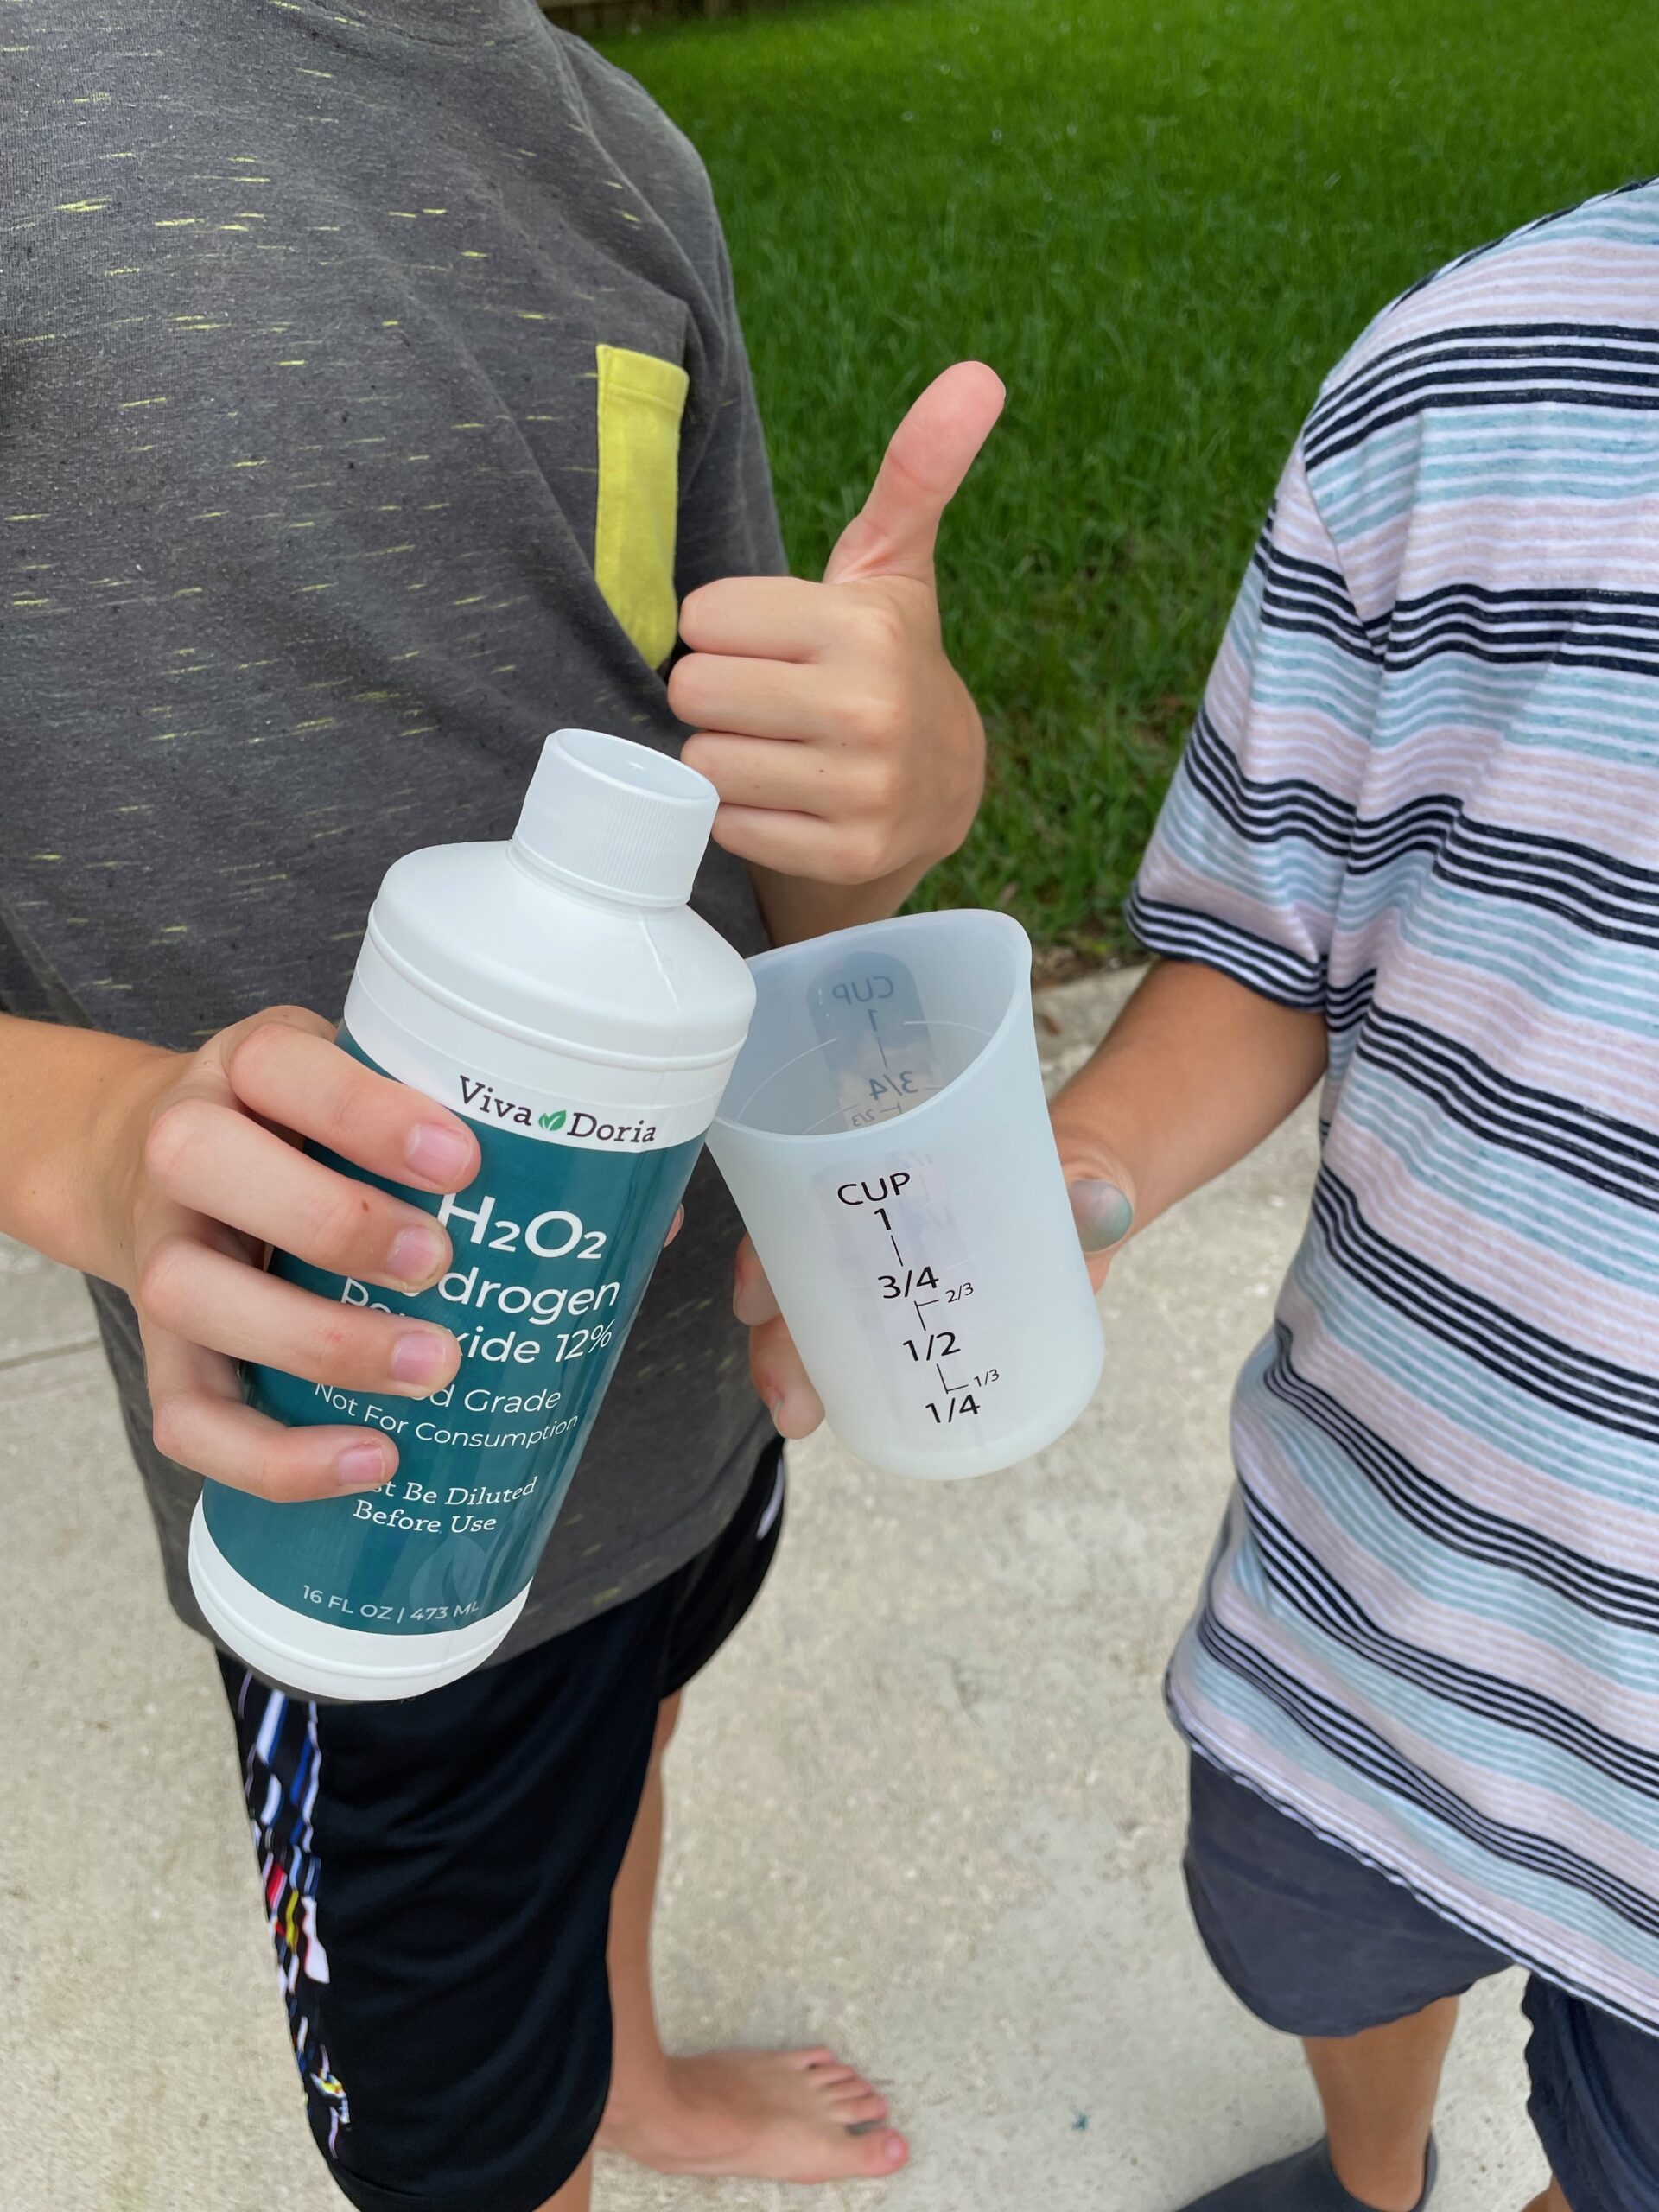
3% hydrogen peroxide (this is a special version of hydrogen peroxide)
Measuring cups
Measuring spoons
Safety glasses
Outdoor Location
Liquid food coloring (optional)
Step 1: Measure 1/2 cup of hydrogen peroxide, and carefully pour it into the bottle.
Step 2: Add a big squirt of dish soap into the bottle, and swirl gently to mix.
Step 3 (optional): If you want to make your foam a color, add a few drops of food coloring directly into the hydrogen peroxide, and swirl the bottle gently to mix.
Step 4: In a measuring cup mix together one tablespoon of yeast and three tablespoons of warm water. Stir for about 30 seconds.
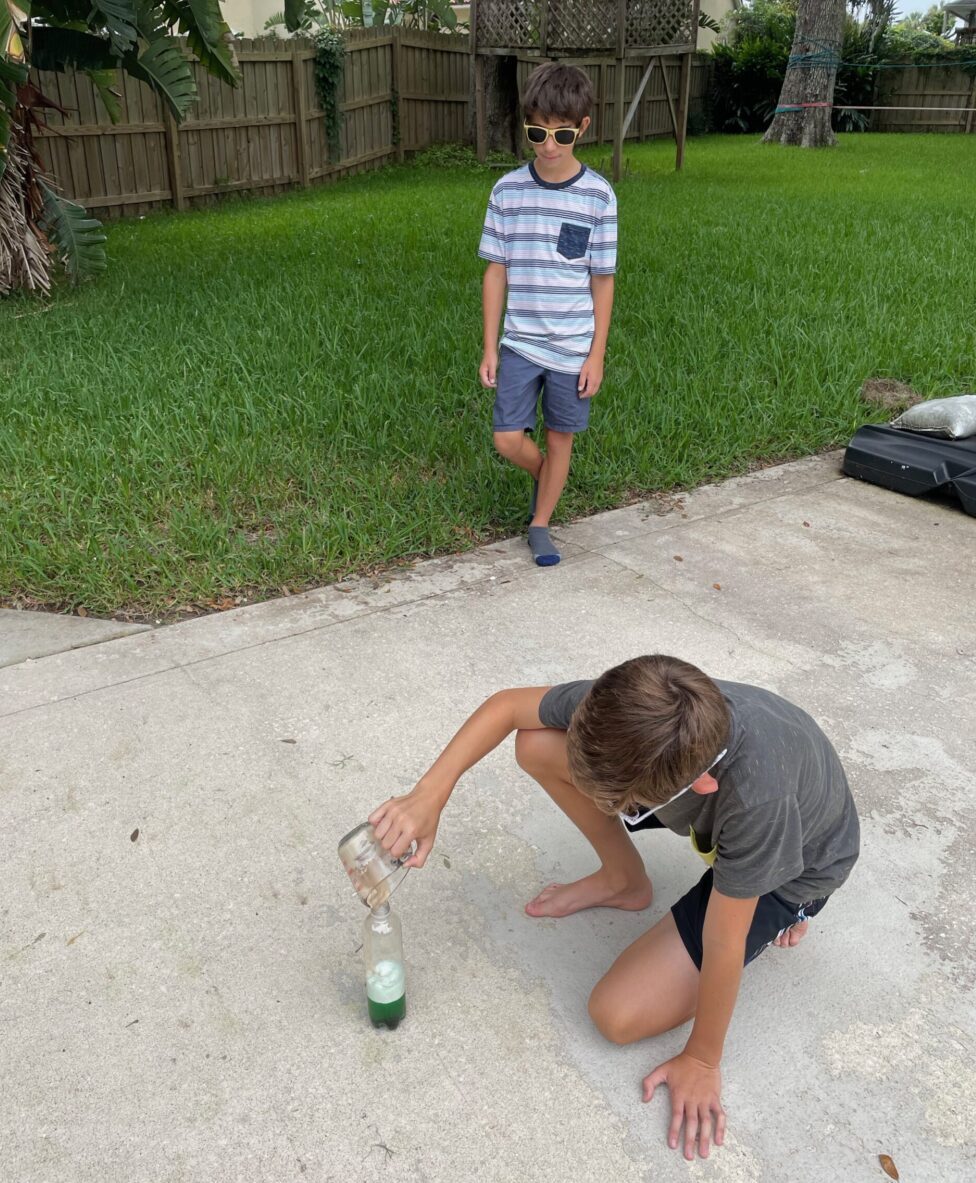
Step 5: Pour the yeast mixture into the bottle then quickly step back, and watch for the chemical reaction to push the “elephant toothpaste” out of the bottle!
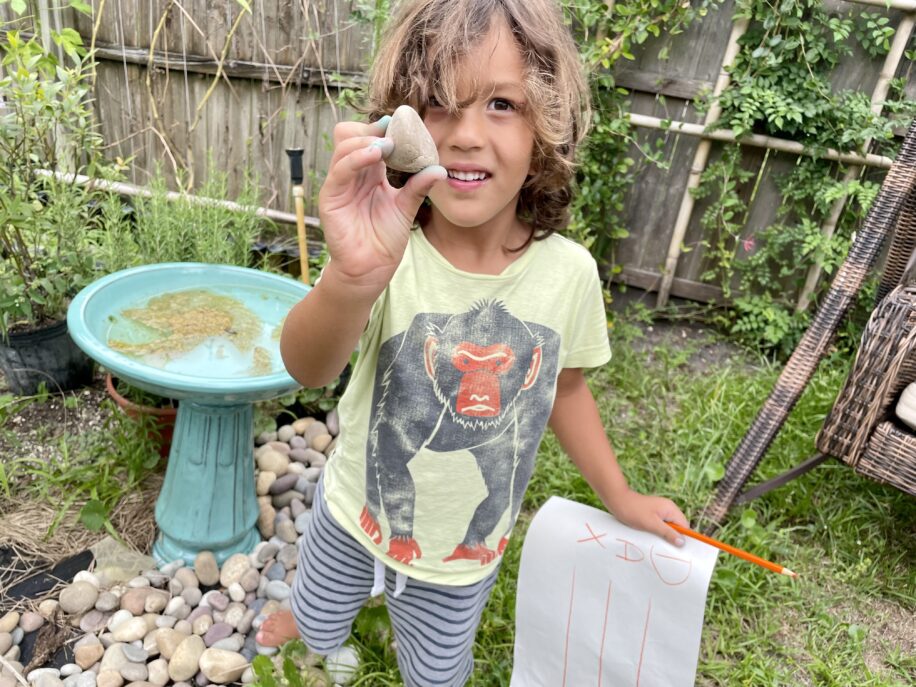
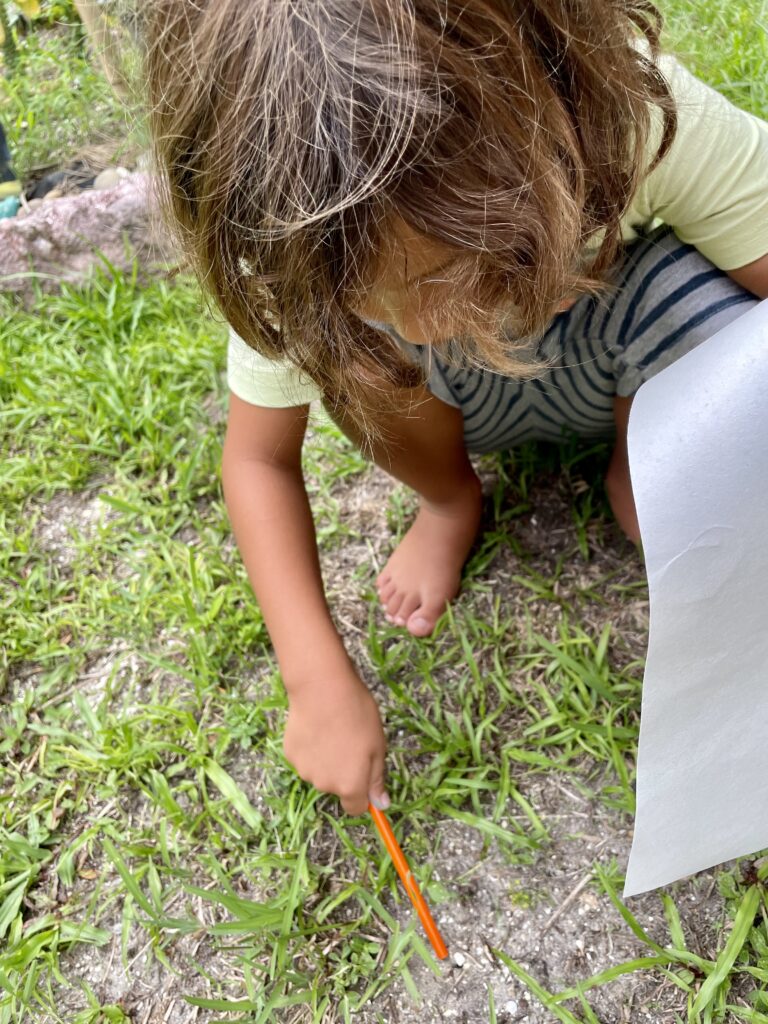
Have you ever talked to your child about being a good “observer?” What does it mean to really take note of things? Practice your observation skills in this fun experiment that will have you hunting outside for treasures you didn’t even know were there!
Use our “My Name In Nature” play sheet that has items you may find in your yard or neighborhood that correspond to each letter of the alphabet. Pick the letters that spell your name and start hunting!
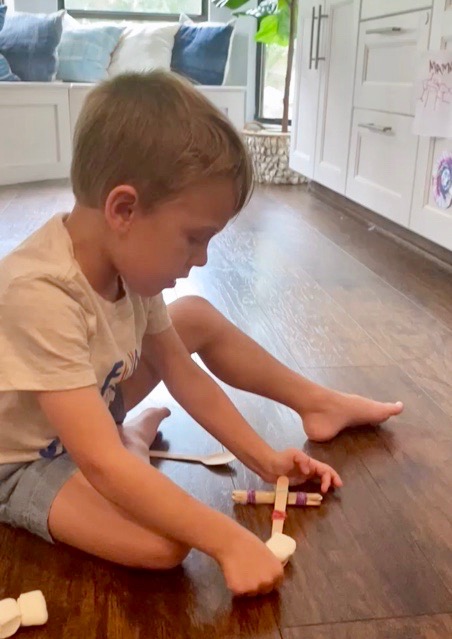
There’s nothing like catapulting marshmallows across the kitchen to get kids excited about engineering!
This is a great activity to experiment with! Be a scientist and try it different ways by changing the types of materials you use to see what works best.
Suggested Materials:
Popsicle sticks (approximately 8)
Rubber bands (at least 5)
Spoon (plastic or wooden is fine, experiment with both!)
Marshmallows
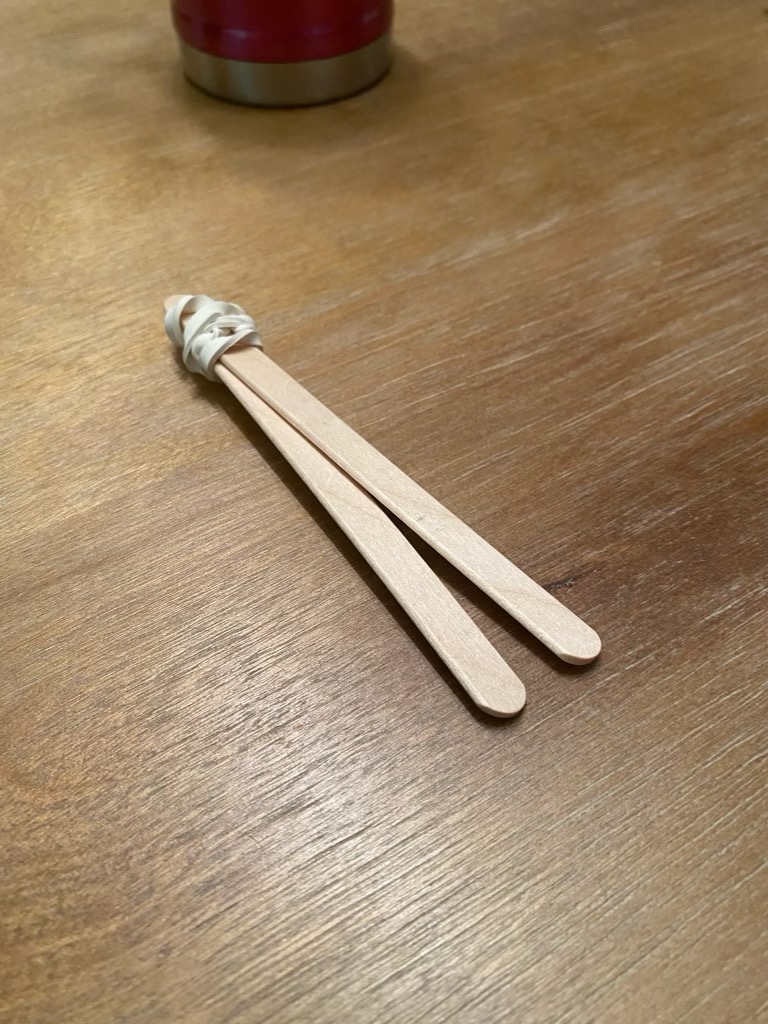
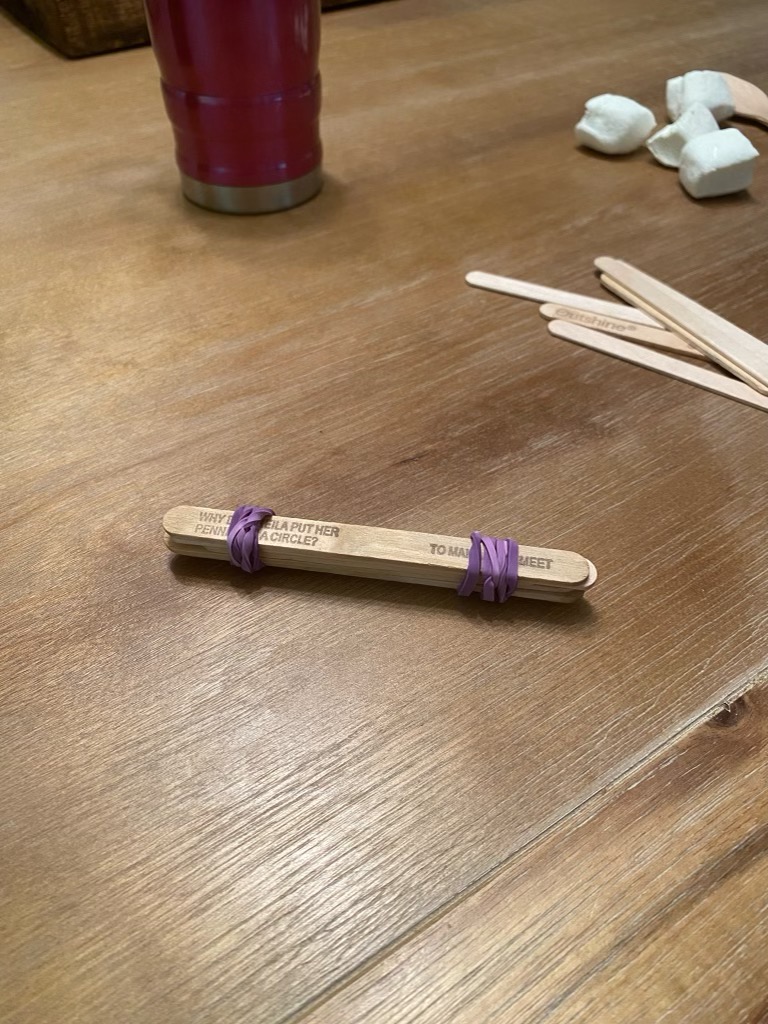
Step 1. Stack a few popsicle sticks together (about 6 sticks works well) and wrap rubber bands around each end.
Step 2: Combine two more popsicle sticks and wrap another rubber band around just one end.
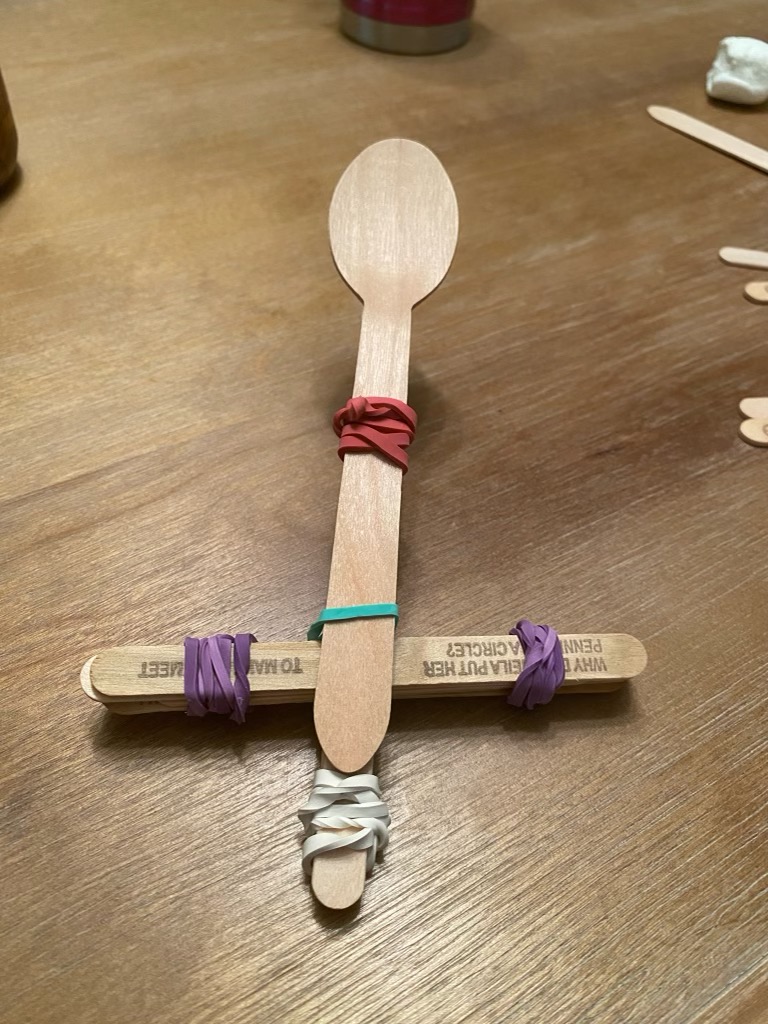
Step 3: Slide the larger stack of popsicle sticks, in between the open side of the other two sticks.
Step 4: Secure the two parts together with another rubber band by wrapping it across the spot where the two sets of sticks meet so the rubber band makes an X.
Step 5: Secure a plastic spoon onto the arm of your catapult with another rubber band.
Step 6: Place a marshmallow on the spoon, pull down, and let go to send it soaring!
Try experimenting with different materials (sticks, chopsticks, pencils, erasers, larger spoons, etc..) to see if you can make your catapult work better.
Discussion Points: What else can you find to safely launch across the room? What object soars highest? Which goes farthest?
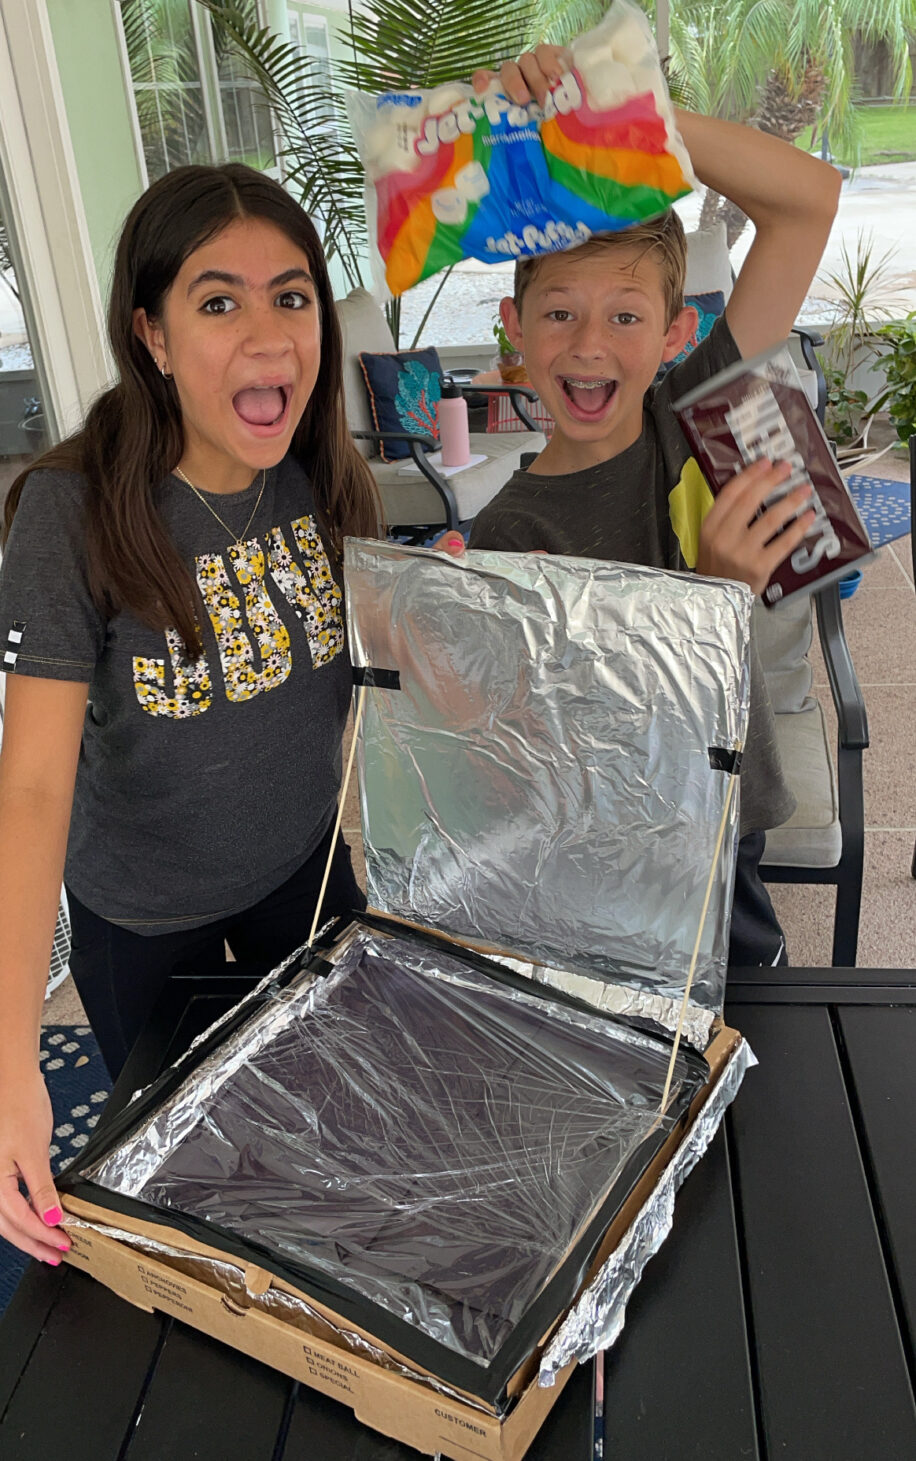
Put your innovative skills to work, pull out that recycle bin and get crafting! Rain is nature’s way of refreshing our earth and helping plants to grow. When raindrops fall that’s part of the Water Cycle, scientifically known as Precipitation.
How much precipitation does your yard need to stay healthy? Different climates are based on geography, annual temperatures, and the average amount of rainfall.
Measuring rainfall can give us a lot of data on what’s happening to the climate in any given area.
Are you curious about the rain that falls in your yard?
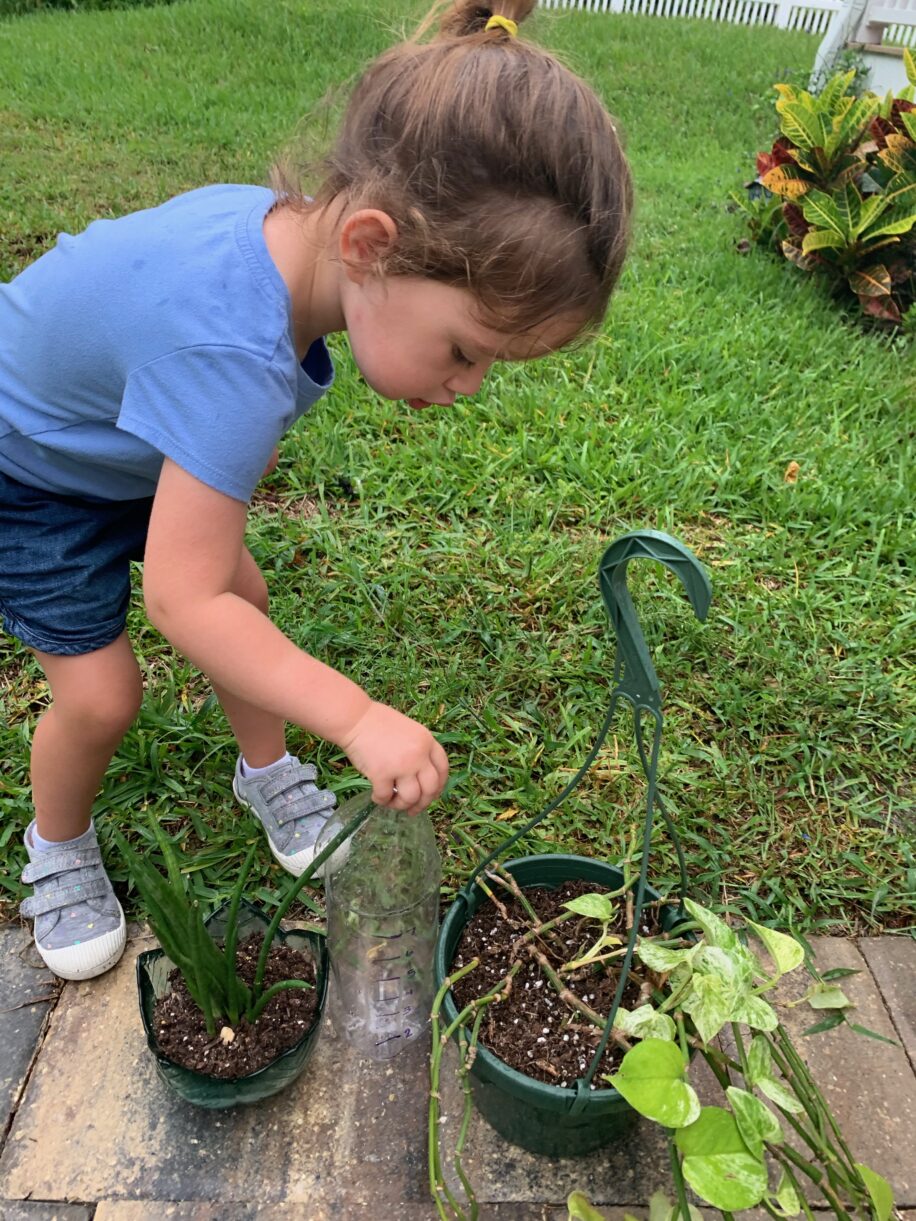
Follow these simple steps to make a Rain Gauge, to measure your local precipitation.
Materials Needed:
Empty plastic bottle (any size will do, but we like a 1 Liter bottle best!)
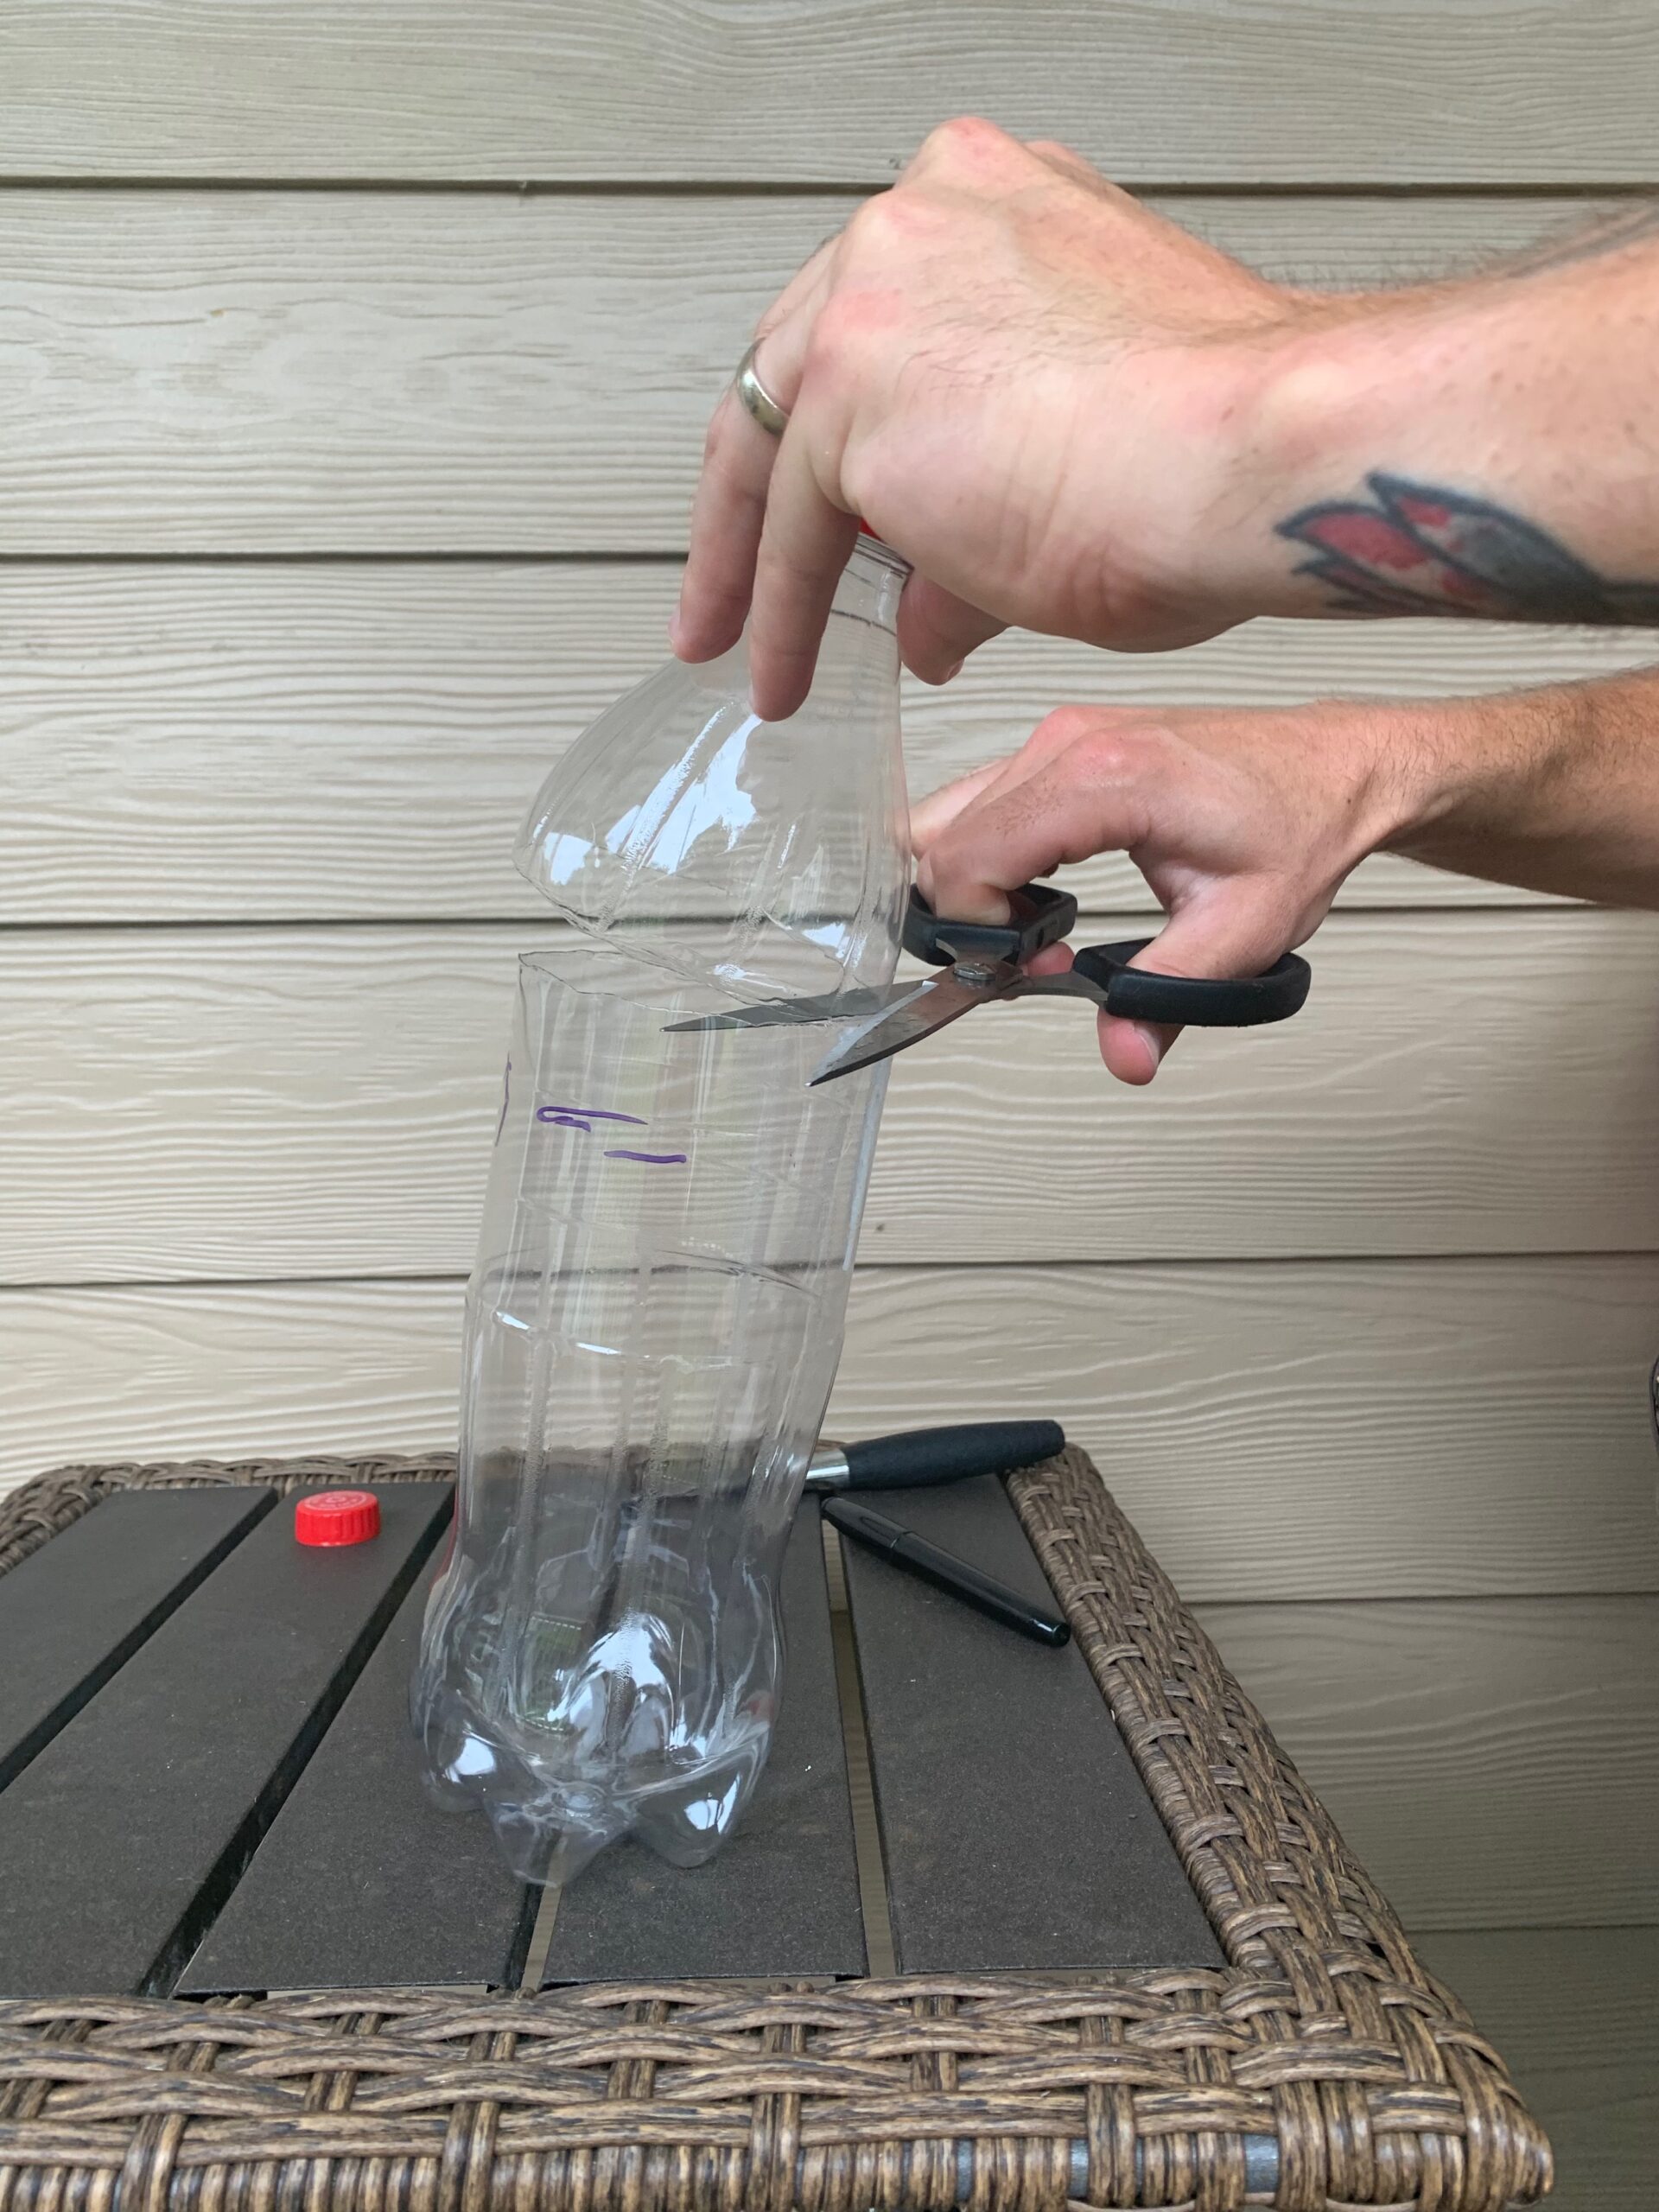
Scissors (with an adult’s help)
Permanent marker
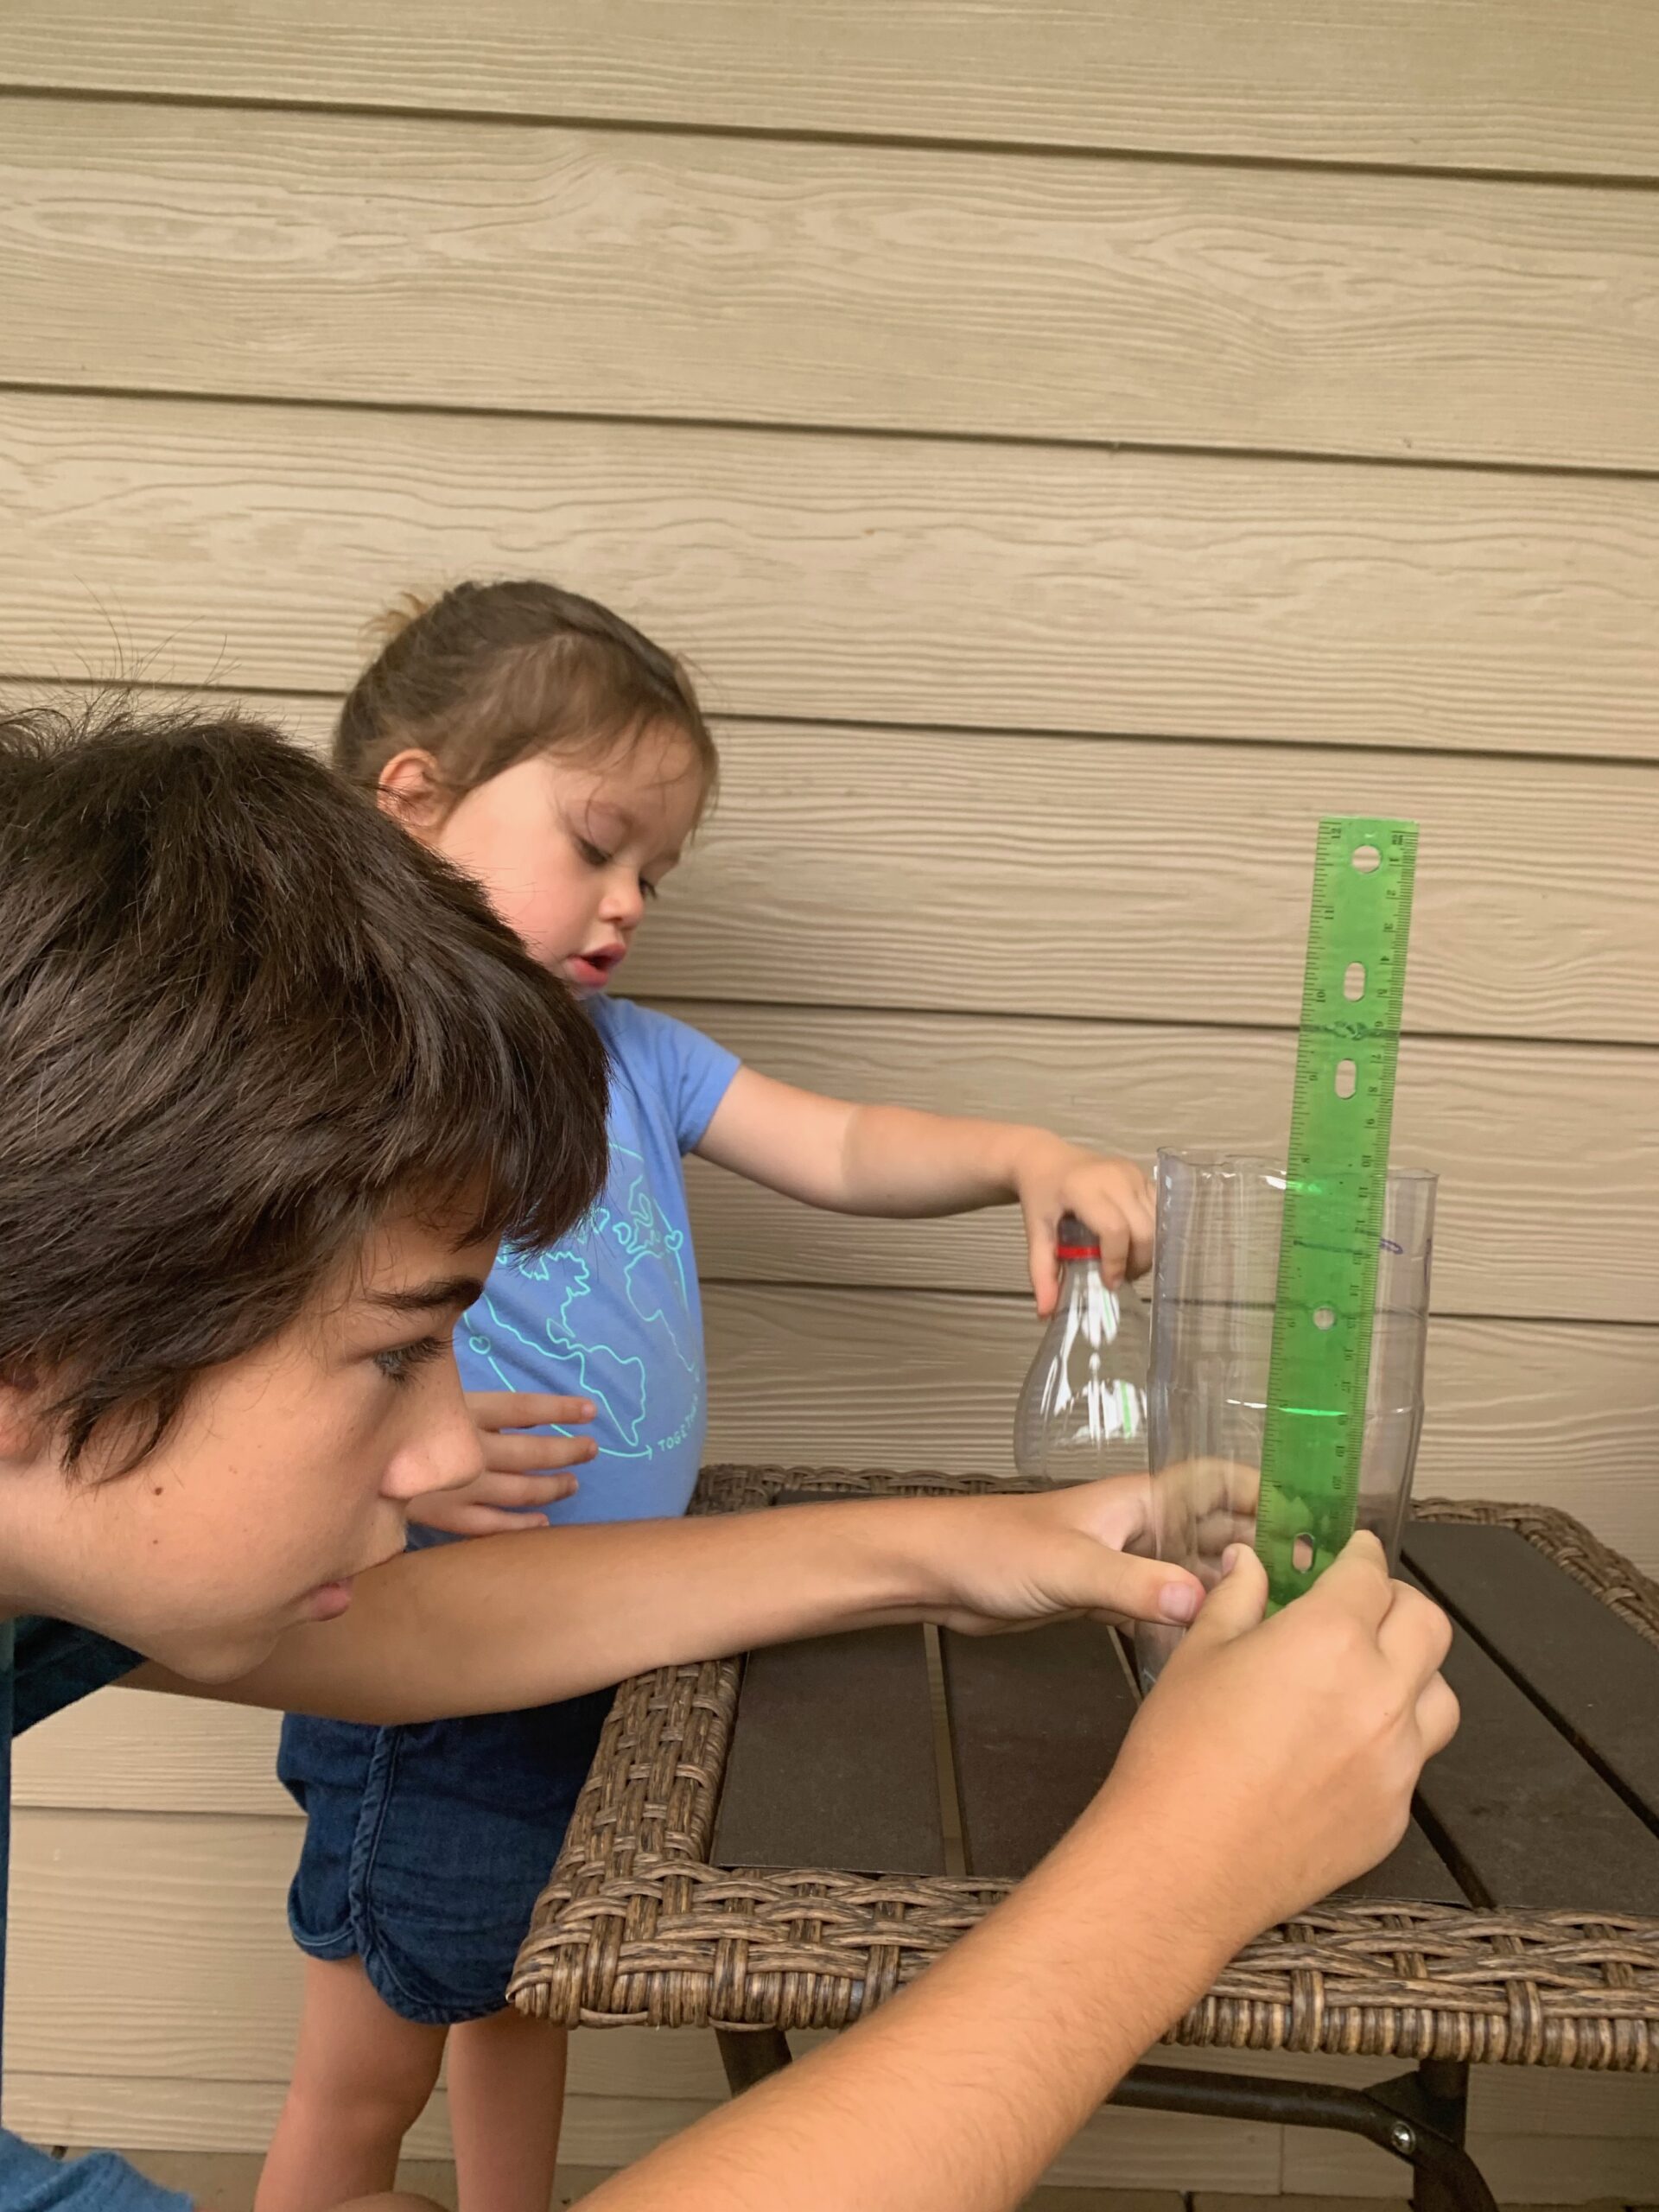
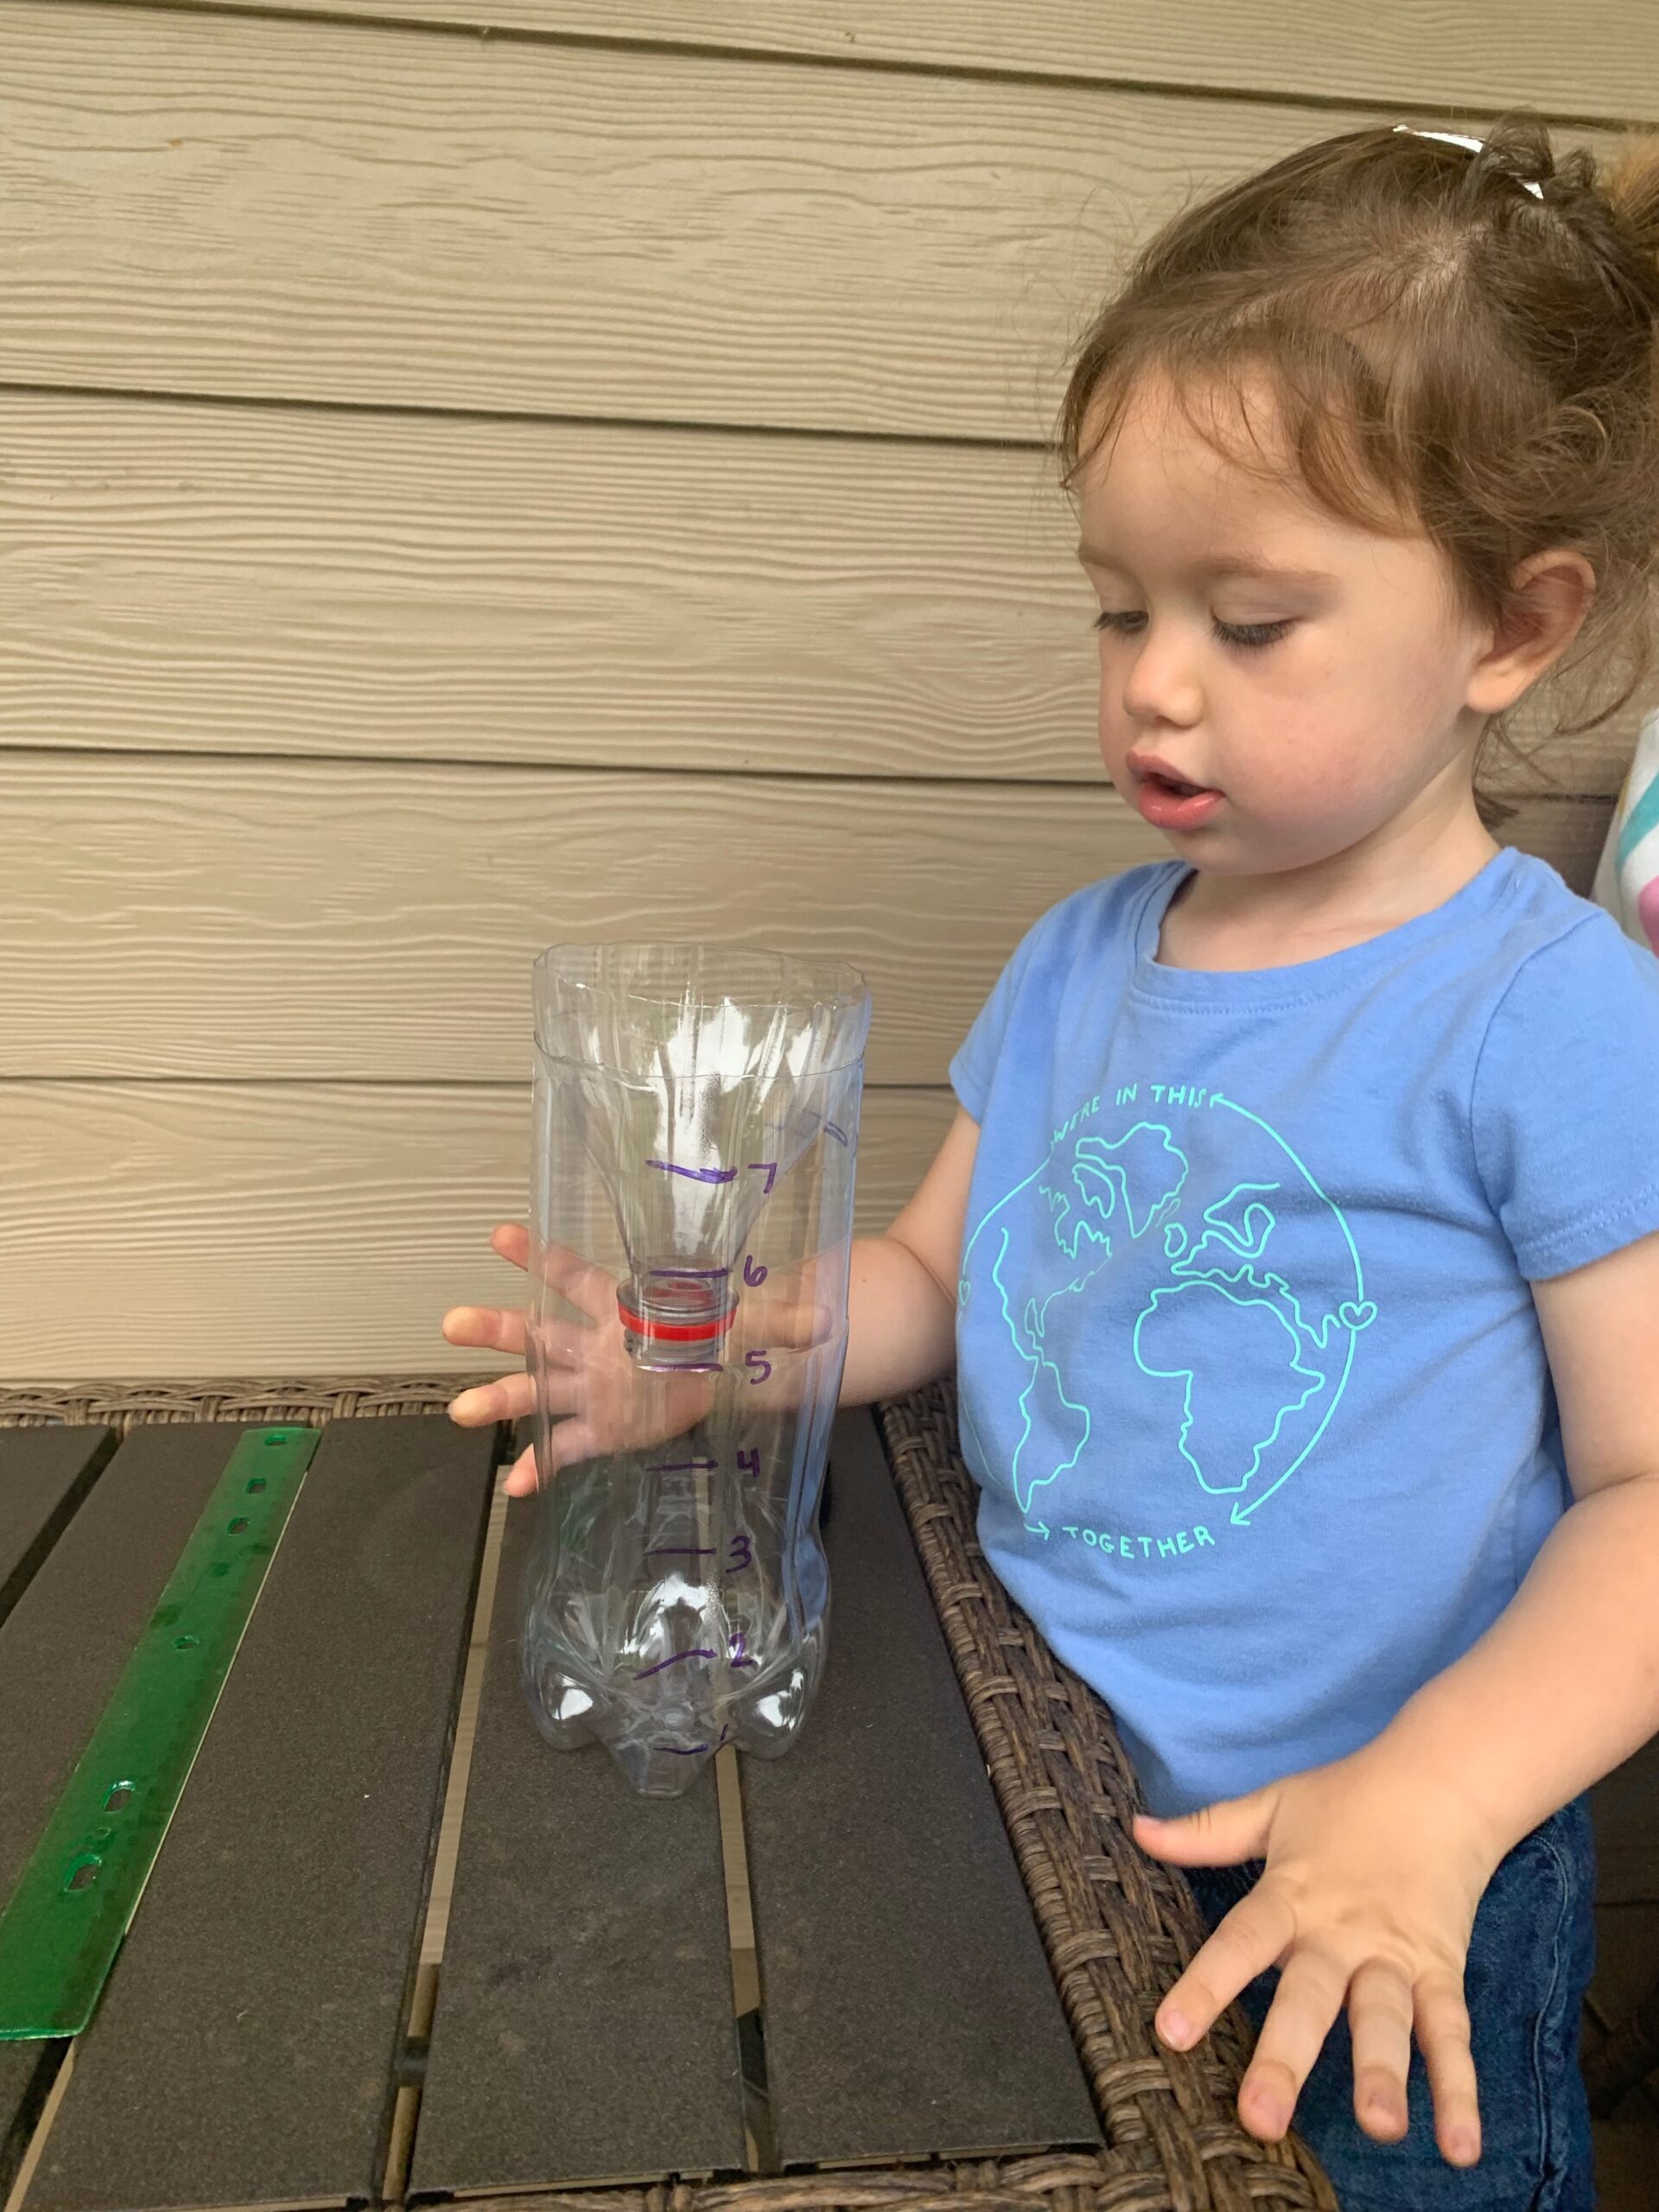
Ruler
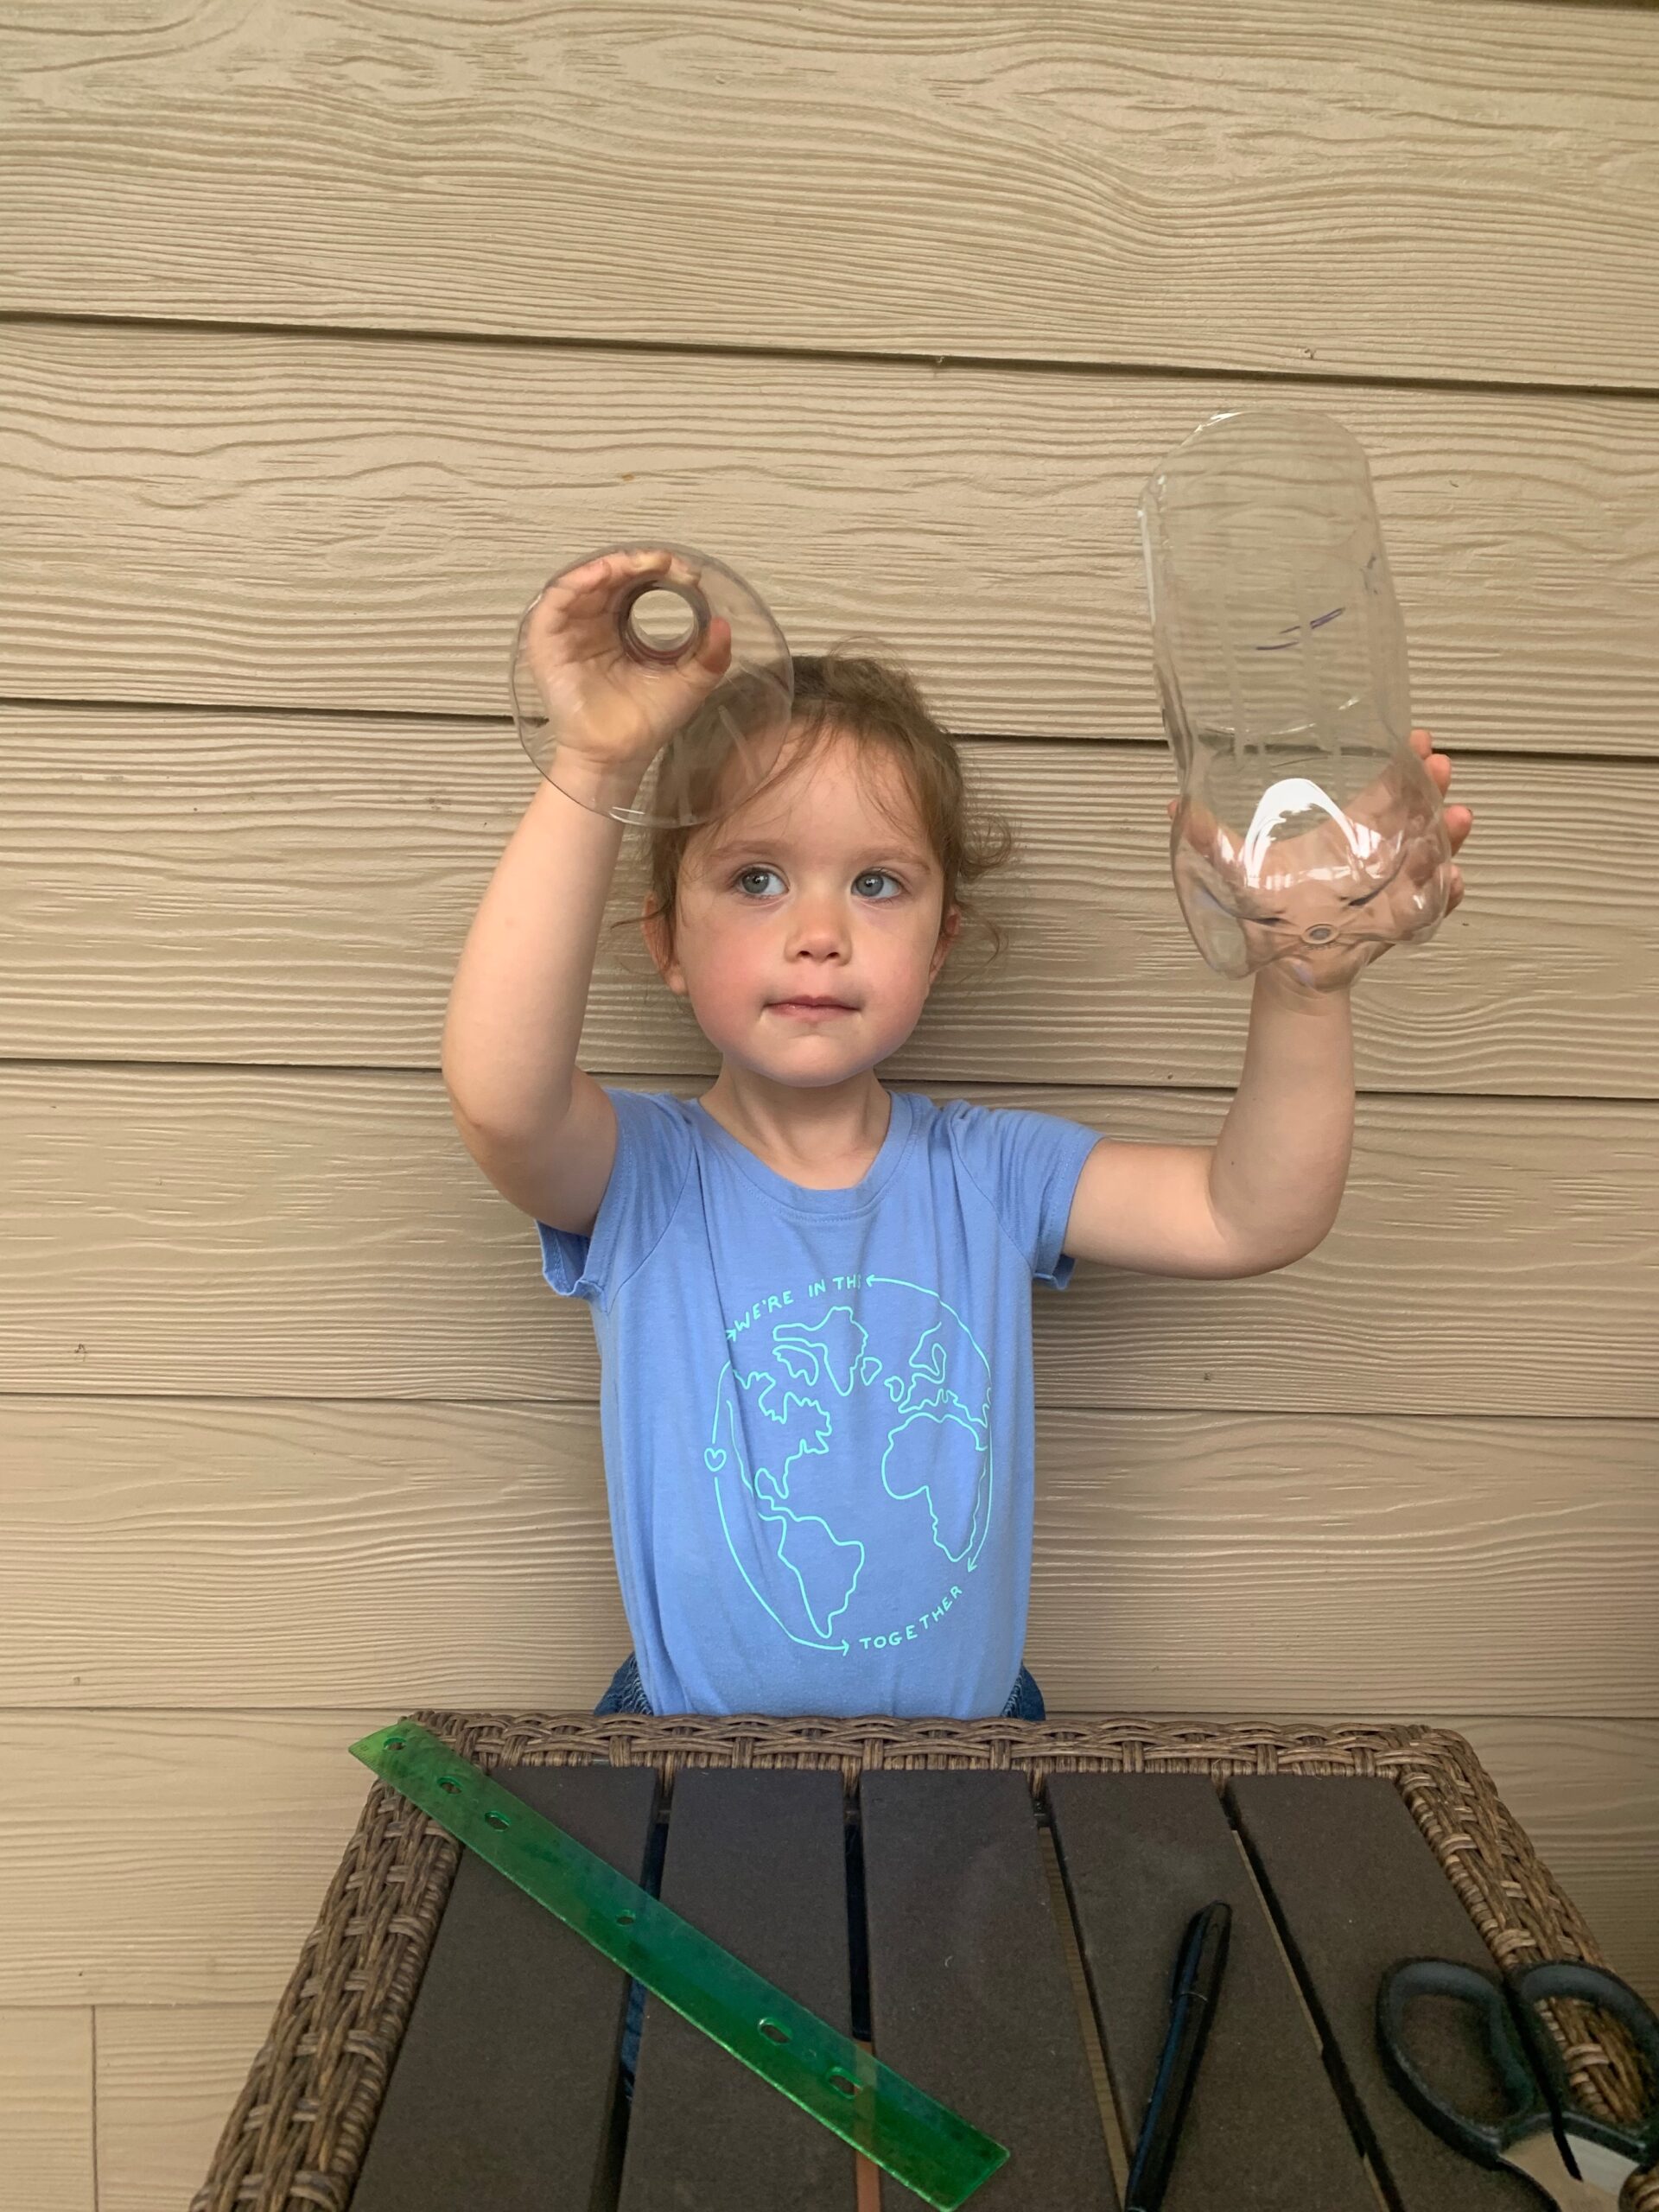
Step 1: With a parent’s help, cut off the top of the bottle about 2 inches from the top.
Step 2: Turn the piece you just cut off upside down and place it back inside the bottle making sure the top edges are flush.
Step 3: Using the ruler, mark off lines at one-inch intervals from the bottom all the way to the top. Draw lines around the bottle at each of those one-inch intervals. Additionally, add marks at each half inch and quarter inch. (No need to draw lines all the way around for those measurements)
Step 4: Place your new rain gauge outside in an area free from trees and other overhangs where the rain can fall directly into it.
*Note: to keep heavy rain or winds from blowing it over you can secure your rain gauge between flower pots, or use duct tape to affix it to a stick in the ground, etc…
Now have fun waiting for the rain!
Discussion point: Could there be some mornings you might find moisture in your rain gauge when it hasn’t rained?! Then you’ve observed condensation… another part of the water cycle!
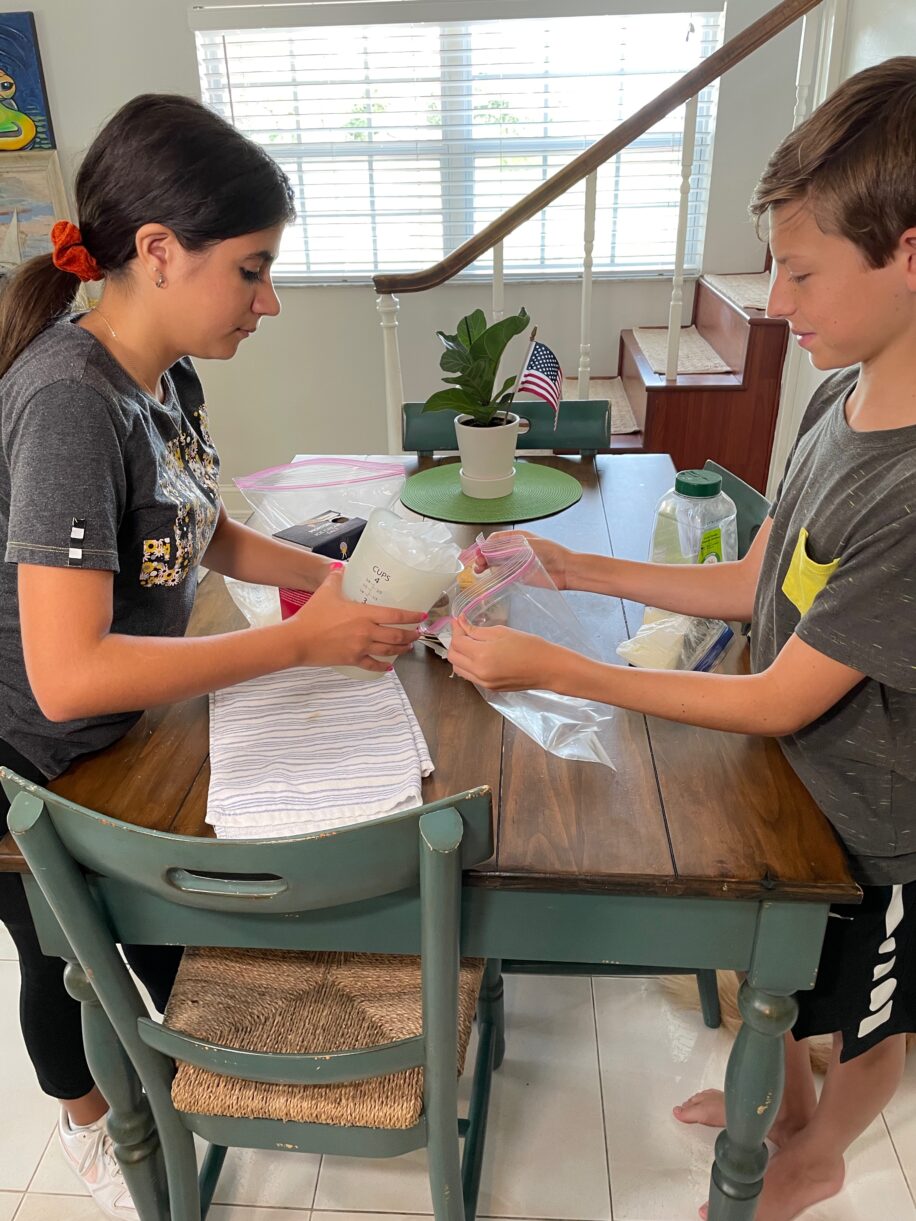
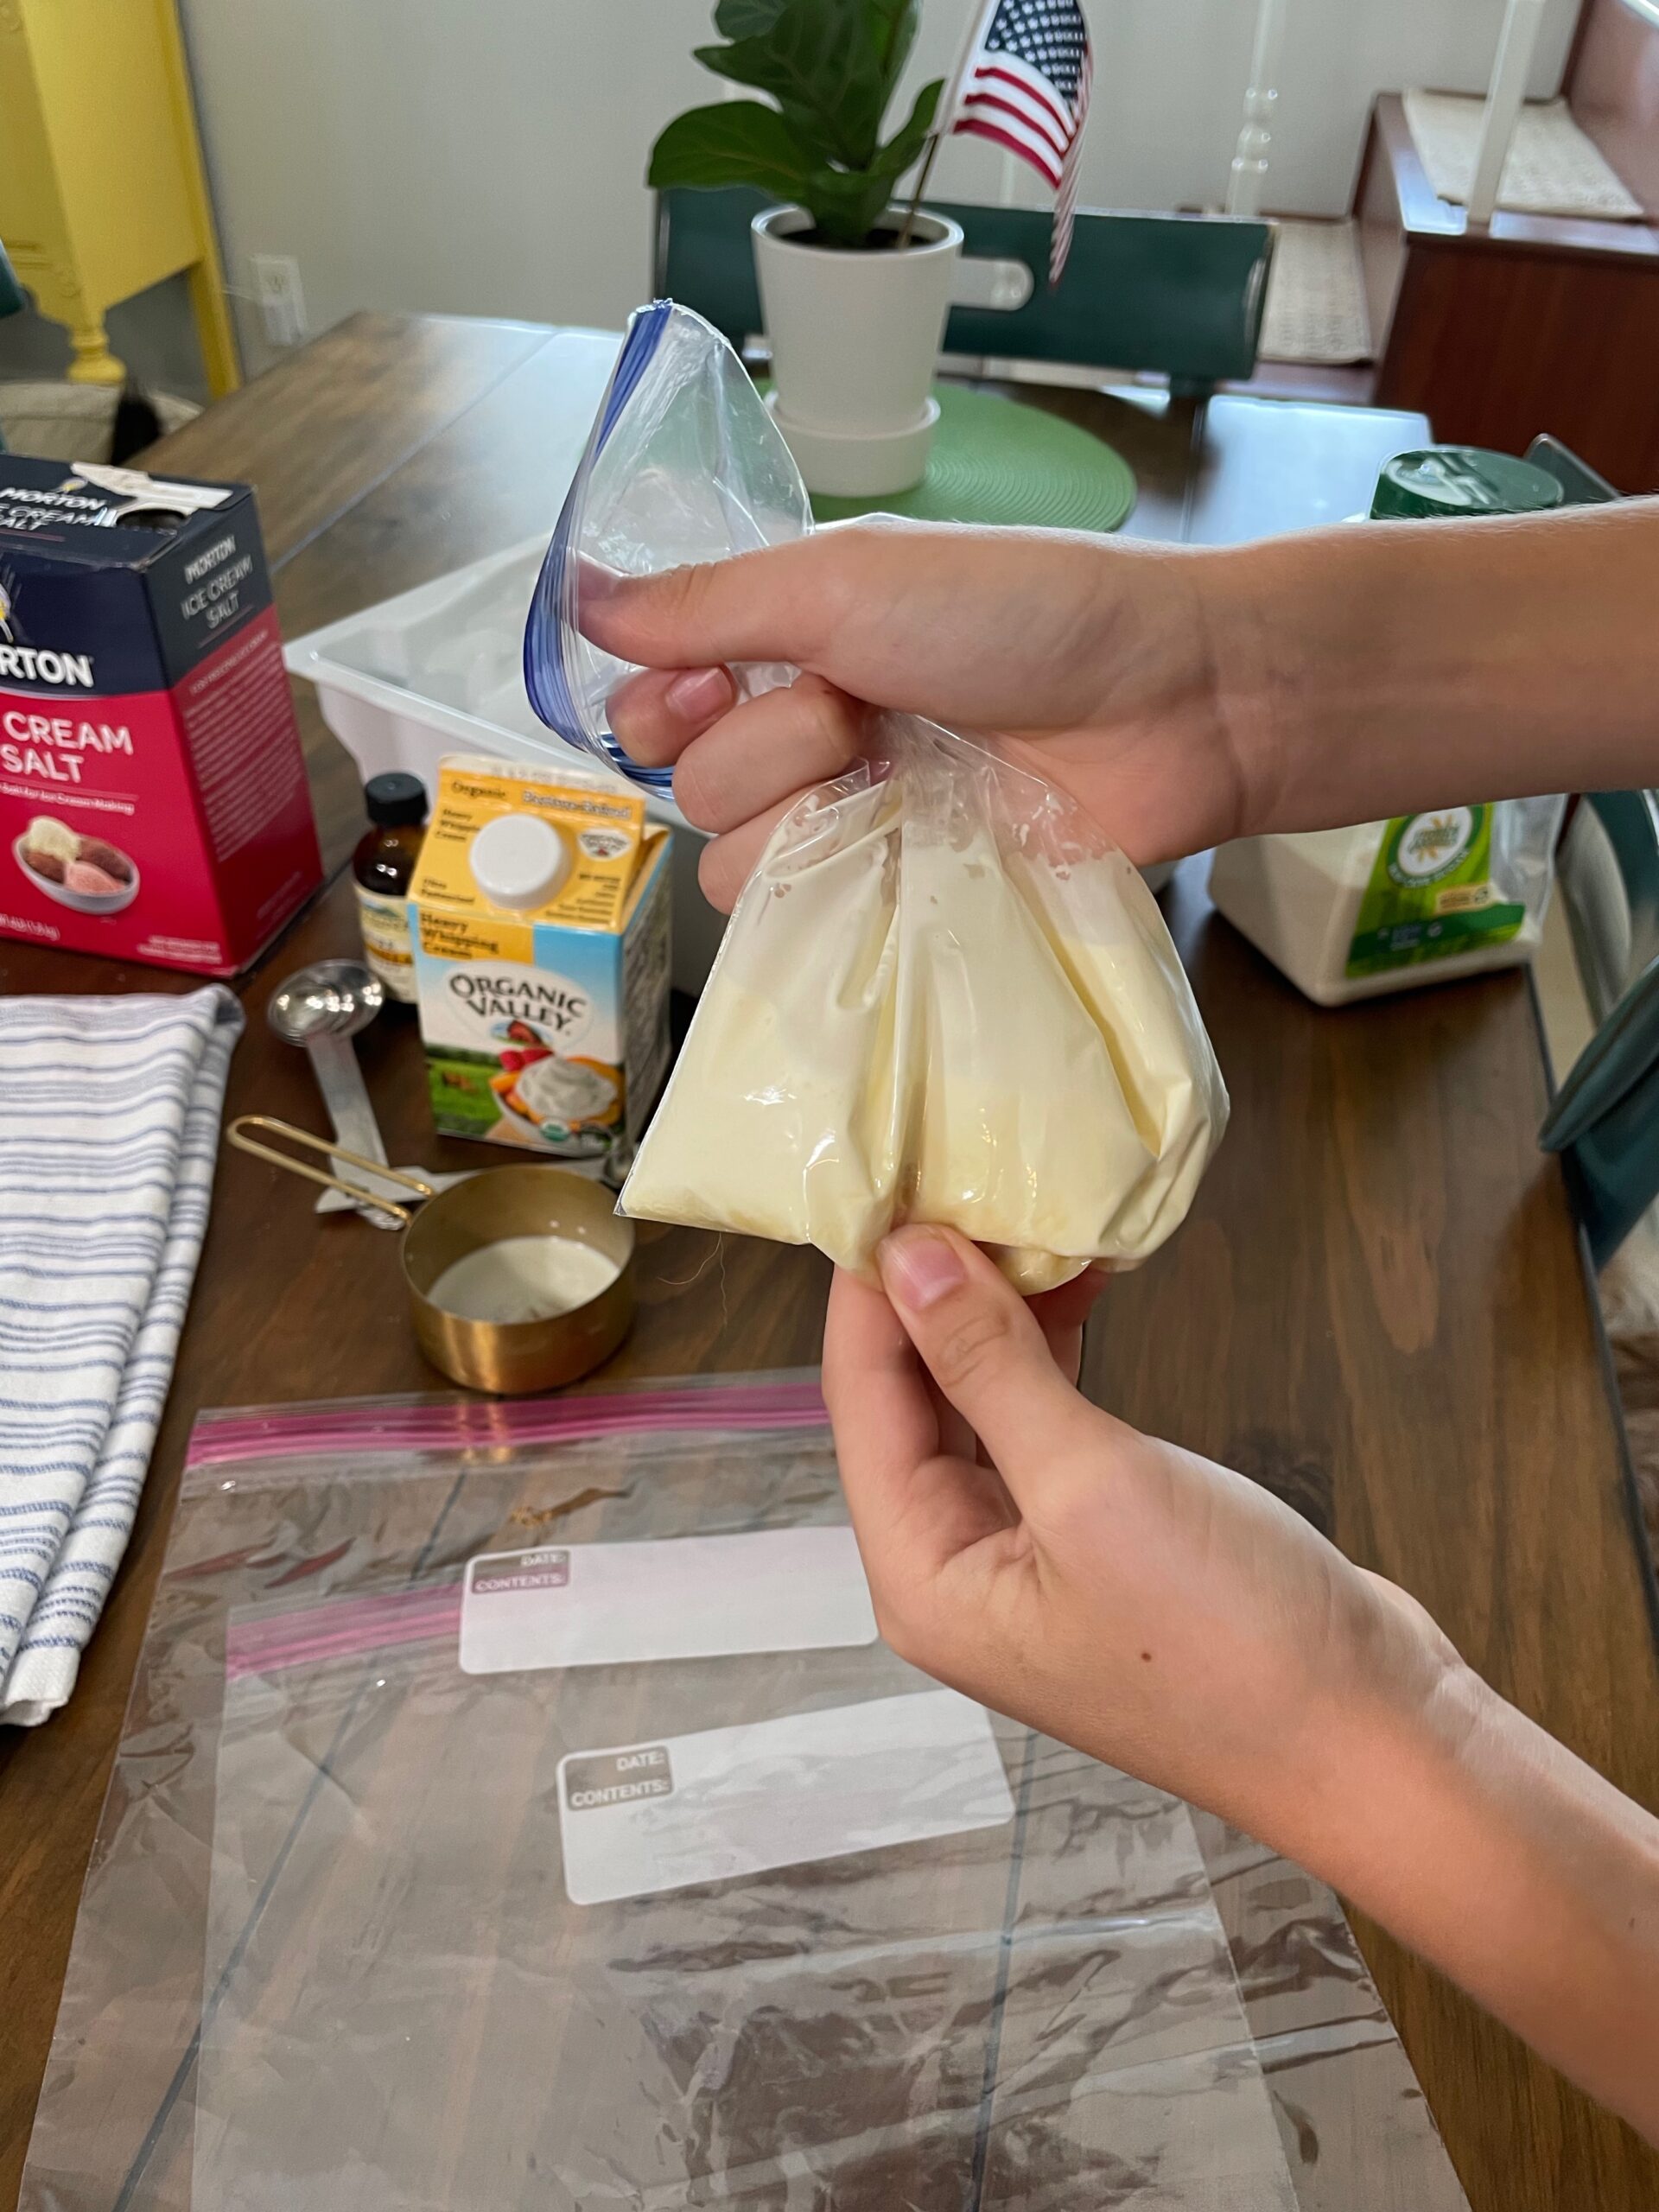
What summer (or any season for that matter!) day isn’t made better by a serving of ice cream?! Challenge your kids to take the science of ice cream making into their own hands.. Literally!
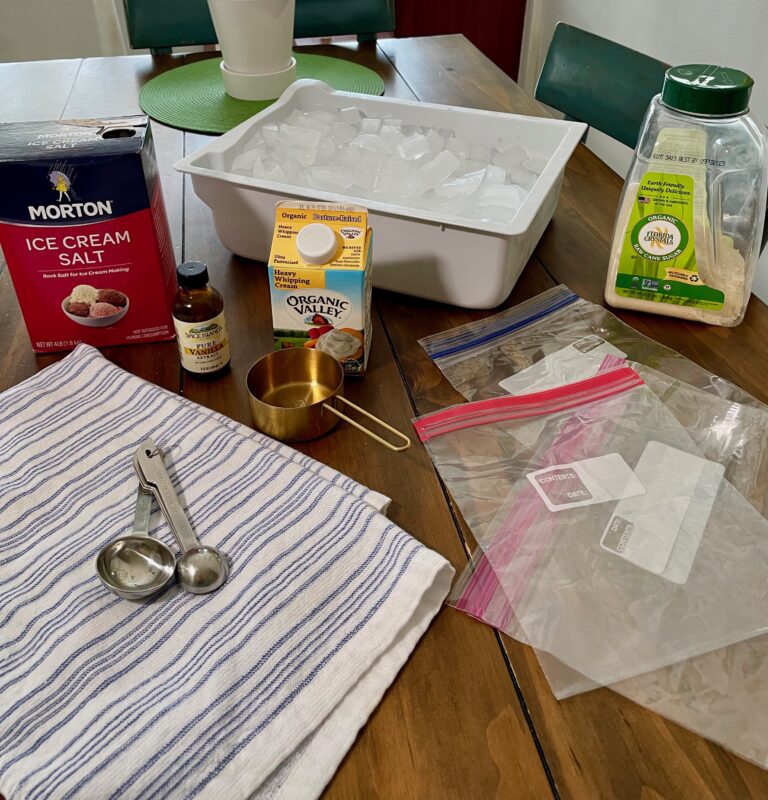
Here is our recipe for… Easy homemade ice cream in a bag
Materials Needed:
Sugar
Milk (half n half, heavy whipping cream, etc..)
Vanilla extract
Rock Salt (we like Morton’s Ice Cream Salt)
Ice Cubes
Measuring spoons & cup
Small sealable bag
Gallon-size sealable bag
Hand towel
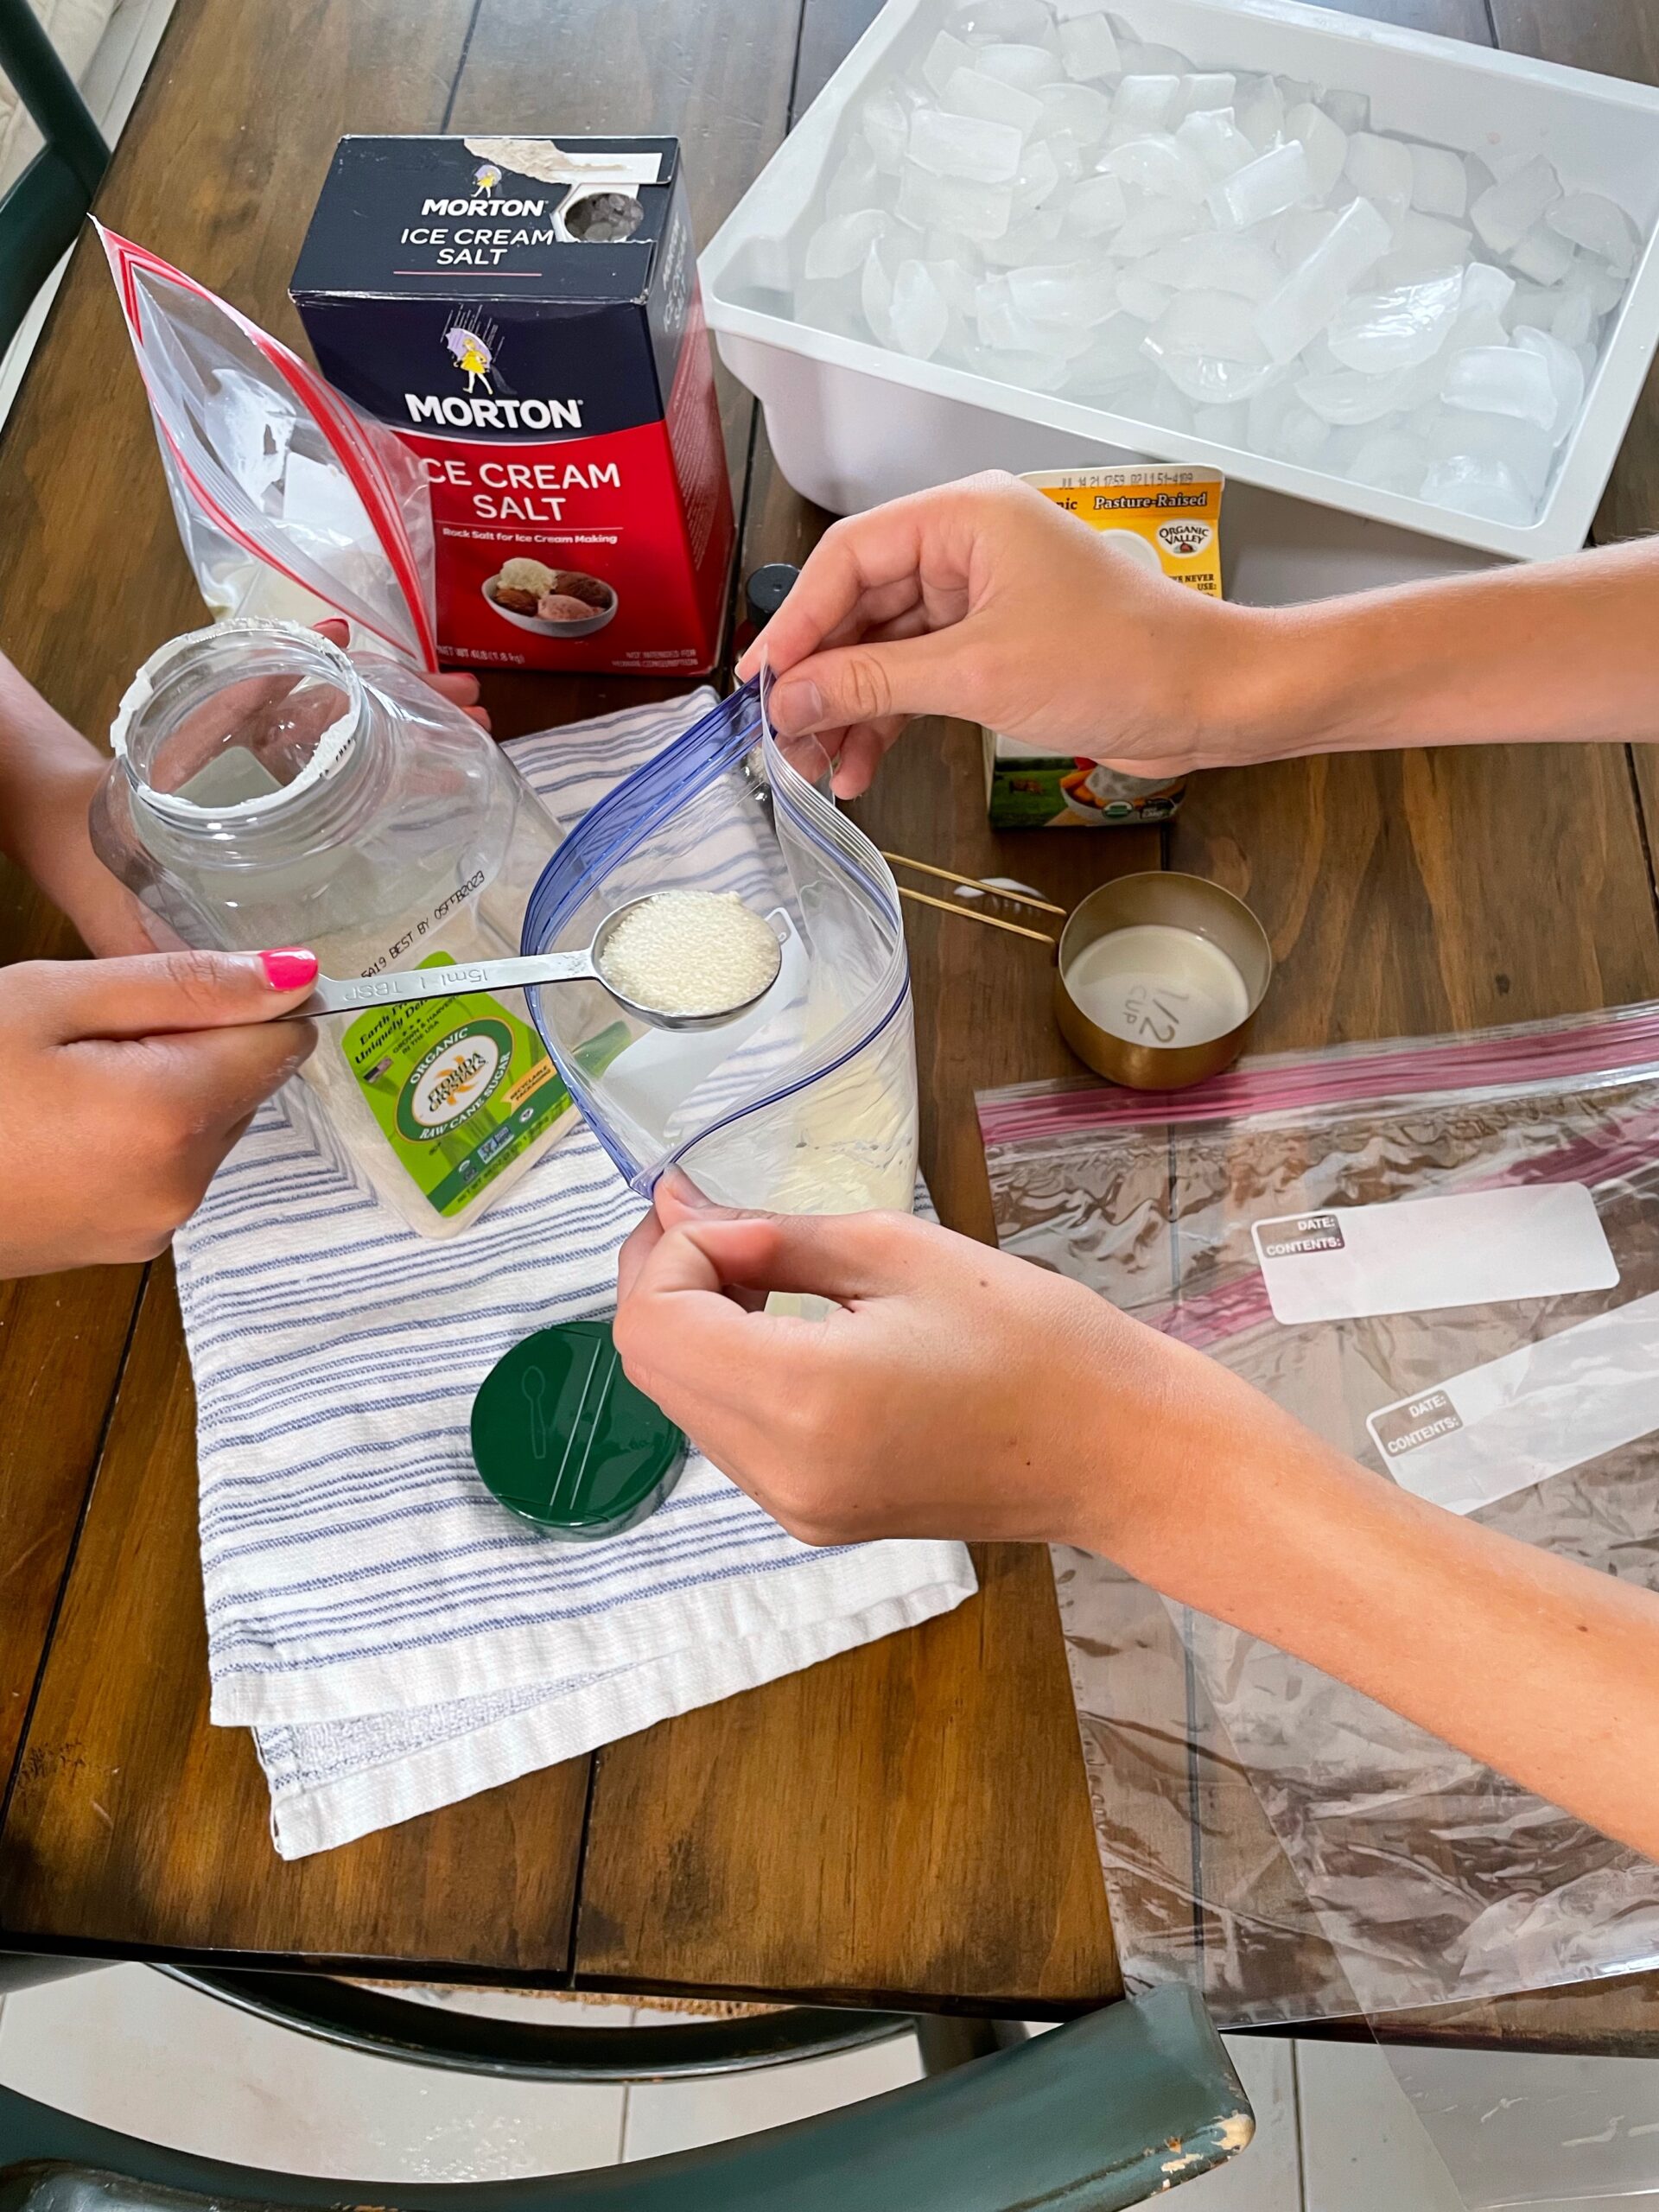
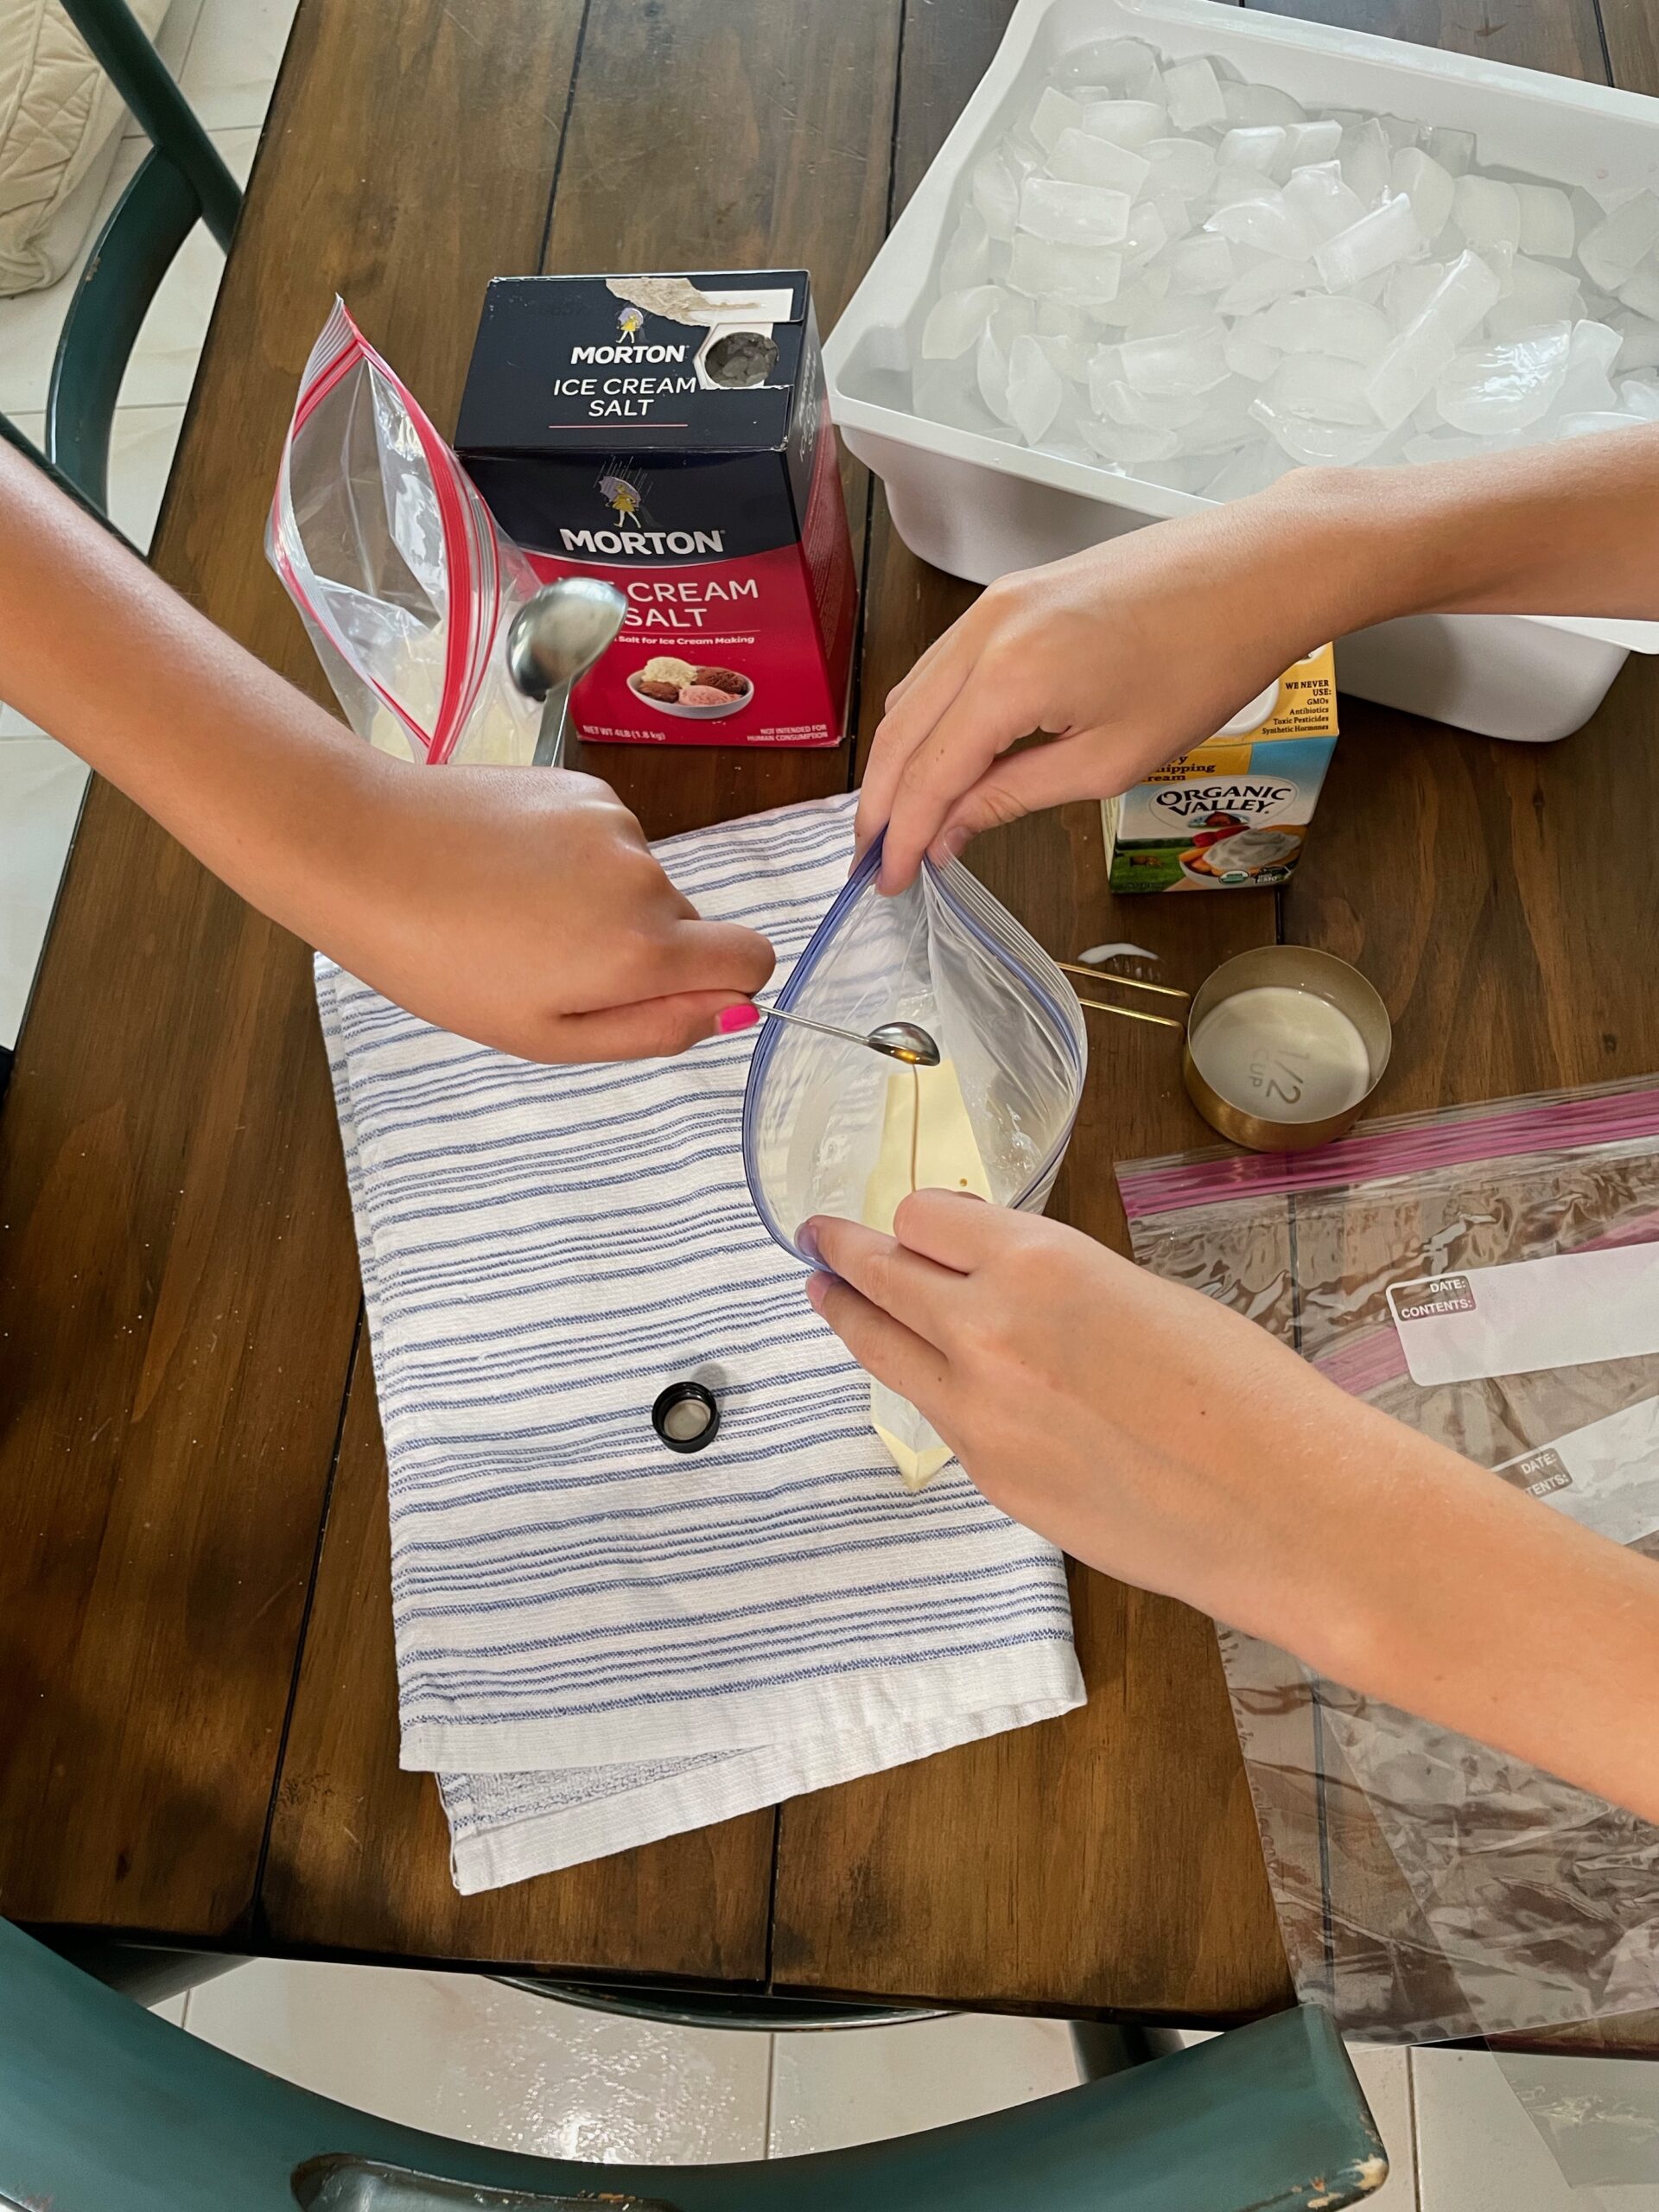
Step 1: Pour ingredients into the smaller bag: 1T sugar, 1/4t vanilla, ½ cup milk (or half n half, heavy cream, etc..)
Step 2: Add 4 cups to the gallon-sized bag, then add ½ cup of salt to the same bag
Step 3: Place the smaller bag with liquid into the middle of the ice in the larger bag.
Step 4: Wrap bag with a towel and shake it around for about 5 minutes. Check very few minutes to see your progress.
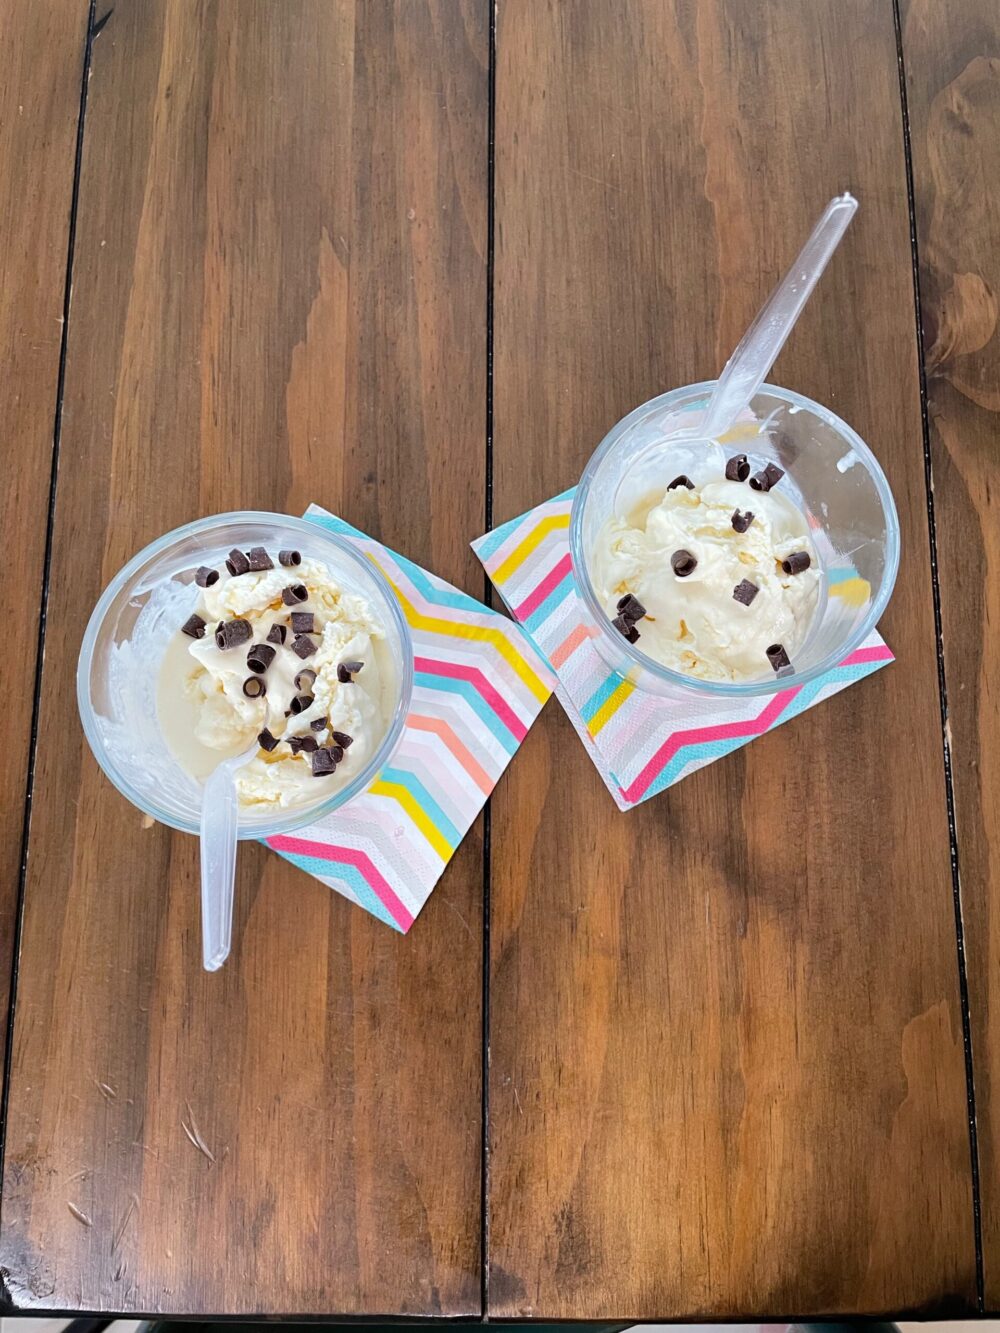
Step 5: Ice cream is ready when it had reached your desired consistency
Step 6: Grab a spoon and enjoy!
Add your own twist… strawberries or chocolate syrup!